Deploying the EBS-backed BYOL Virtuoso EC2 AMI
Introduction
In addition to the Instance-backed EC2 AMI that has been in existence since 2008, Virtuoso is now also available as an EBS-backed EC2 AMI based on your choice of License Model --
- Bring You Own License, or BYOL (documented here)
- Pay As You Go, or PAGO
With either License Model, you will be starting with a preconfigured Virtuoso instance. The fundamental benefits provided by this type of AMI include:
- Virtuoso is preinstalled and tuned for the host operating system
- You can start and stop this Virtuoso instance without having to terminate its host AMI
BYOL simply requires that you acquire a Virtuoso License, as you would for any other deployment, and then apply that license to the preconfigured Virtuoso instance that awaits you in the Amazon EC2 Cloud.
Prerequisites
- An Amazon Web Services (AWS) account.
- Recently created AWS accounts will have been automatically signed up for the Amazon S3 and EC2 Web Service. If you created your AWS account a long time ago, you may now need to manually sign up for these services.
- A Virtuoso commercial license for Linux, purchased from the Virtuoso Web Site.

Setup & Instantiation of the EBS-backed BYOL Virtuoso AMI
- From the AWS Management Console, select Launch Instances.
- You will need to choose an AMI.
In the Community AMIs tab, type Virtuoso 7.1 in the search box to find the relevant images published by OpenLink —
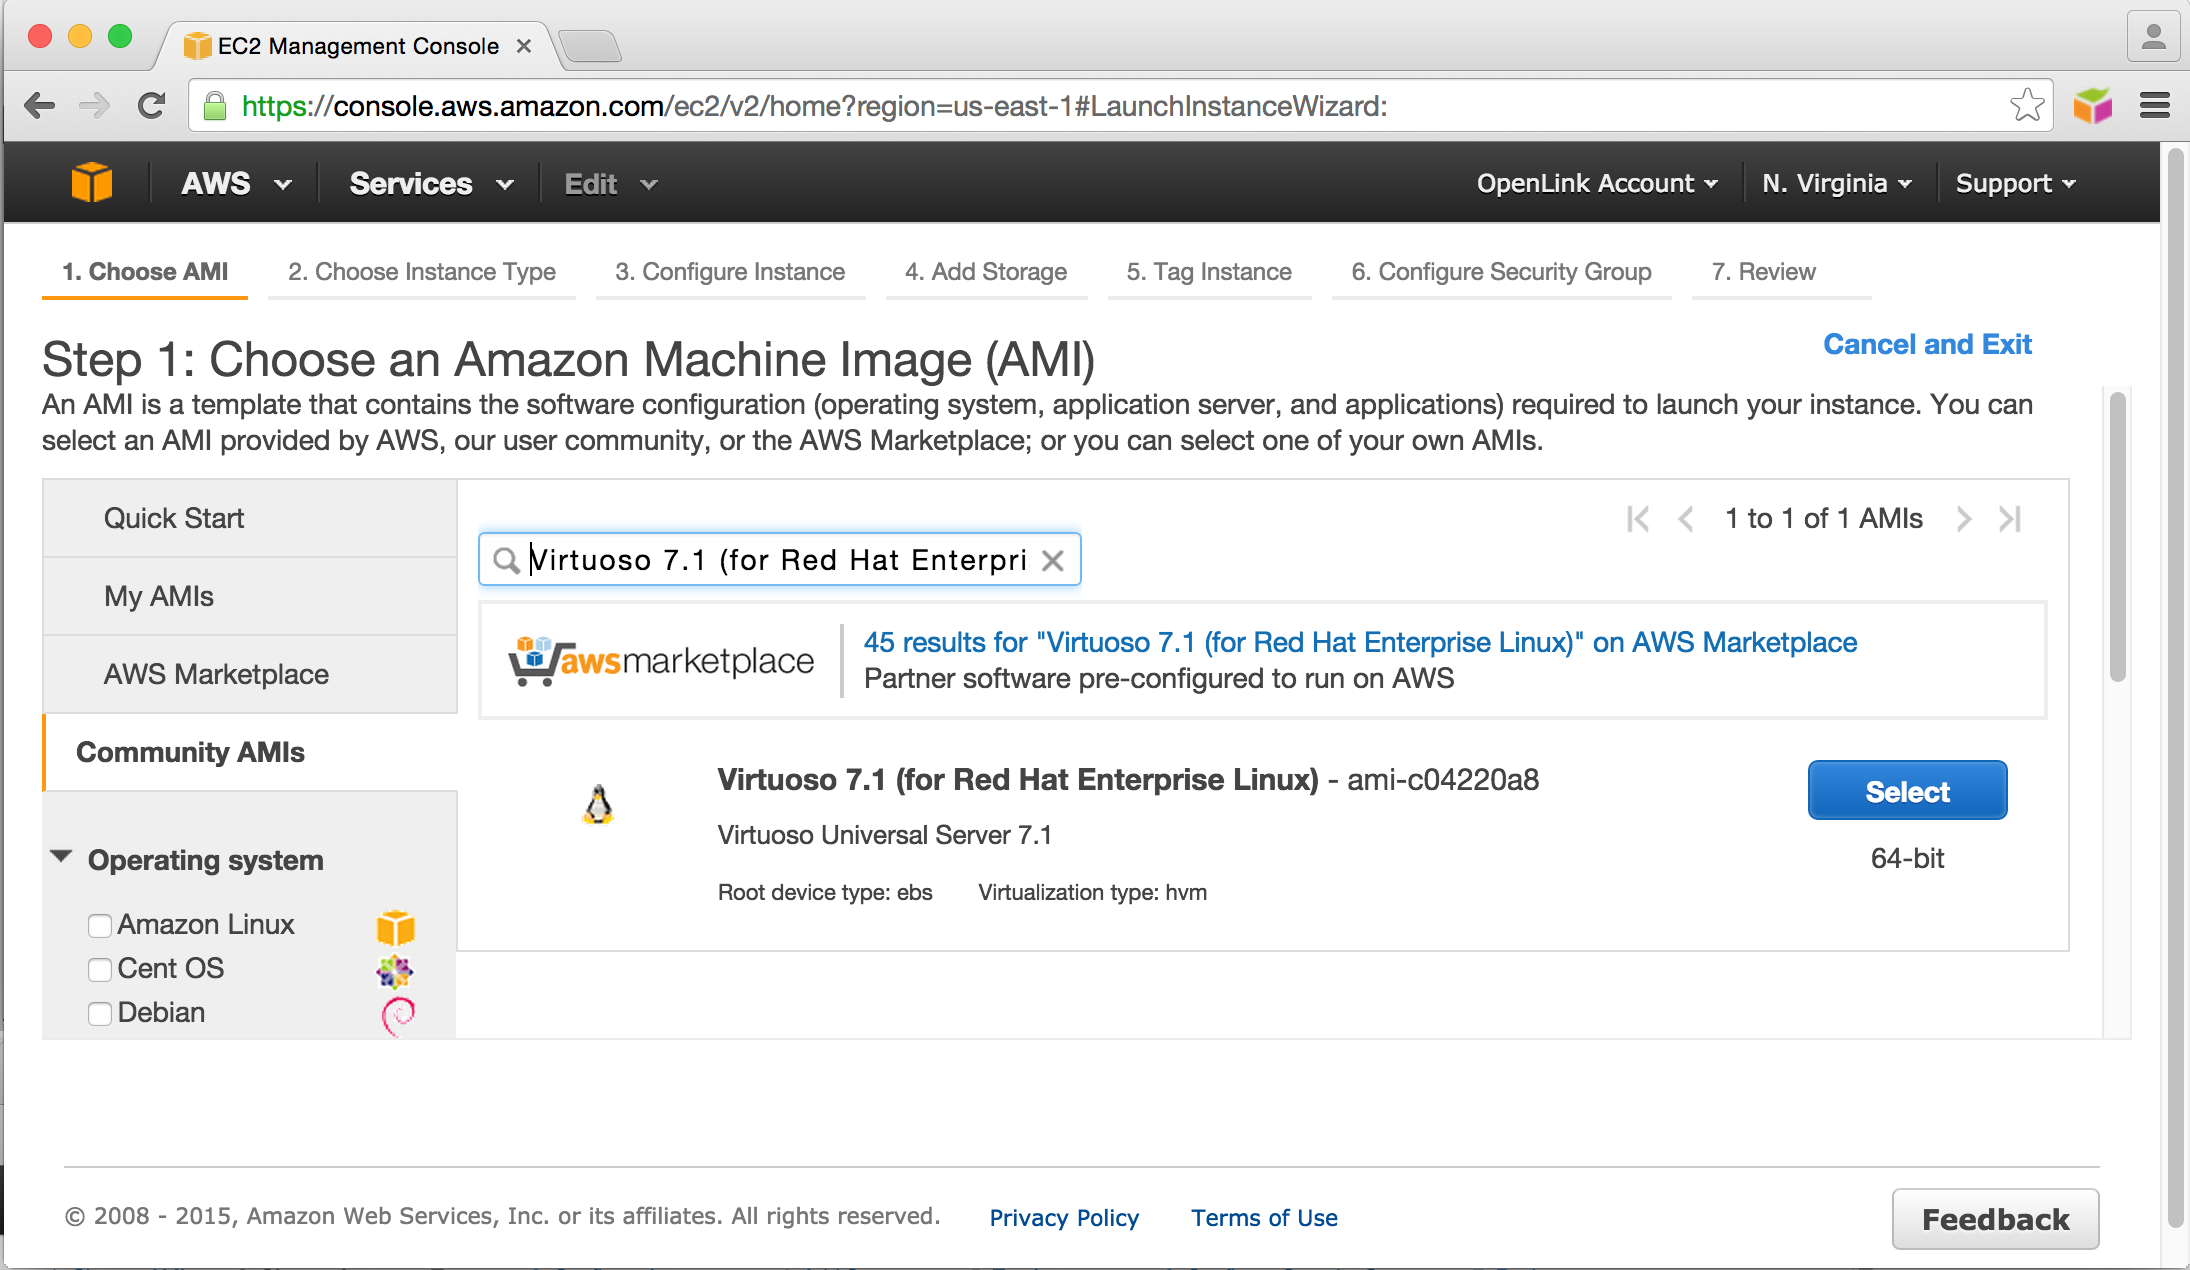
Edition ID Description 64-bit ami-c04220a8Virtuoso 7.1 (for Red Hat Enterprise Linux)
- Choose the Instance Type the AMI is to be instantiated with.

- Configure your Instance Details.

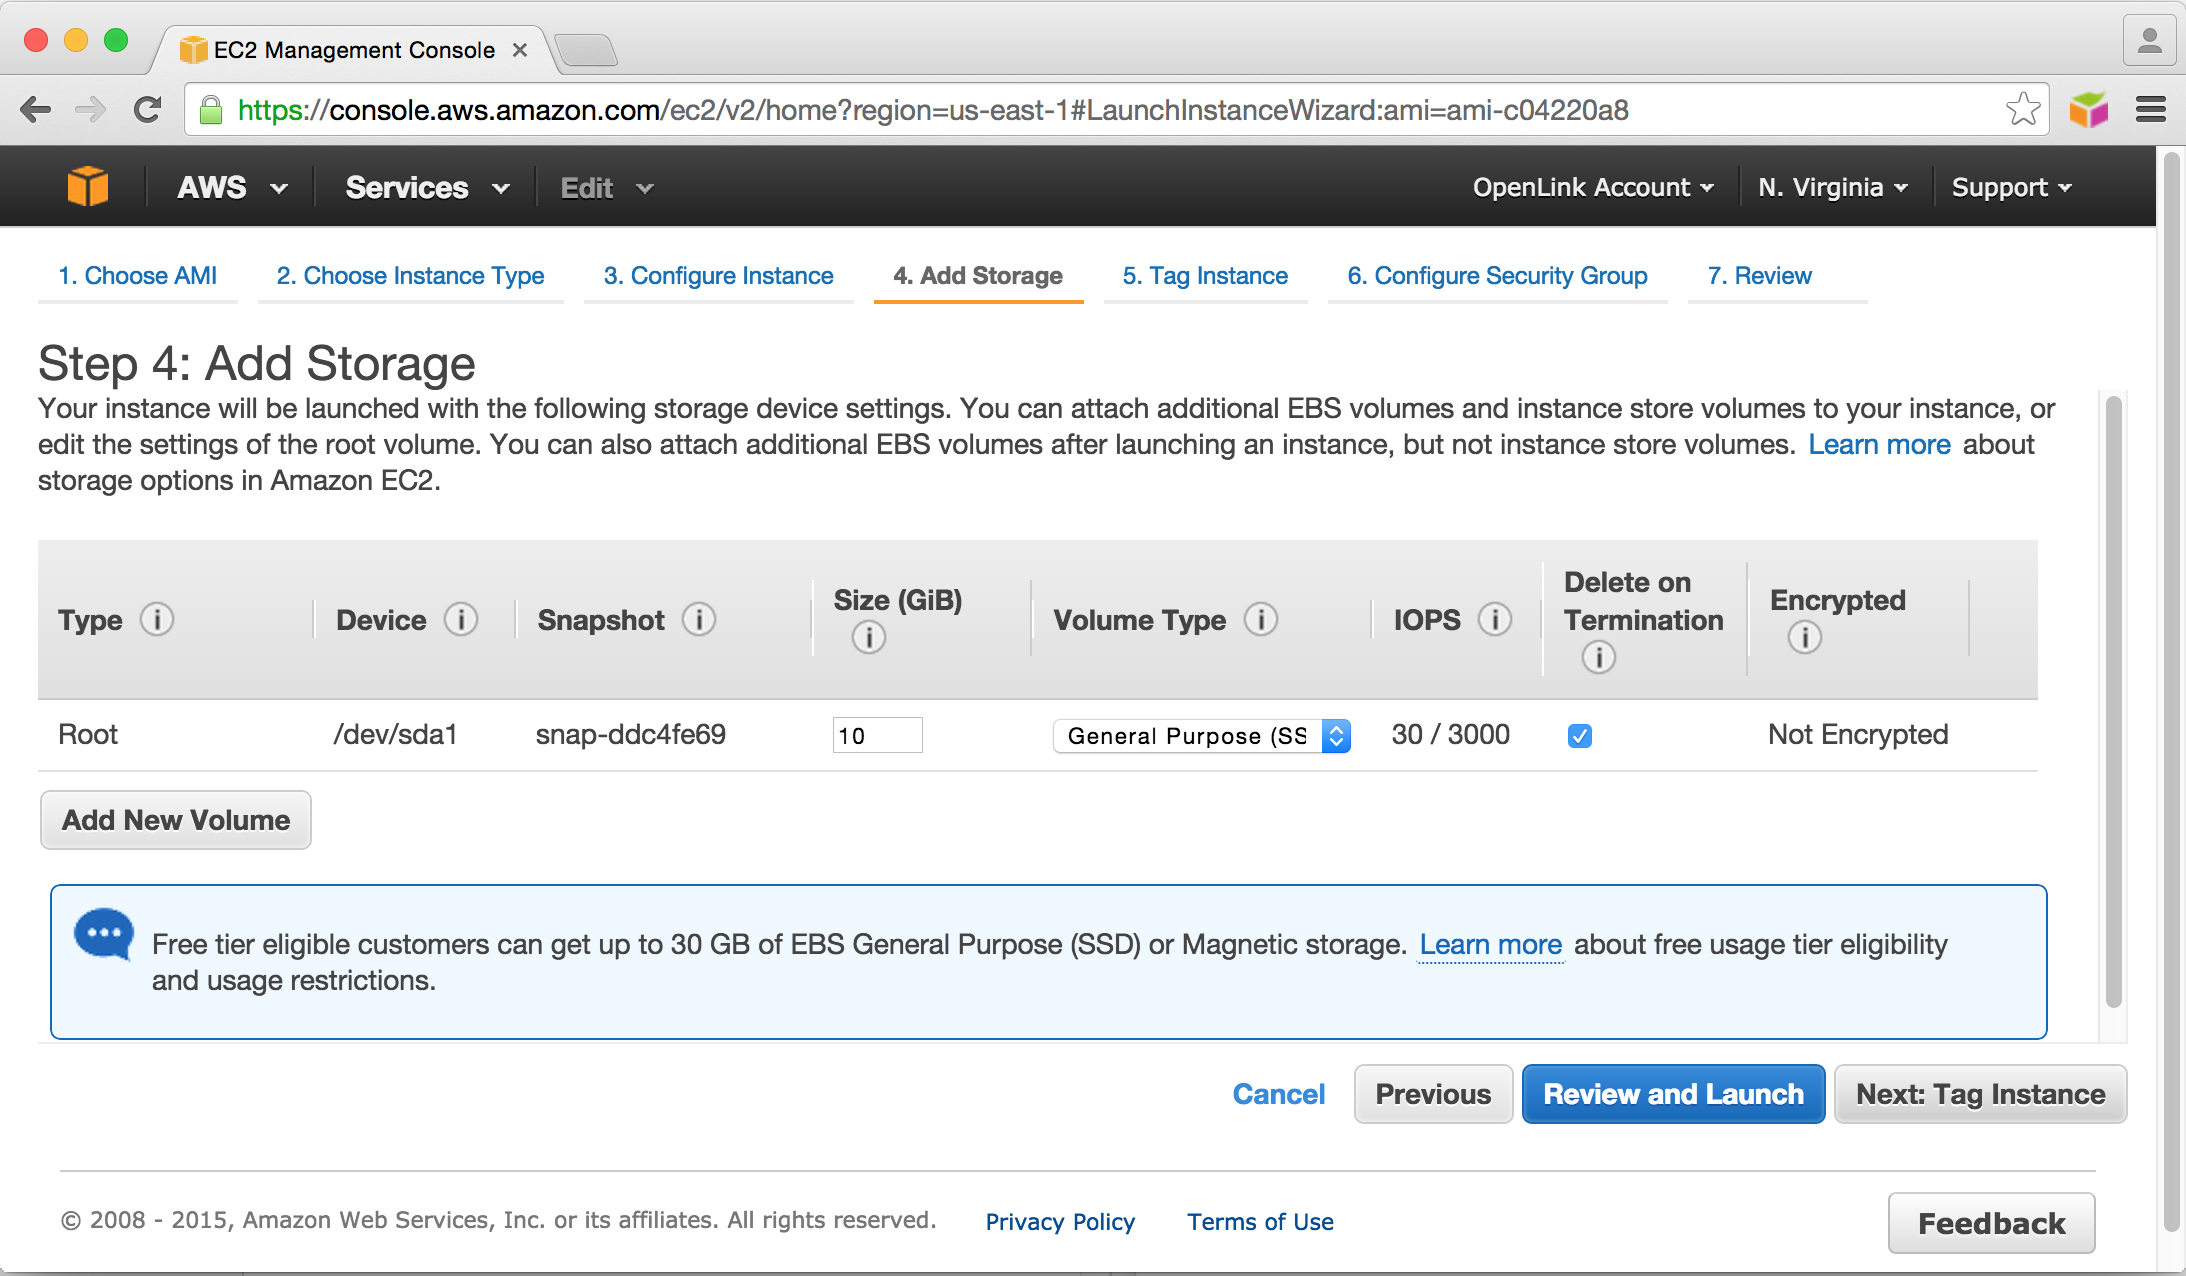
- Add Storage, selecting a suitably sized storage device.
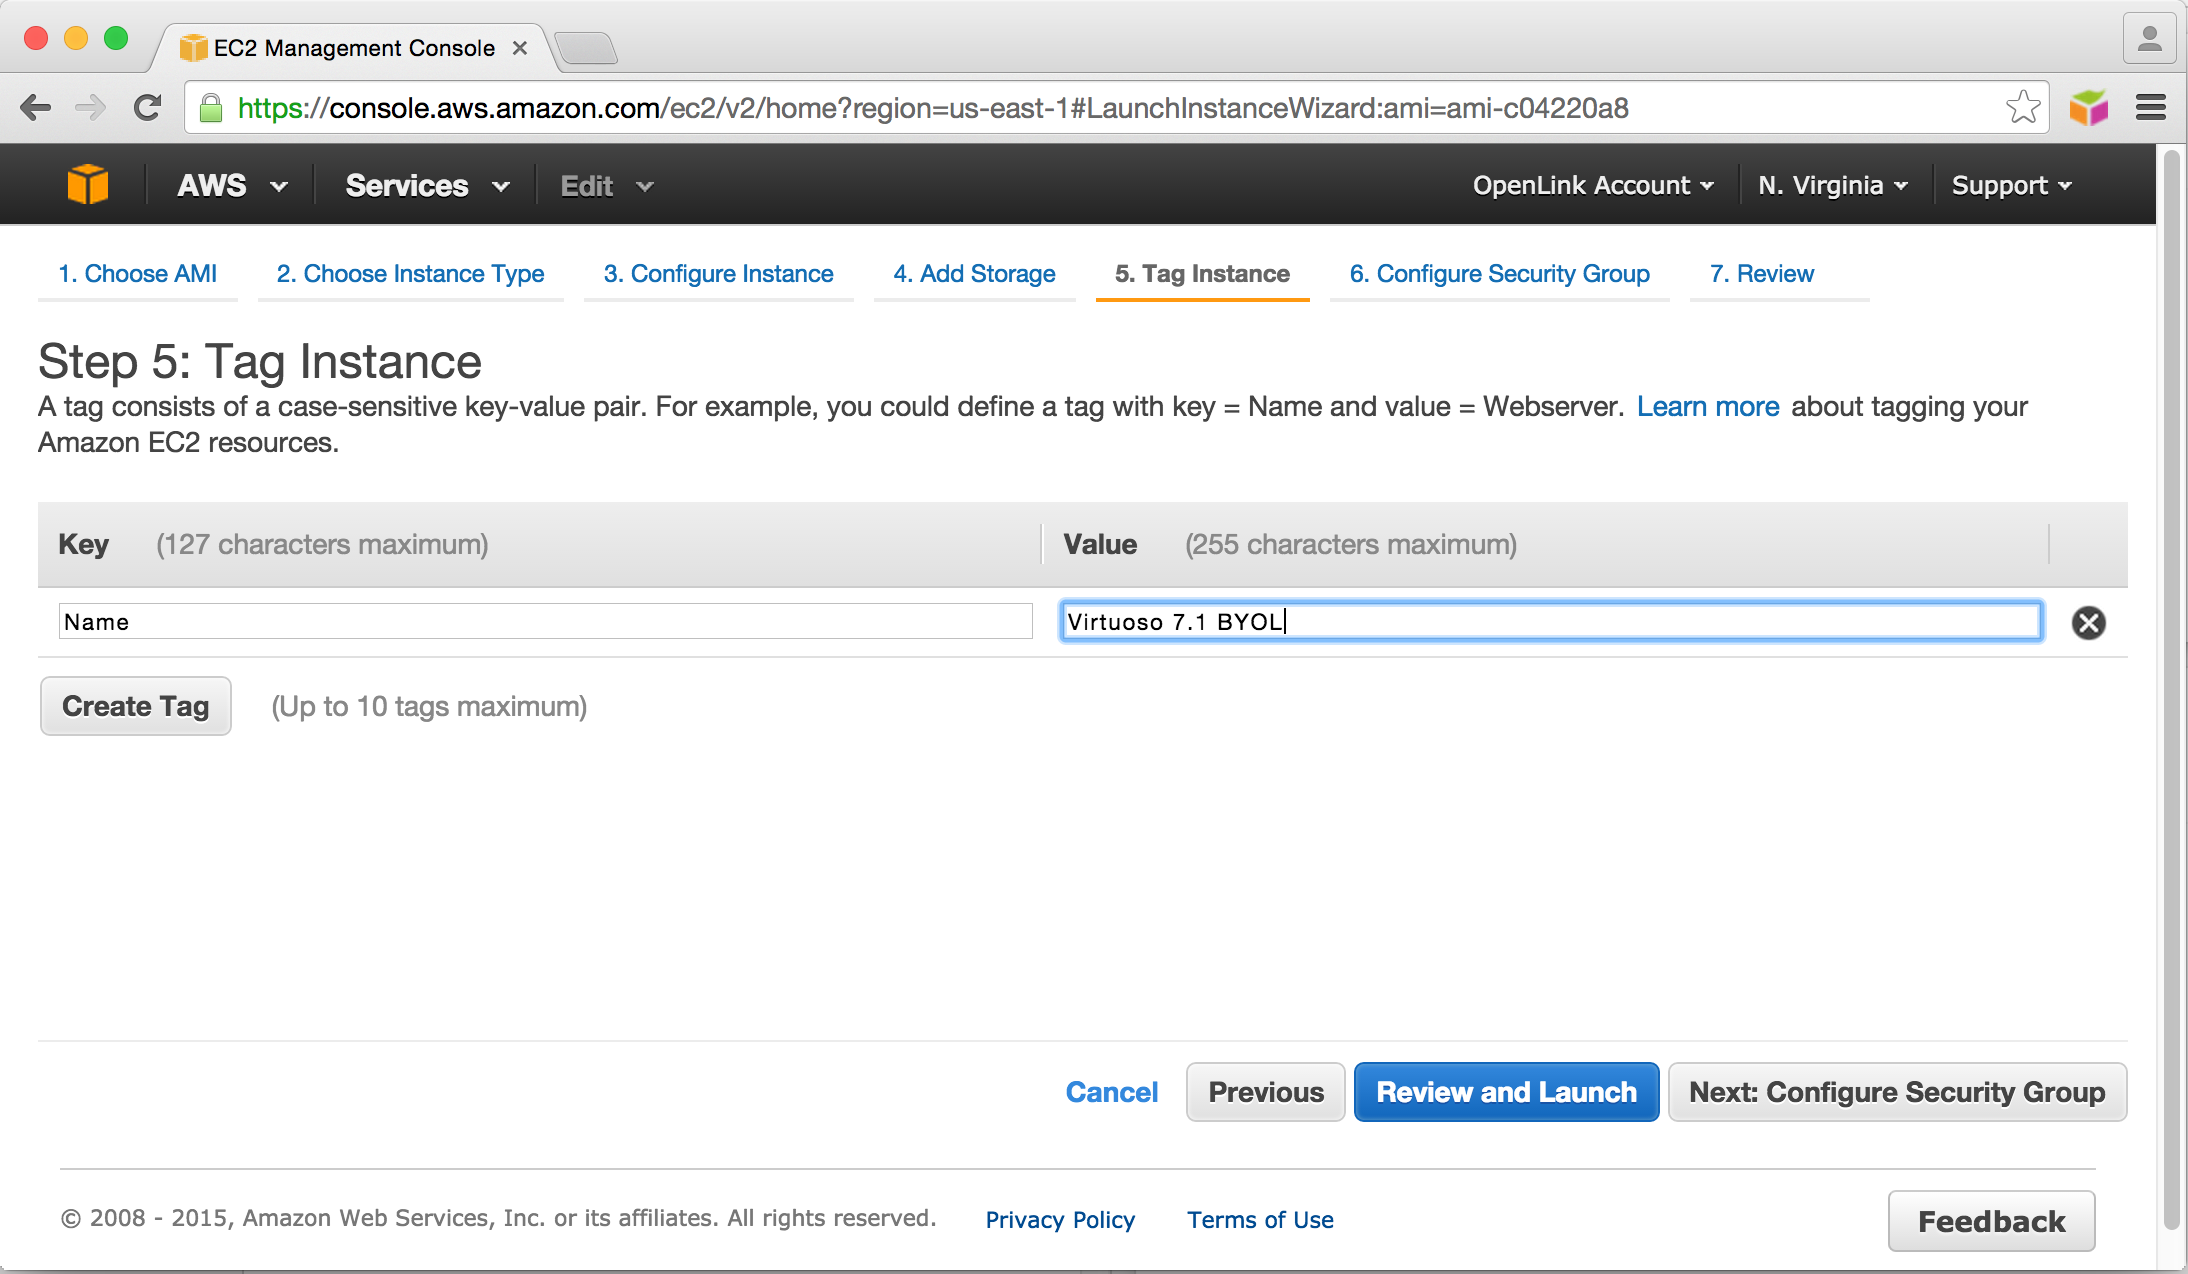
- Tag the Instance(s) with a suitable name for your own purposes.
- Configure network access security.
Note that port 22 is always required for
sshaccess to the AMI, and port 80 is needed for HTTP access to the Virtuoso server instance. Access to port 1111 may also be needed, if access to the Virtuoso SQL port is required, and/or port 443, if HTTP+TLS will be needed.

- Review the Instance settings before clicking Launch to instantiate the AMI.
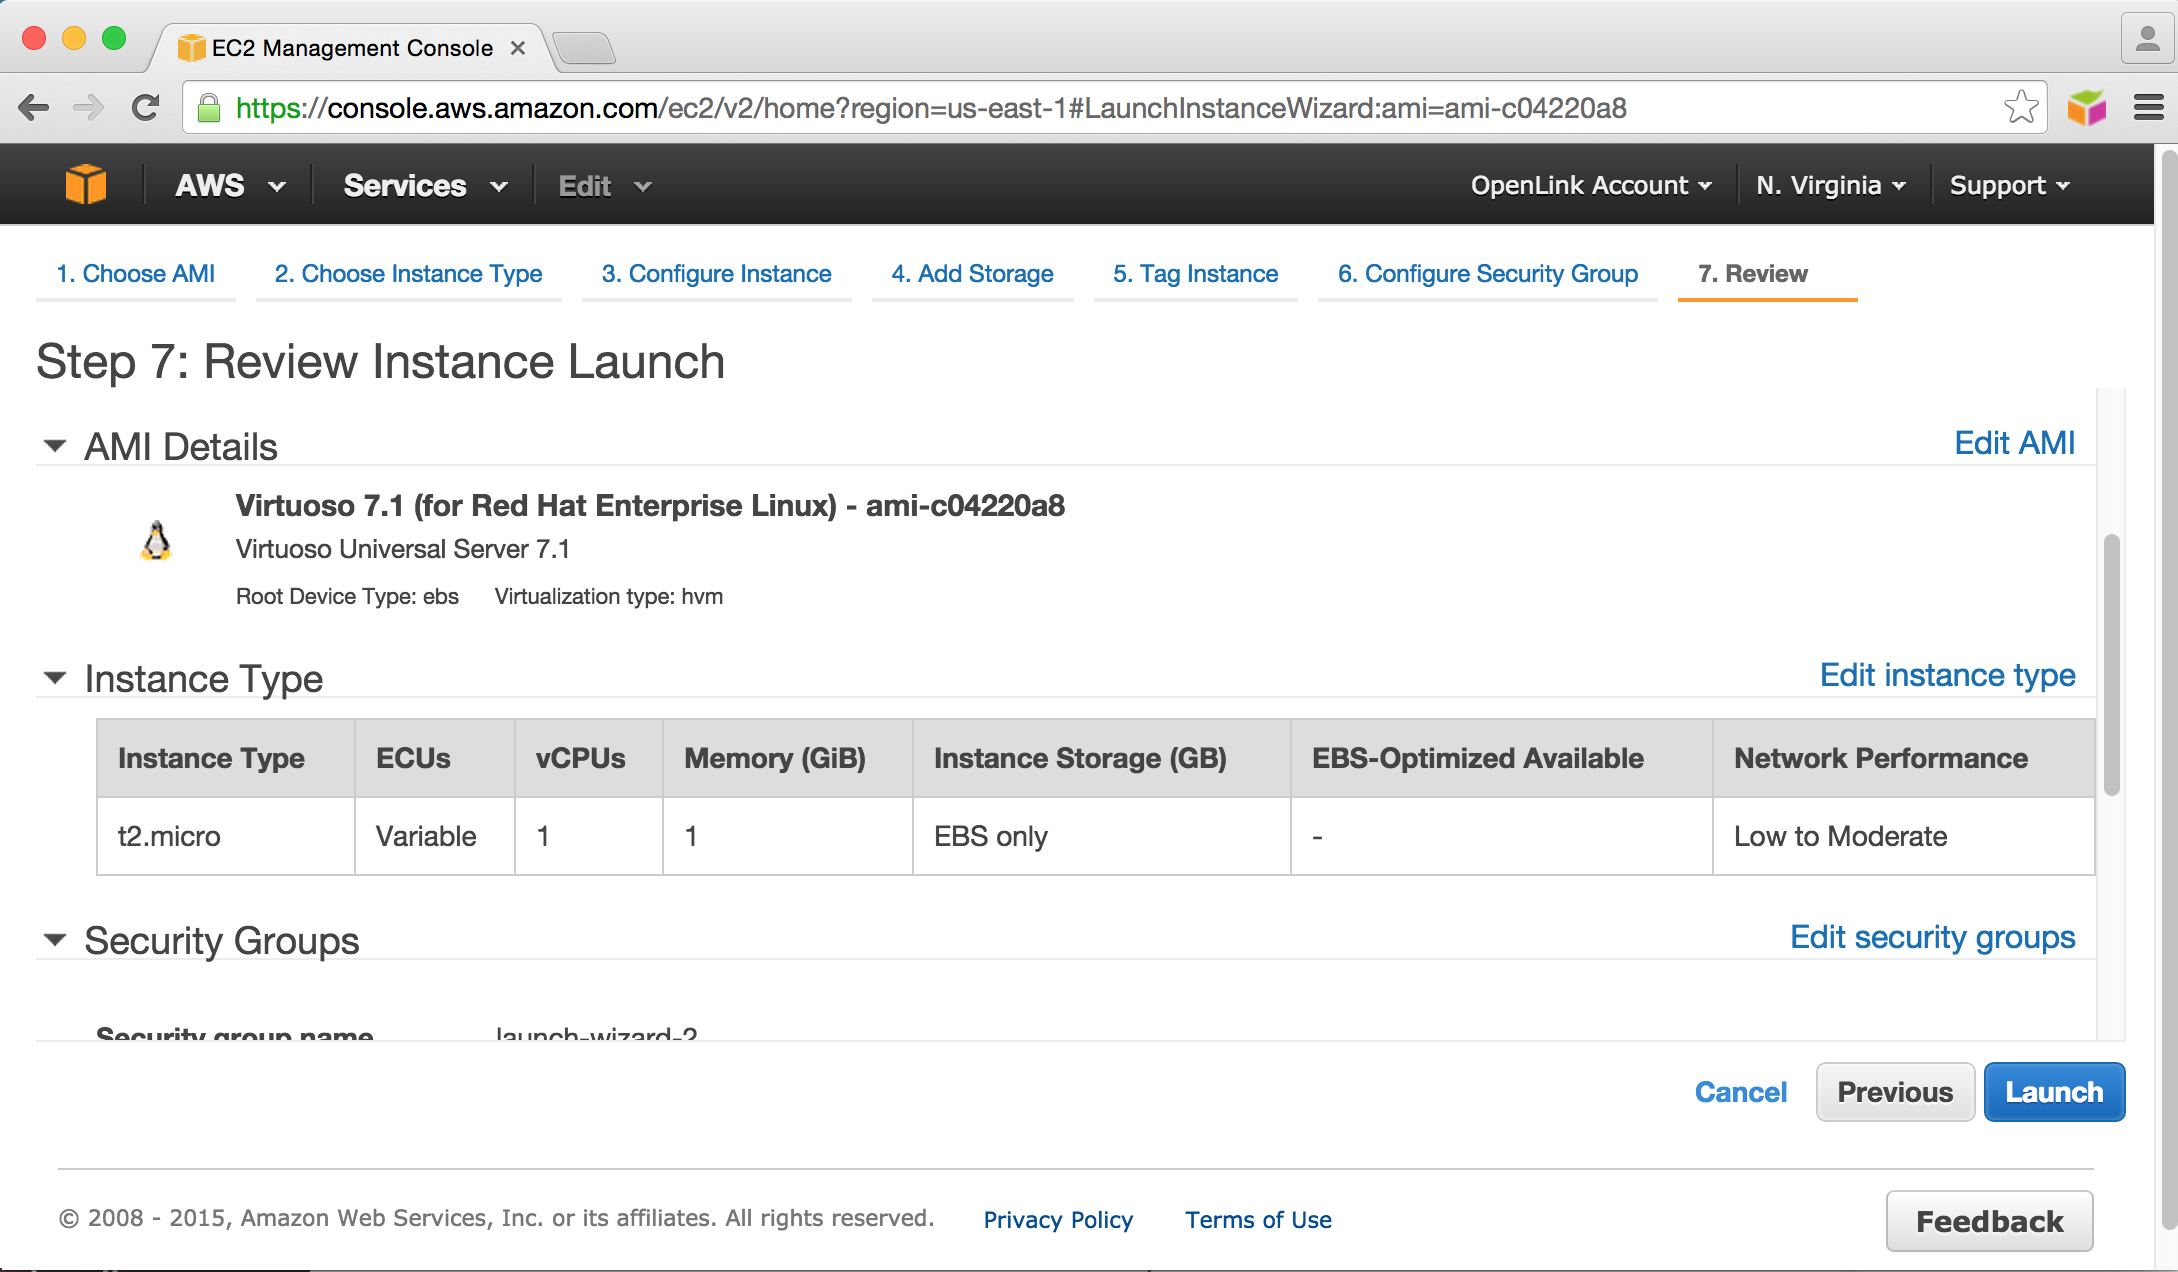
- Select a suitable pre-existing security key pair, or choose to create a new pair, for instance instantiation and access, and Launch the instance.

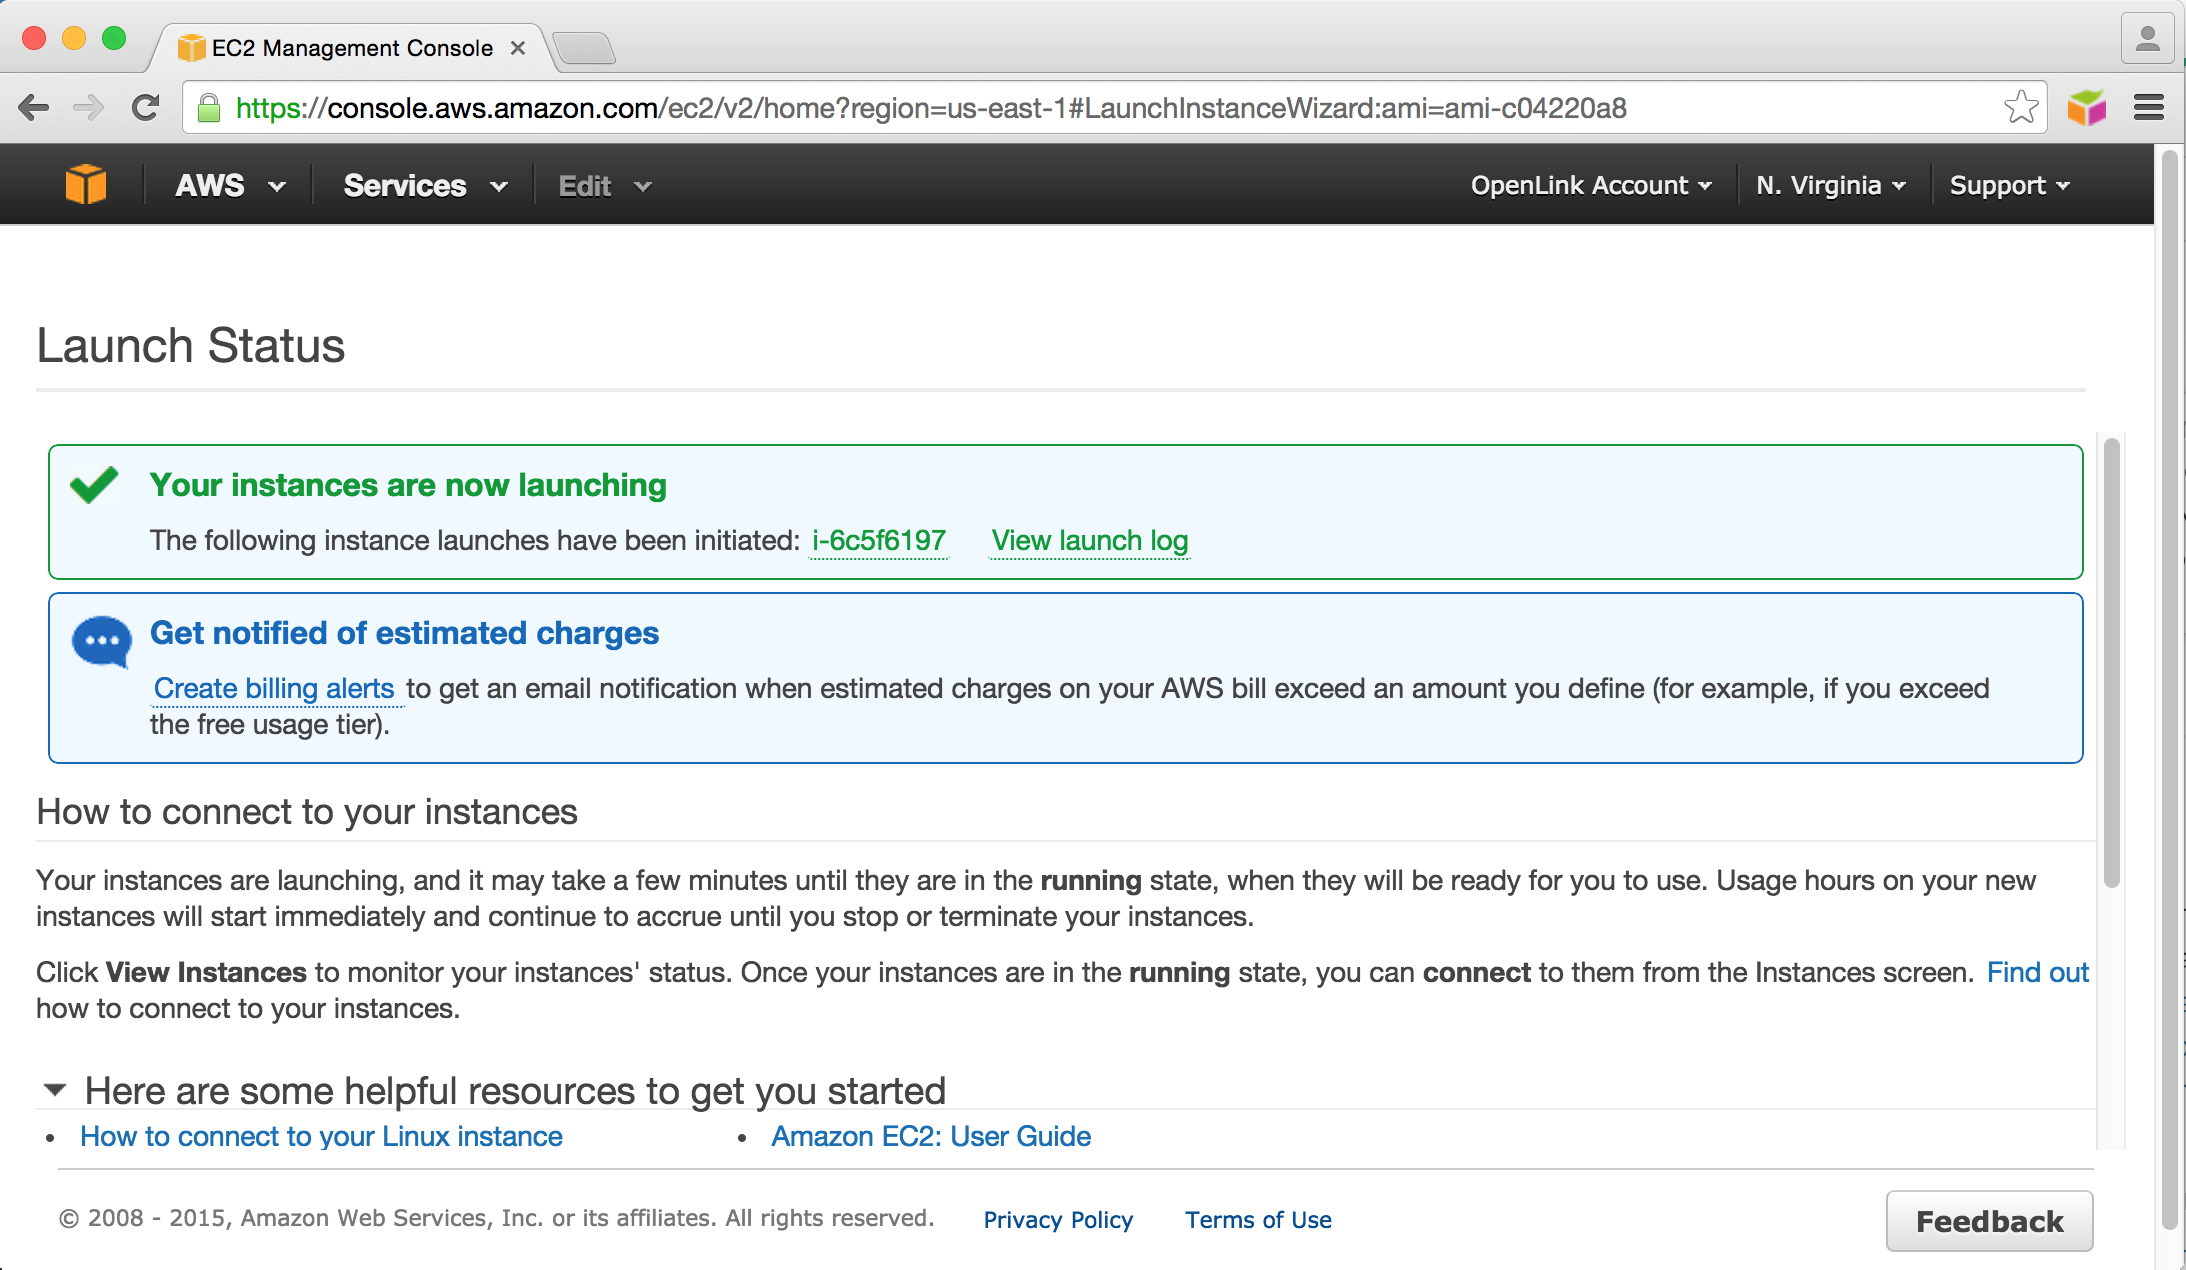
- The Launch Status page will be displayed for tracking progress.
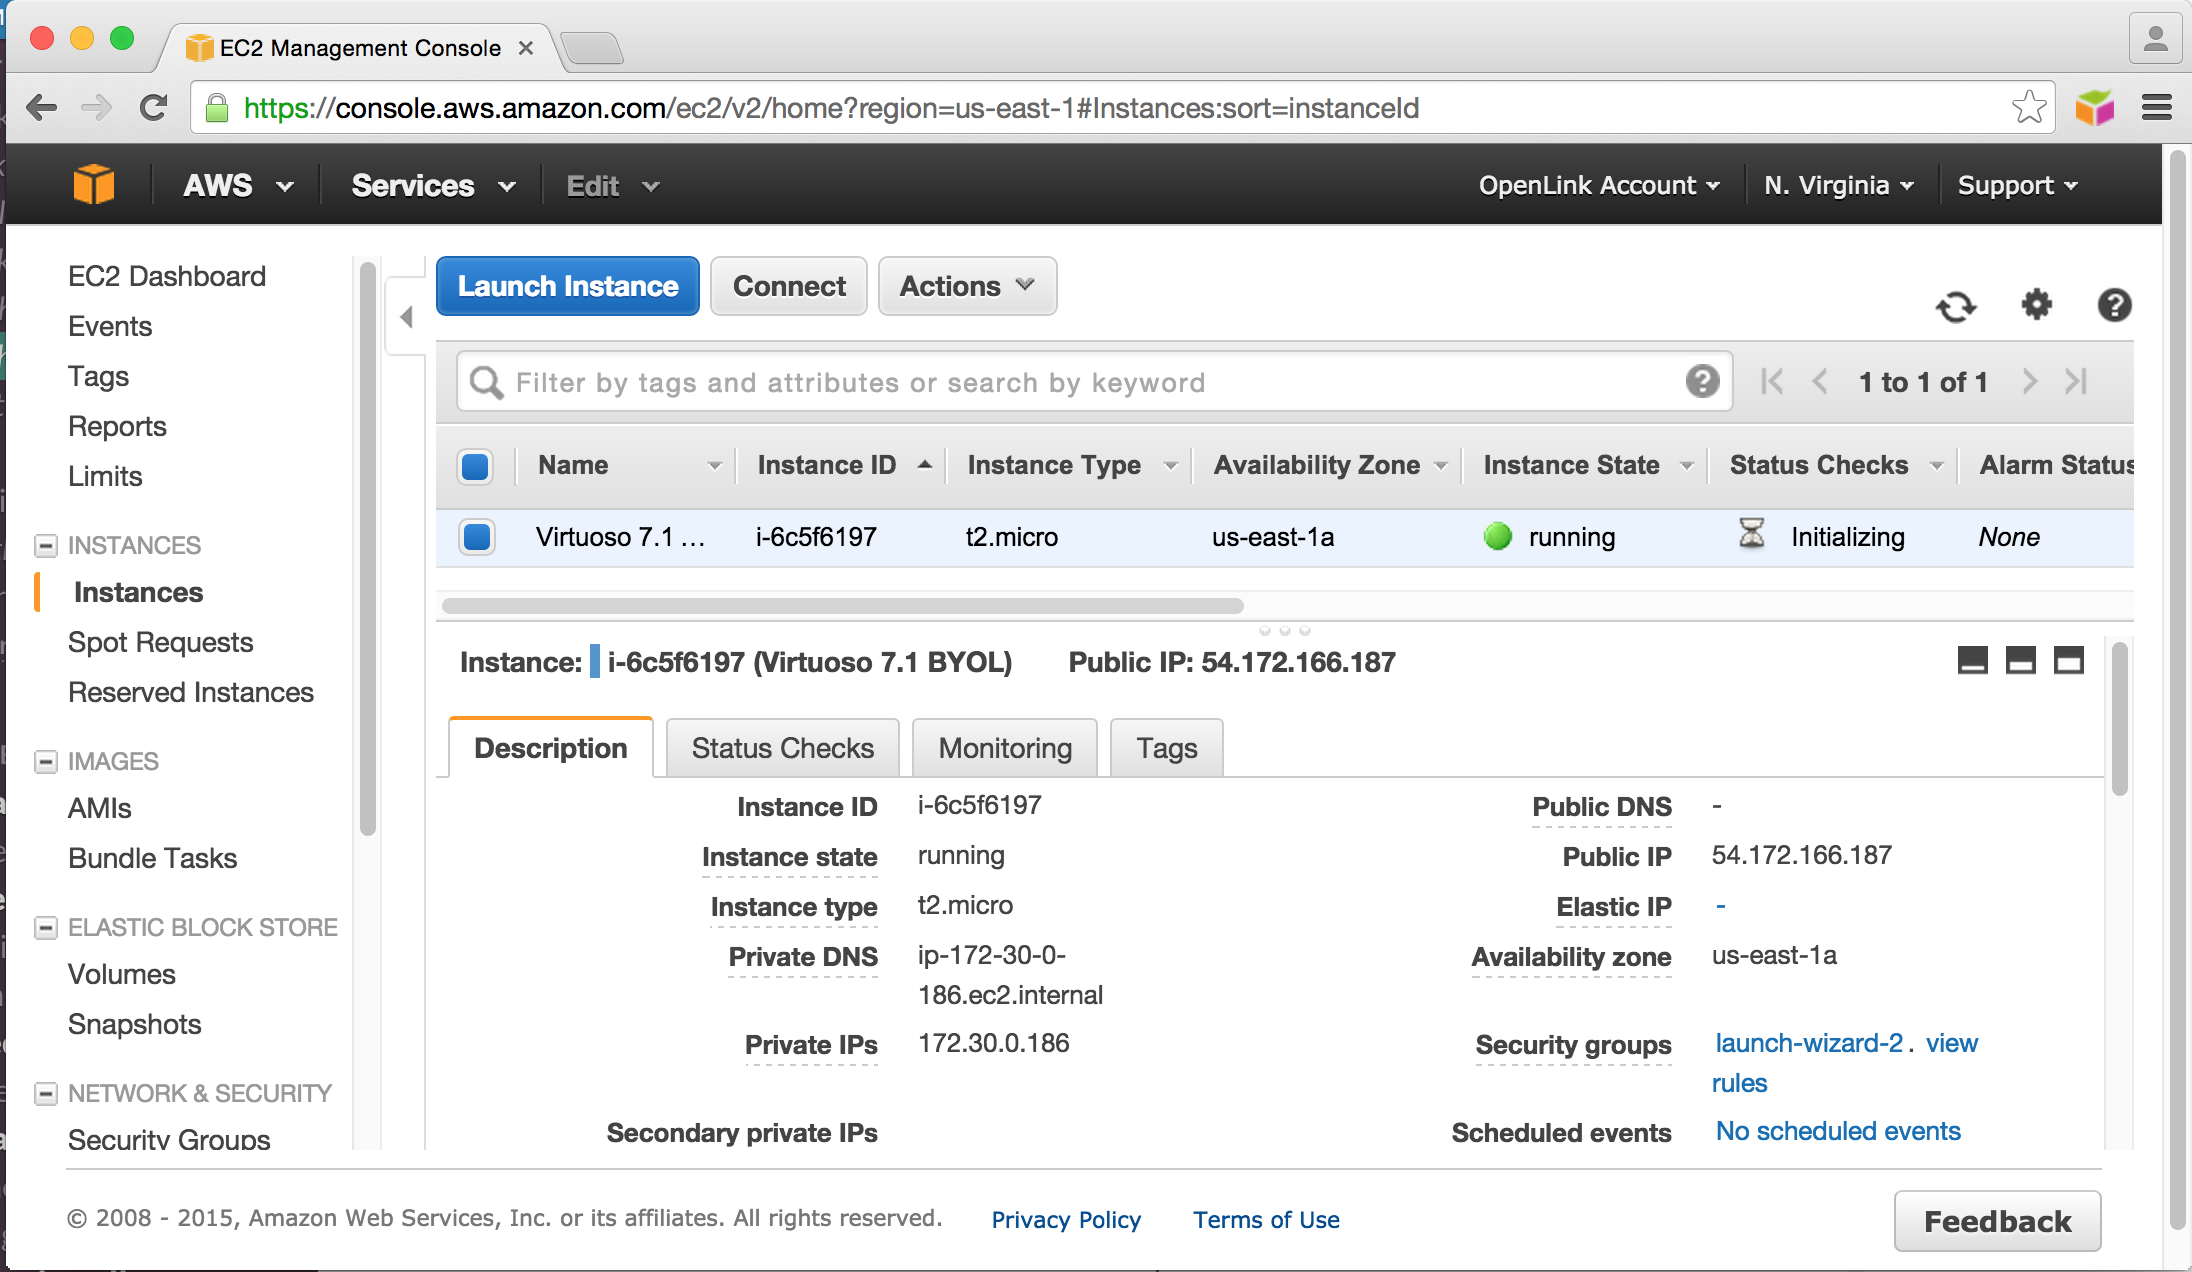
- Once complete, view the Launched Instance page in AWS console to see the instantiated AMI.
After AMI Instantiation
- Locate the security key selected or created above, and run the command —
chmod 600 MyKeyPair.pem
- Copy your Virtuoso license file (virtuoso.lic) to the AMI instance, using the default "ec2-user" that has "sudo" rights, with the command —
scp -i MyKeyPair.pem virtuoso.lic ec2-user@your-ec2-instance-cname:~/
- Connect to the EC2 AMI Server using the default "ec2-user" that has "sudo" rights, with the command —
ssh -i MyKeyPair.pem ec2-user@your-ec2-instance-cname
- The Virtuoso EC2 AMI installation is located in
/opt/virtuoso. Run the following commands to navigate to this location, and set the Virtuoso server environment variables —
cd /opt/virtuoso
. ./virtuoso-environment.sh
- Run the following command to copy the Virtuoso license to the
bindirectory of your Virtuoso installation
sudo cp ~/virtuoso.lic bin/virtuoso.lic
- Run the following command to start the default Virtuoso database located in the
databasedirectory.
sudo bin/virtuoso-start.sh database
- The Virtuoso instance should now be running.
This can be verified by checking the
virtuoso.logfile in the database directory, with a command like this:
tail -n 100 database/virtuoso.log
Output will look something like this:
		Mon Jan 19 2015
10:35:25 { Loading plugin 2: Type `plain', file `mediawiki' in `../hosting'
10:35:25   MediaWiki version 0.1 from OpenLink Software
10:35:25   Support functions for MediaWiki collaboration tool
10:35:25   SUCCESS plugin 2: loaded from ../hosting/mediawiki.so }
10:35:25 { Loading plugin 3: Type `plain', file `creolewiki' in `../hosting'
10:35:25   CreoleWiki version 0.1 from OpenLink Software
10:35:25   Support functions for CreoleWiki collaboration tool
10:35:25   SUCCESS plugin 3: loaded from ../hosting/creolewiki.so }
10:35:25 { Loading plugin 4: Type `plain', file `im' in `../hosting'
10:35:25   IM version 0.61 from OpenLink Software
10:35:25   Support functions for Image Magick 6.6.6
10:35:25   SUCCESS plugin 4: loaded from ../hosting/im.so }
10:35:25 { Loading plugin 5: Type `plain', file `wbxml2' in `../hosting'
10:35:25   FAILED  plugin 5: Unable to locate file }
10:35:25 { Loading plugin 7: Type `Hosting', file `hosting_php.so' in `../hosting'
10:35:25   FAILED  plugin 7: Unable to locate file }
10:35:25 { Loading plugin 8: Type `plain', file `qrcode' in `../hosting'
10:35:25   FAILED  plugin 8: Unable to locate file }
10:35:25 { Loading plugin 12: Type `plain', file `hslookup.so' in `../hosting'
10:35:25   FAILED  plugin 12: Unable to locate file }
10:35:25 OpenLink Virtuoso Universal Server
10:35:25 Version 07.10.3211-pthreads for Linux as of Dec 15 2014
10:35:25 uses parts of OpenSSL, PCRE, Html Tidy
10:35:25 Registered to OpenLink Virtuoso (Internal Use)
10:35:25 Personal Edition license for 10 connections
10:35:25 Issued by OpenLink Software
10:35:25 Enabled Cluster Extension
10:35:25 Enabled Column Store Extension
10:35:25 Database version 3126
10:35:25 SQL Optimizer enabled (max 1000 layouts)
10:35:26 Compiler unit is timed at 0.000190 msec
10:35:27 Roll forward started
10:35:27 Roll forward complete
10:35:27 Checkpoint started
10:35:27 Checkpoint finished, log reused
10:35:27 HTTP/WebDAV server online at 80
10:35:27 FTP server online at 21
10:35:27 Server online at 1111 (pid 964)
- The default Virtuoso
dbapassword is the AMIinstance-idwhich can be obtained from the AMI properties presented by the Amazon AWS console UI or by executing the following command in the Linux shell:
curl http://169.254.169.254/latest/meta-data/instance-id
- Install the Virtuoso Conductor VAD application package by running the following commands:
$ /opt/virtuoso/virtuoso-environment.sh
$ isql 1111 -U dba -P instance-id
Connected to OpenLink Virtuoso
Driver: 07.10.3214 OpenLink Virtuoso ODBC Driver
OpenLink Interactive SQL (Virtuoso), version 0.9849b.
Type HELP; for help and EXIT; to exit.
SQL>  vad_install('/opt/virtuoso/vad/conductor_dav.vad',0);
SQL_STATE     SQL_MESSAGE
LONG VARCHAR  VARCHAR
_______________________________________________________________________________

00000         No errors detected
00000         Installation of "Virtuoso Conductor" is complete.
00000         Now making a final checkpoint.
00000         Final checkpoint is made.
00000         SUCCESS
BLOB 0 chars

6 Rows. -- 5773 msec.
SQL>
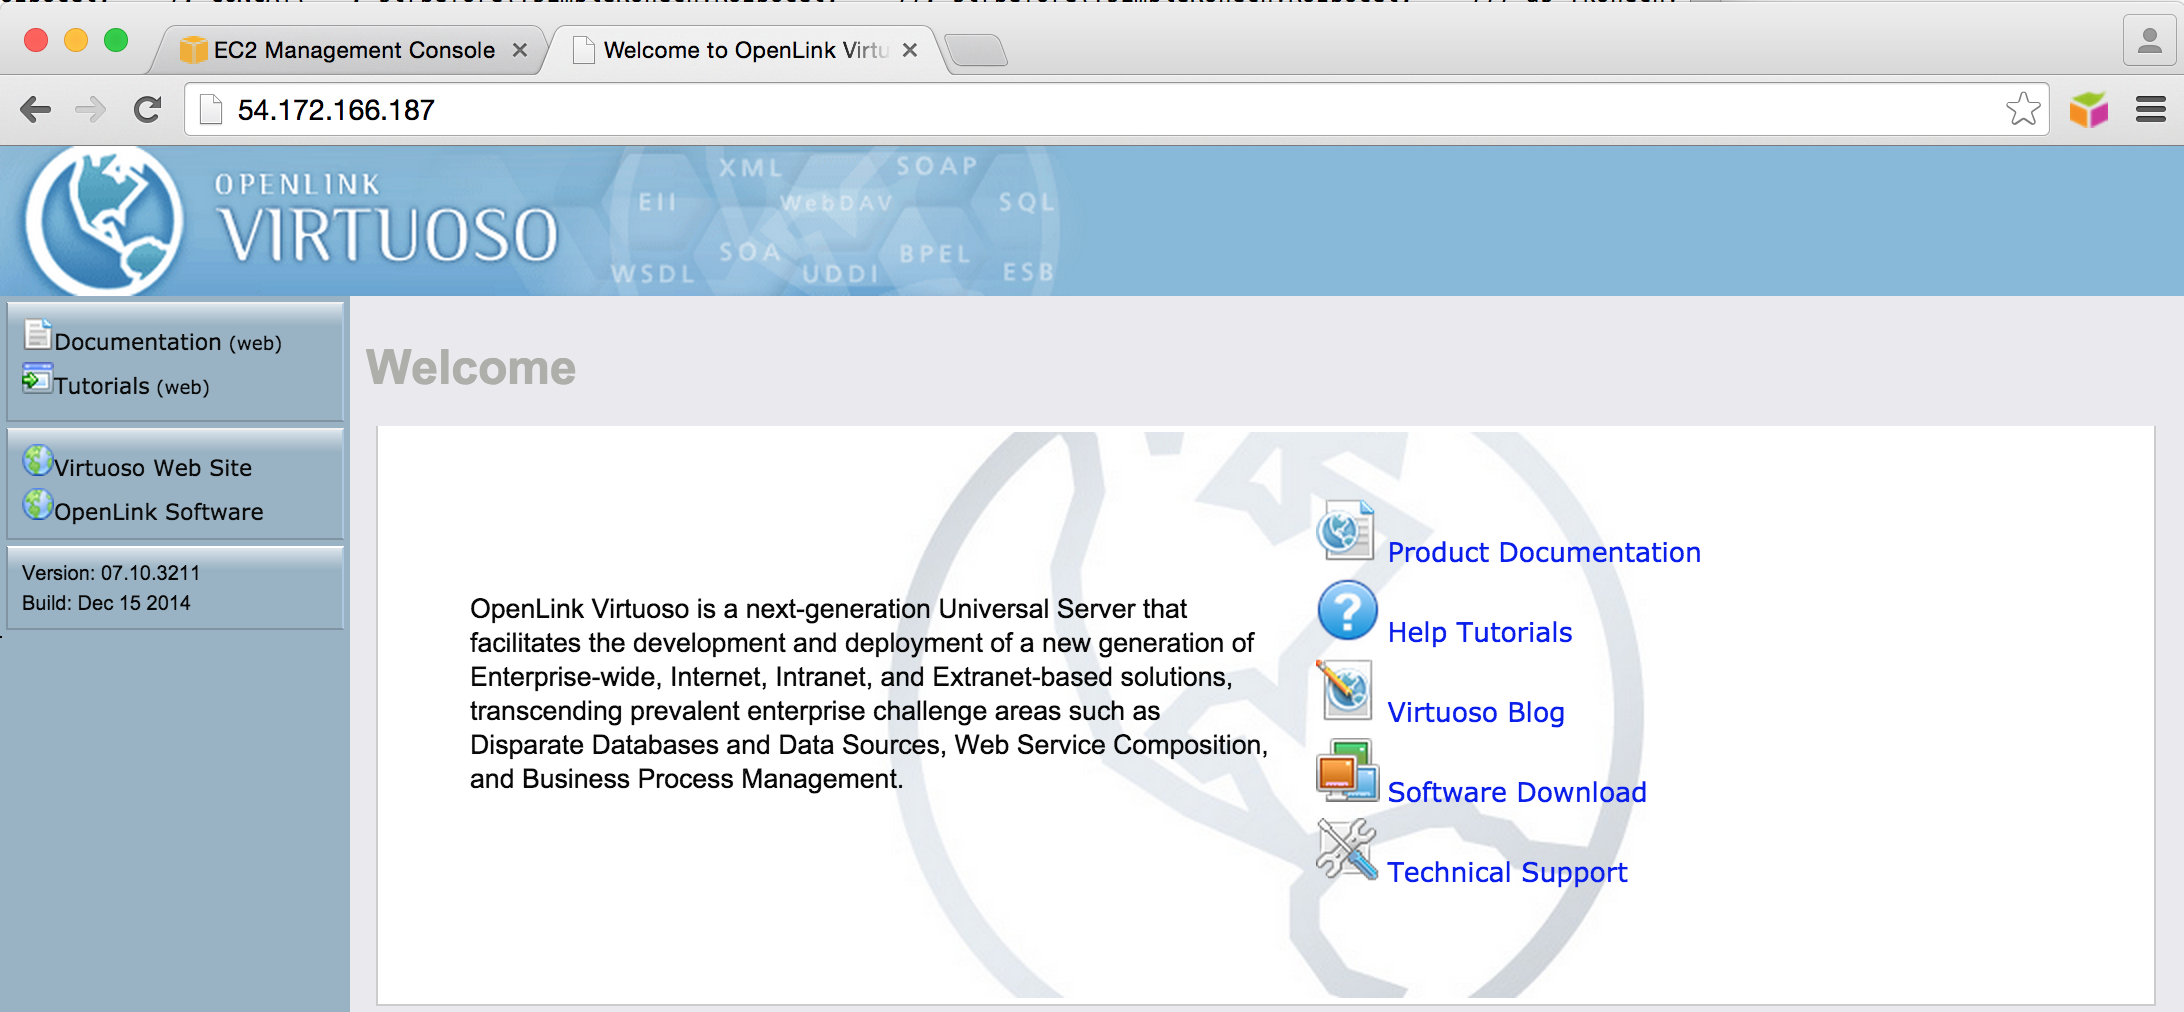
- The Virtuoso host instance should now be accessible via HTTP at a URL like
http://your-ec2-instance-cname/.
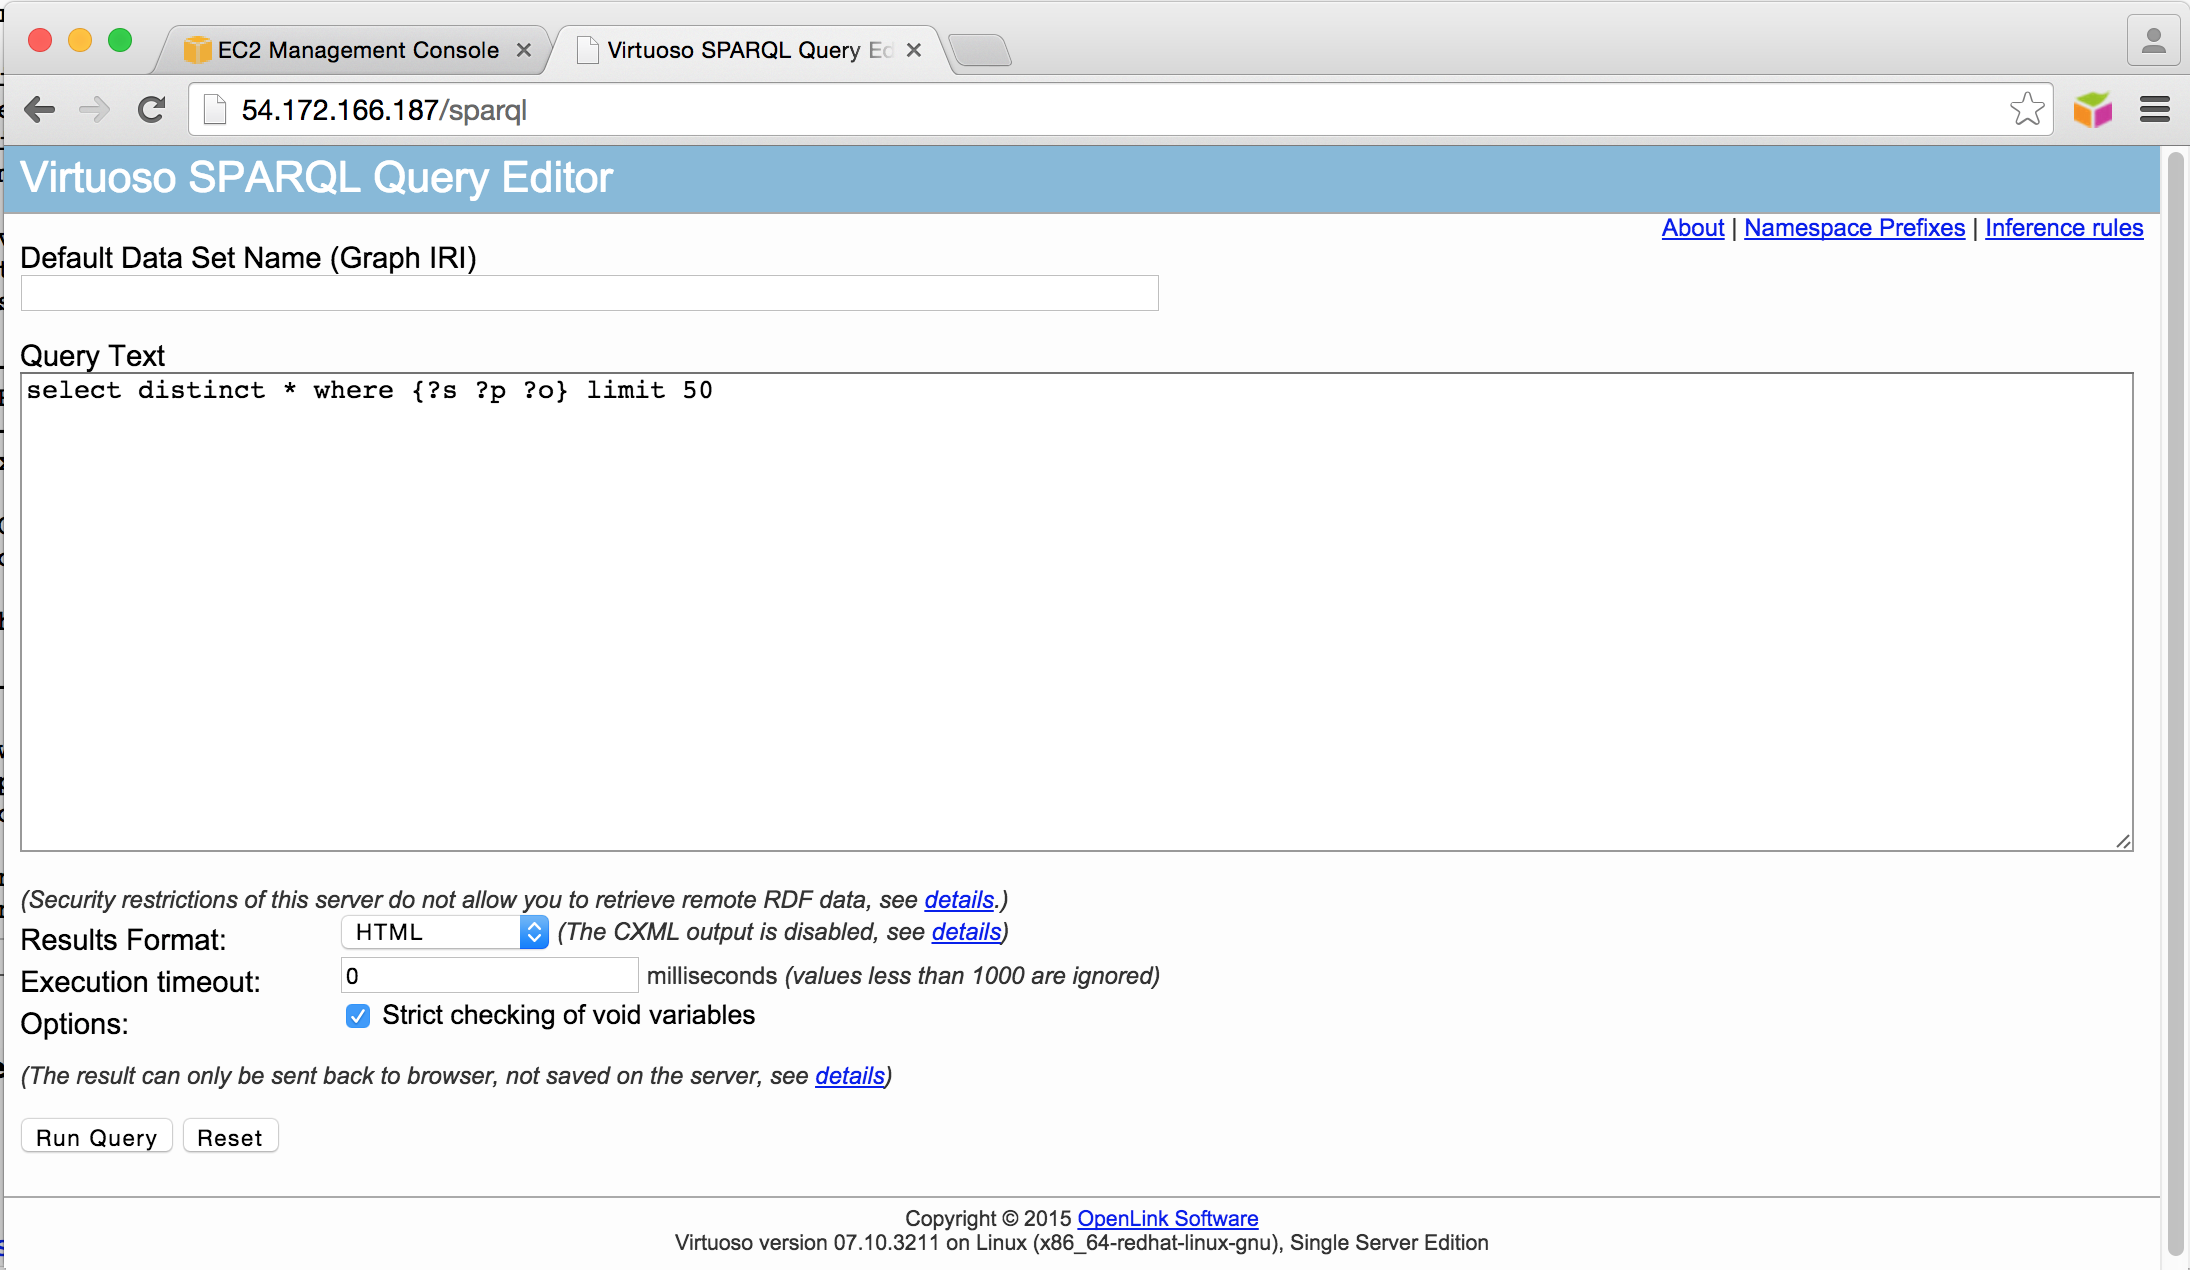
- The Virtuoso SPARQL Endpoint should now be accessible via HTTP at a URL like
http://your-ec2-instance-cname/sparql.
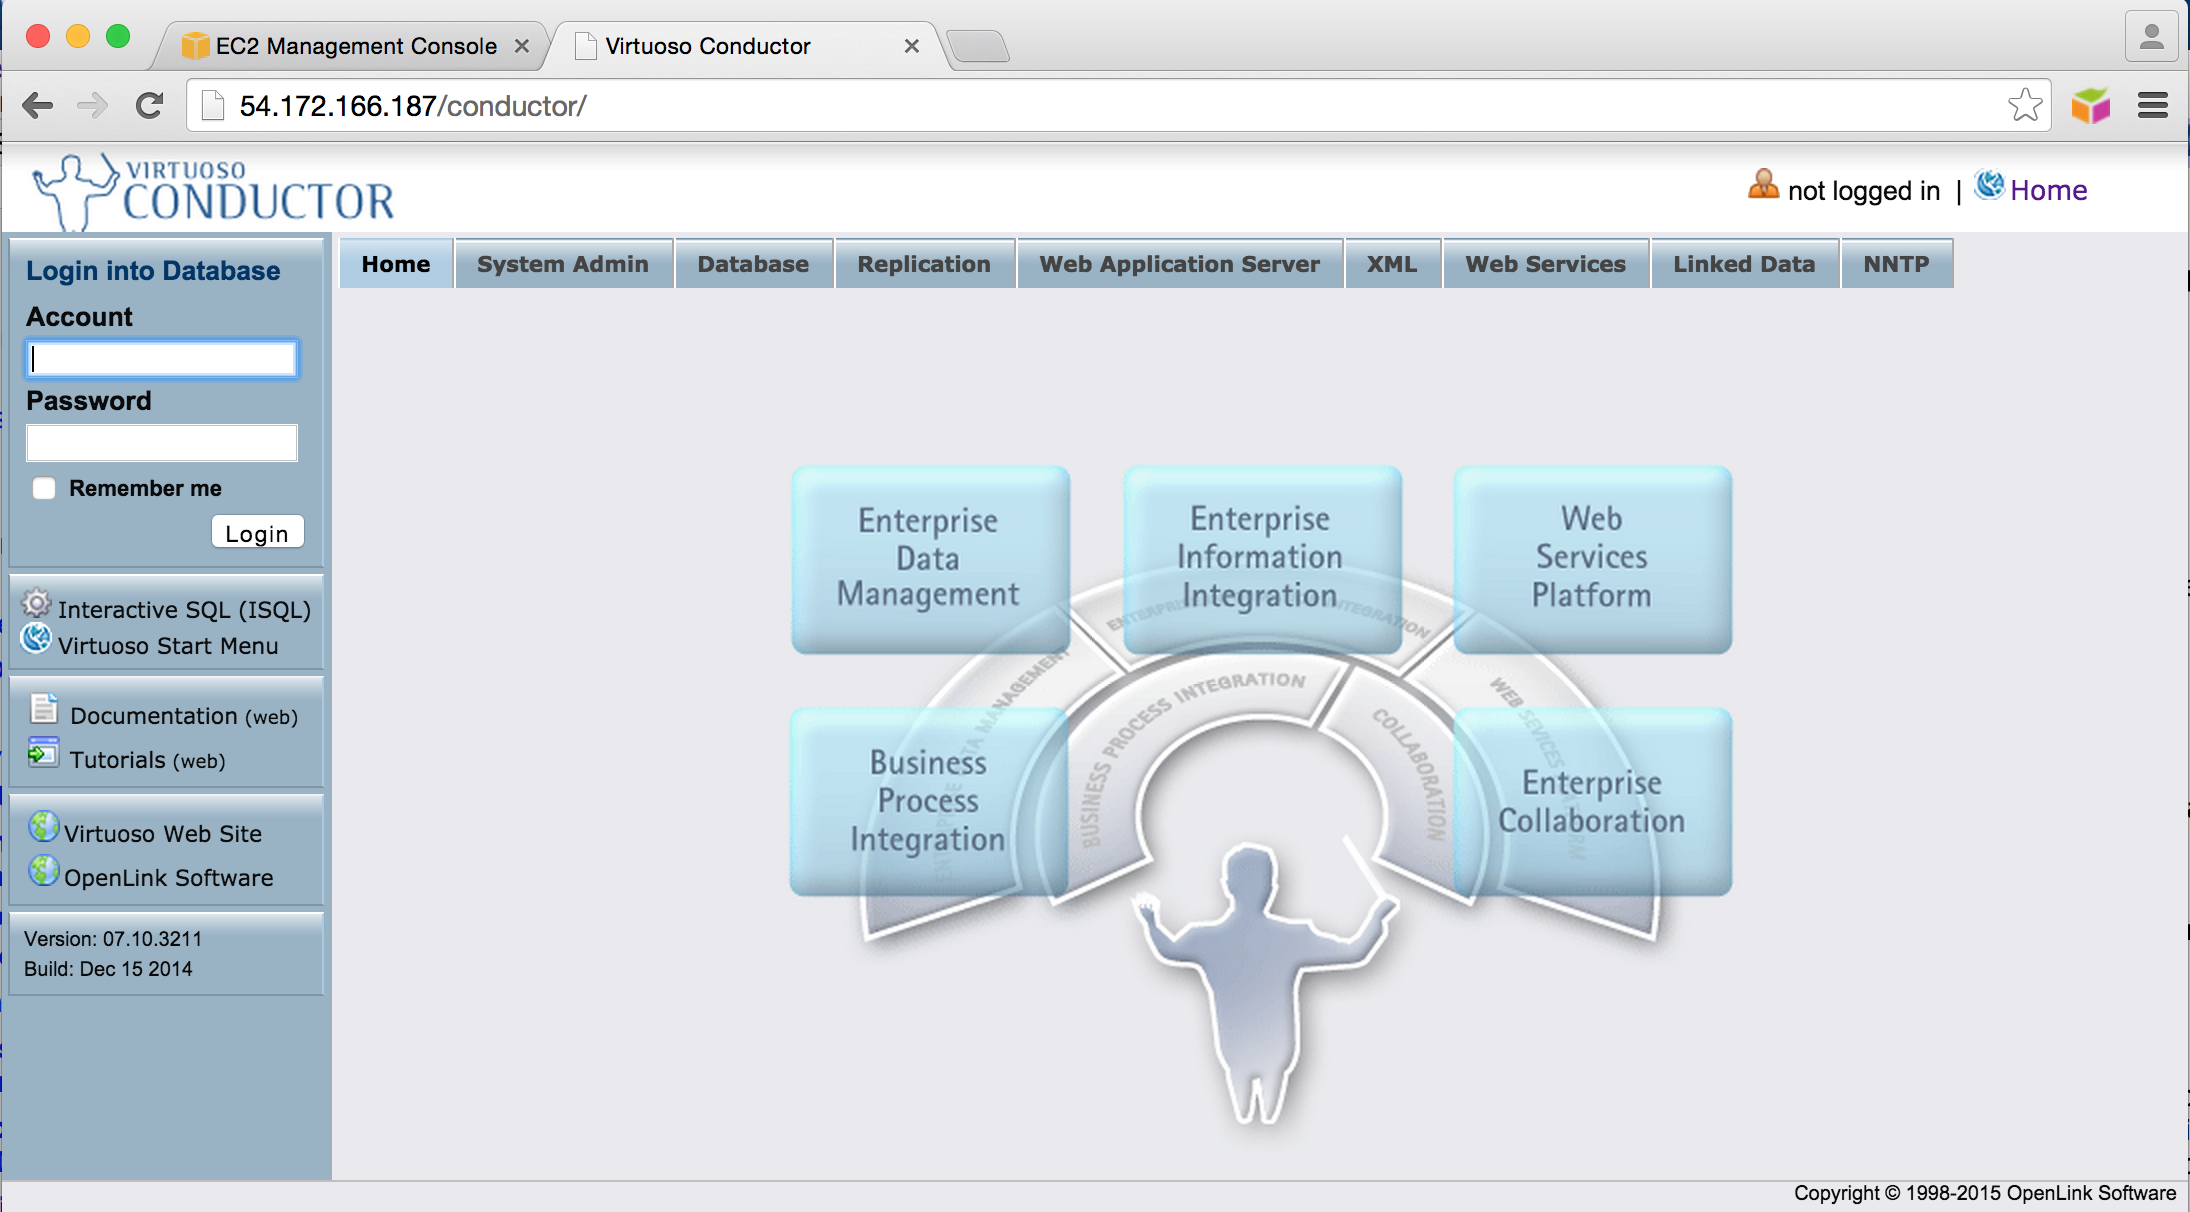
- The Virtuoso Conductor Admin User Interface should now be accessible via HTTP at a URL like
http://your-ec2-instance-cname/conductor(default Admin username and password aredbaandinstance-idobtained previously).
Related Items
- OpenLink Data Spaces Installation
- EC2 & AMI related information
- Instance-backed Virtuoso EC2 AMI
- Pre-configured & Pre-loaded Virtuoso instances (DBpedia, BBC Music & Programmes etc.)
- Creating Your Own Neurocommons Instance
- Creating Your Own Bio2RDF Instance
- Creating Your Own MusicBrainz Instance
- Backup Your Virtuoso EC2 AMI to S3
- Configure your Virtuoso EC2 AMI for use with Amazon Elastic Block Storage (EBS)
- Amazon-provided AWS Simple Monthly Cost Calculator
- Protecting your Virtuoso-hosted SPARQL Endpoint
- Virtuoso documentation
- Virtuoso Tips and Tricks
CategoryHowTo CategoryODS CategoryVirtuoso CategoryDocumentation CategoryEC2