Prepopulated Virtuoso hosting of Bio2RDF on EC2 AMI
What is the Bio2RDF Project?
A Bio Informatics knowledgebase available in RDF based Linked Data form. For additional information see:
Bio2RDF Installation on Virtuoso EC2 AMI instance
OpenLink Software provides a backup up of the current Bio2RDF knowledgebase currently exposed at <http://lod.openlinksw.com/sparql>.
Users can restore a backup of this knowledgebase into a Virtuoso AMI instance in the Amazon EC2 cloud thereby obtaining a personal or service-specific rendition of the Bio2RDF Knowledgebase.Installation
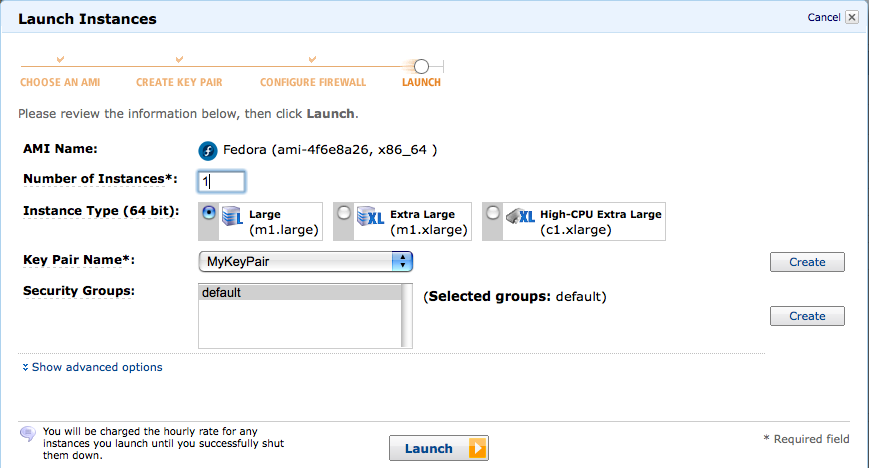
- Start a Virtuoso EC2 AMI instance.
Note a Virtuoso Release 5 AMI instance ( ami-ids ami-59628630 or ami-c46084ad ) must be used with this backup.
A 64-bit large image AMI instance with 8GB of memory, which is the
m1.largeEC2 instance type, is the minimum recommended for Bio2RDF. For best performance, particularly under extensive usage, the 16GBm1.xlargeEC2 instance type is preferred.
- Load the Virtuoso Conductor administration interface of the running EC2 AMI instance with a URL of the form
http://your-ec2-instance-cname/conductor.
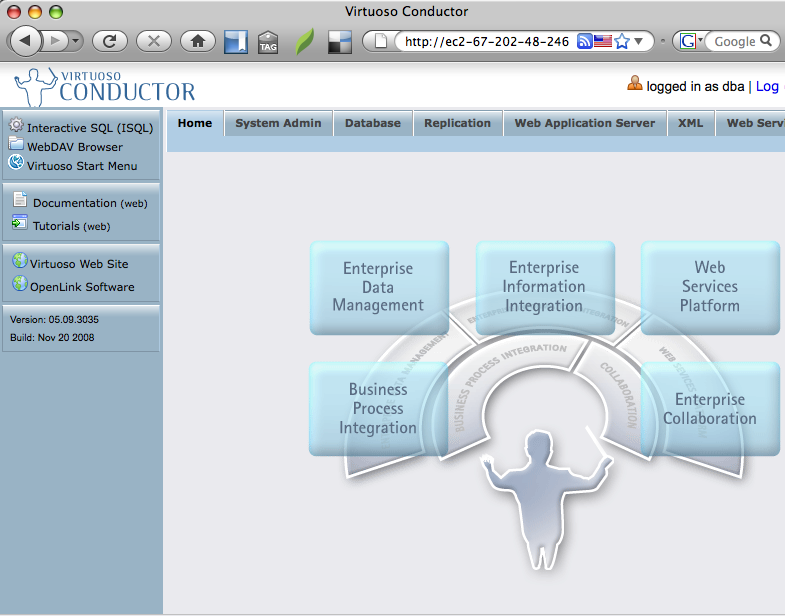
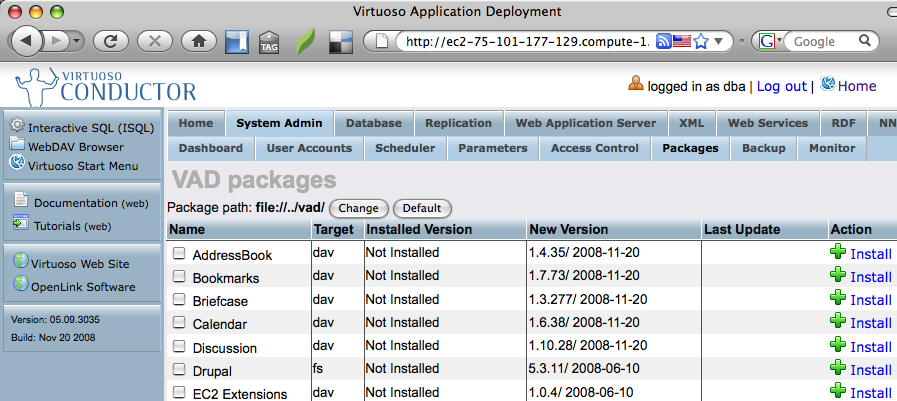
- From the Virtuoso Conductor, navigate to the "System Admin" -> "Packages" tab to obtain a list of available Virtuoso packages (VADs) to install.

- Click the "Install" button to initiate installation of the "EC2 Extensions" VAD package for use in performing backup and restore tasks.
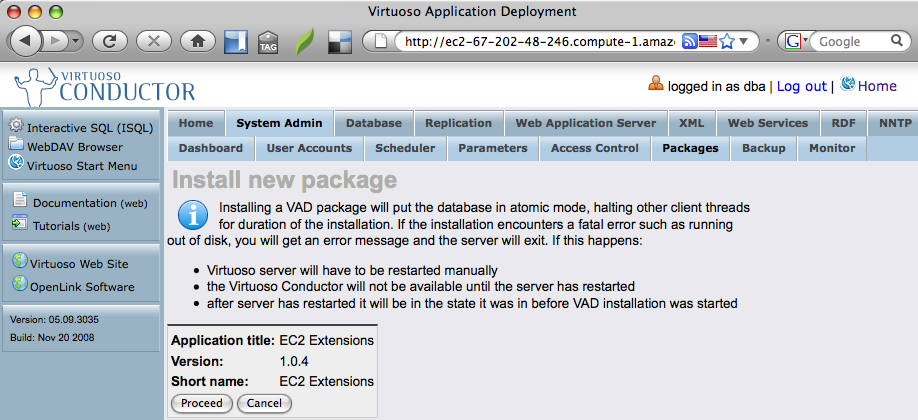
- Click the "Proceed" button to install the "EC2 Extensions" VAD package.
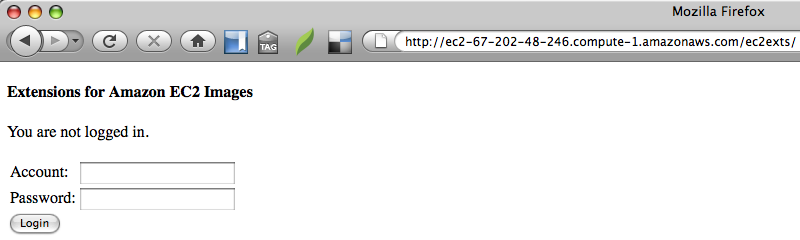
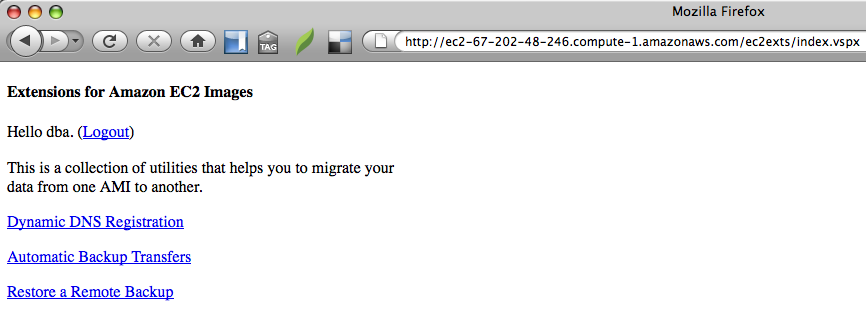
- Go to the URL
http://your-ec2-instance-cname/ec2extsto load the Virtuoso Extensions for Amazon EC2 Images login page and log in as the "dba" user.
- From the Virtuoso Extensions for Amazon EC2 Images main page, click the "Restore a Remote Backup" link.
- On the "Restore a Remote Backup" page, set the follow options —
          Protocol:  WebDAV/HTTP
              Host:  s3.amazonaws.com
    Path or Bucket:  bio2rdf-virtuoso-bundle
Backup File Prefix:  bio2rdf-bundle
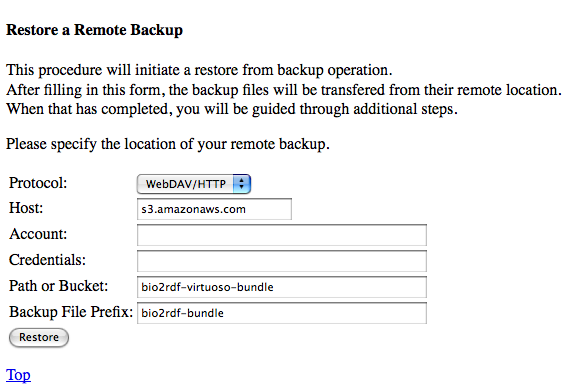
- Click the "Restore" button to begin the restoration of the Bio2RDF database from backup.
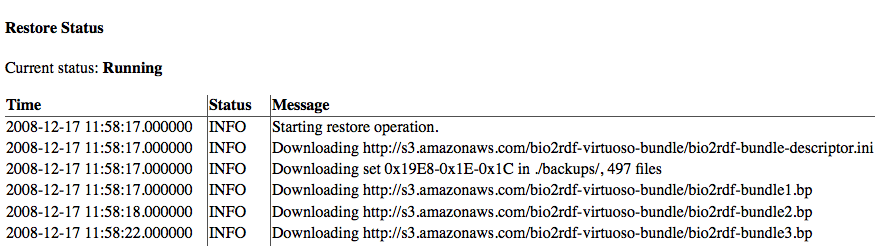
.
.
.
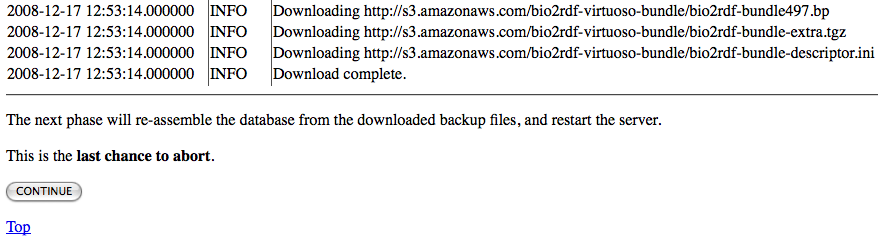
- Click on the "Continue" button to begin the re-assembly of the database from the restored backup files.
Output similar to the following will be displayed when the re-assembly of the database is complete.
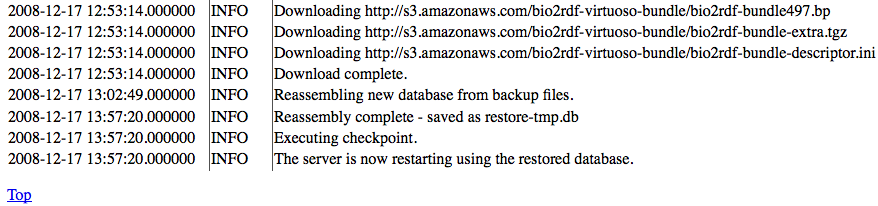
Once complete the server will have been restarted automatically with the restored Bio2RDF database and is ready for use.
Usage Examples
You can then access pages such as these on your Bio2RDF server:
-
-
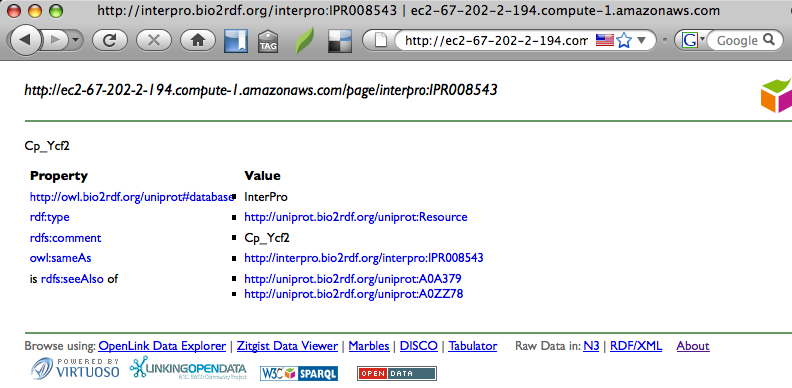
http://your-ec2-instance-cname/interpro:IPR008543
-
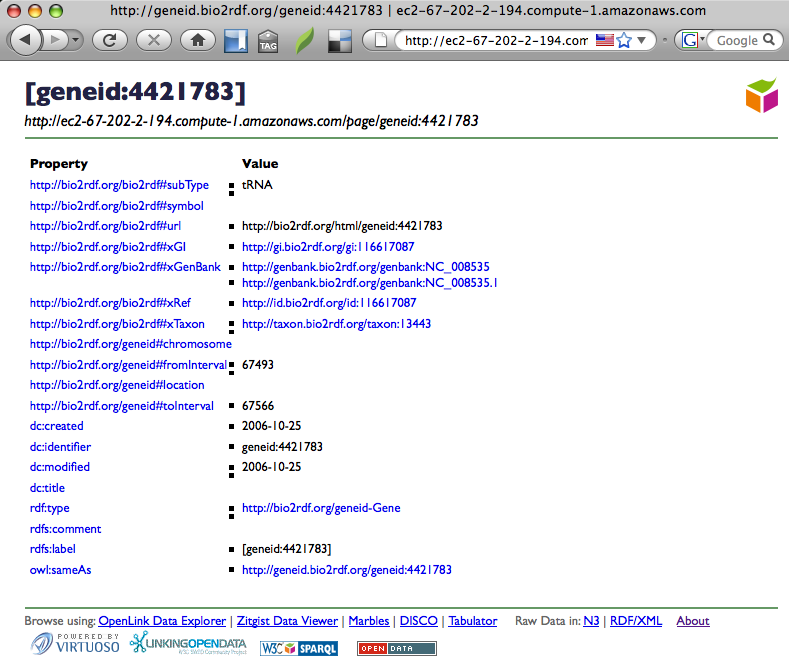
http://your-ec2-instance-cname/geneid:4421783
-
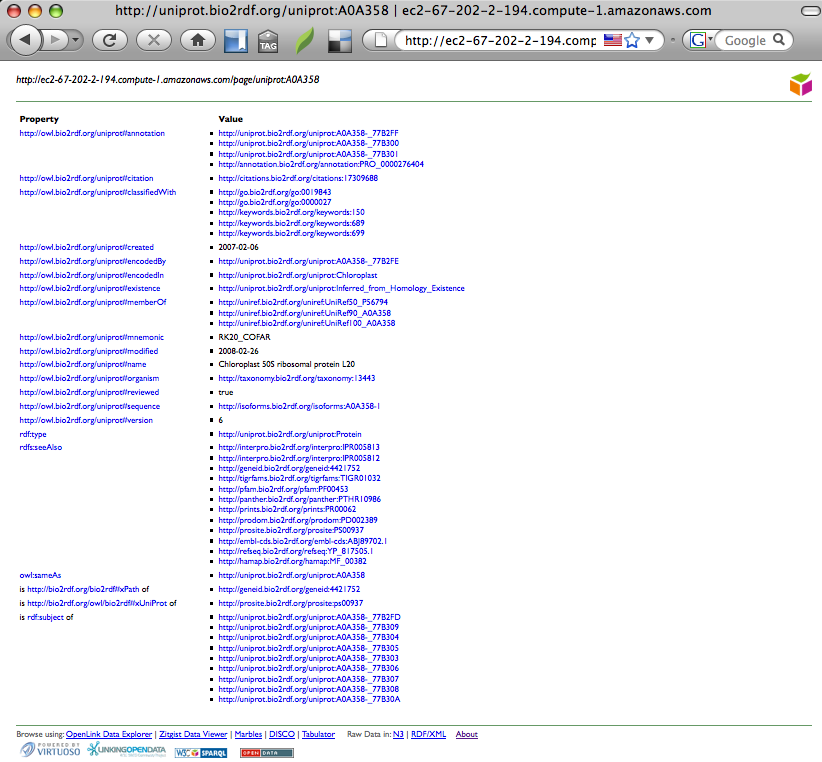
http://your-ec2-instance-cname/uniprot:A0A358
-
Bio2RDF VAD Application Package
For those running a Bio2RDF Virtuoso EC2 AMI instance created before December 18, 2008, you will need to update the installed Bio2RDF VAD Application package to obtain the latest enhancements, by taking the following steps —
- Download the Bio2RDF VAD Application (
bio2rdf_dav.vad) package. - Navigate to the "System Admin" -> "Packages" tab of the Virtuoso Conductor.
- Scroll down to the "Install Package" section of the tab, use the "Upload Package" option "browse" button.
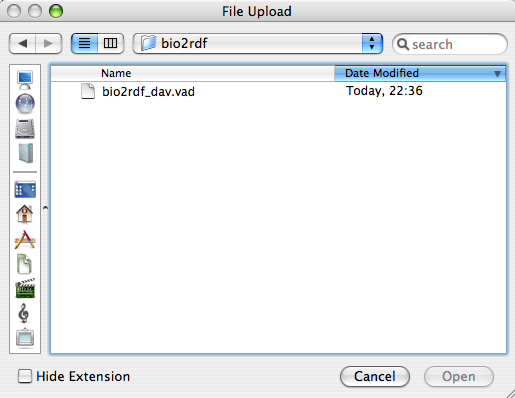
- Navigate to the location of the downloaded
bio2rdf_dav.vadfile and click the "open" button to select it.
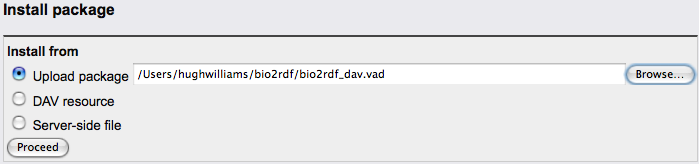
- Click the "Proceed" button to begin the installation process.
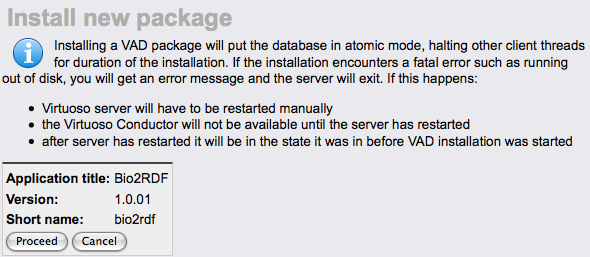
- Once the VAD installation is complete, the Bio2RDF installation is up-to-date and ready for use.
Results
- The Bio2RDF SPARQL endpoint can be accessed on http://your-ec2-instance-cname/sparql
- The OpenLink Interactive SPARQL Query Builder can be accessed on http://your-ec2-instance-cname/isparql, enabling the visual construction of queries (Graph Patterns).
Related
- Safeguarding your Virtuoso-hosted SPARQL Endpoint
- EBS-backed BYOL ("Bring Your Own License") Virtuoso EC2 AMI
- SPARQL Endpoint Protection Methods Collection
- Virtuoso documentation
- Virtuoso Tips and Tricks Collection
- SPARUL over SPARQL using the http://cname:port/sparql-auth endpoint
- Virtuoso Authentication Server UI
- Manage a SPARQL-WebID based Endpoint
- Configure Virtuoso instance as an X.509 Certificate Authority and HTTPS listener
- Configure Virtuoso+ODS instance as an X.509 Certificate Authority and HTTPS listener
- WebID Protocol Support in OpenLink Data Spaces.
- Manage ODS Datadspaces Objects WebID? Access Control Lists (ACLs):
- Guide for Set up a X.509 certificate issuer and HTTPS listener and generate ODS user certificates.
- Setting up PubSubHub in ODS
- PubSubHubBub Demo Client Example
- Feed subscription via PubSubHub protocol Example
- Setting Up PubSubHub to use WebID Protocol or IP based control lists
- CA Keys Import using Conductor
- Generate an X.509 Certificate hosted WebID Guide
- Generate an X.509 Certificate (with a WebID watermark) to be managed by host operating system keystore
- Generate an X.509 Certificate (with a WebID watermark) to be managed by a browser-based keystore
- Using Virtuoso's WebID Verification Proxy Service with a WebID-bearing X.509 certificate
- Using Virtuoso's WebID Identity Provider (IdP) Proxy Service with an X.509 certificate
- ODS Briefcase WebID Protocol Share File Guide
- WebID Protocol Specification
- Test WebID Protocol Certificate page
- WebID Protocol Certificate Generation page