Using AWS Elastic Block Storage
What is AWS Elastic Block Storage?
Amazon Elastic Block Storage (Amazon EBS) is a new type of storage designed specifically for Amazon EC2 instances. Amazon EBS allows you to create volumes that can be mounted as devices by EC2 instances; your AMI sees an EBS volume as a raw unformatted hard drive device. These can then be managed through the AWS Management Console, with snapshots taken to preserve the state at a given point in time, etc.
Typical Usage Scenarios
Preconfigured Databases
With EBS it is possible to ship whole instances (dump/restore images of virtuoso.db database files) of databases. OpenLink currently provide a few such preconfigured databases. See specific installation instructions for:
Managing Virtuoso Storage
Prerequisites
- Ensure you have downloaded your ssh keypair, with which to access your AMI instance.
- Some Unix/Linux knowledge is assumed.
Creating larger databases
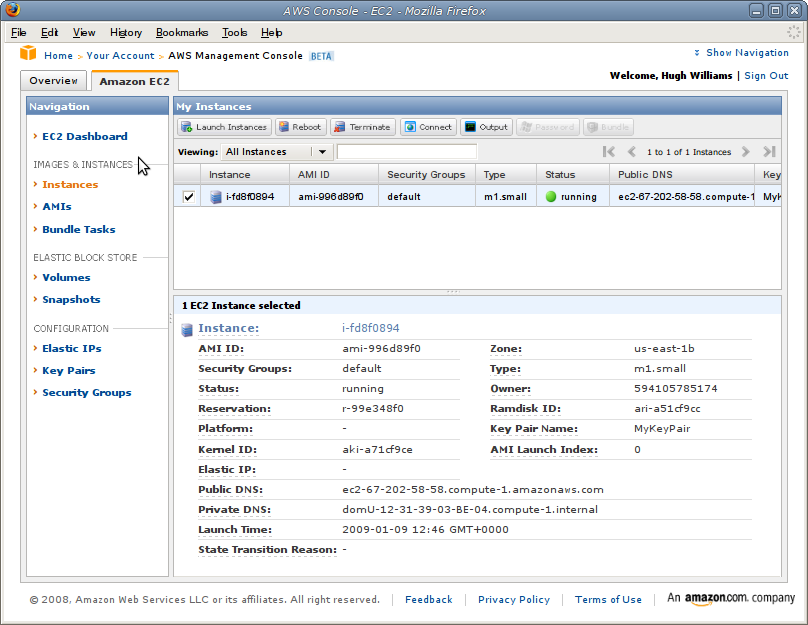
- Start by logging into your Amazon AWS Management Console.
From here you should see the dashboard overview with an instance running:
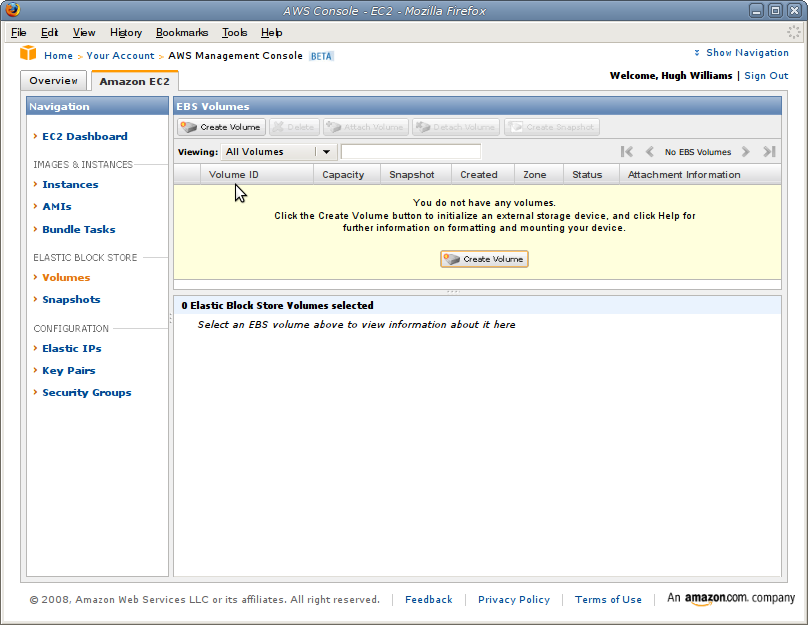
- From the left menu, select Volumes to view any existing EBS volumes you might have created.
In this case, we have no pre-existing volumes:
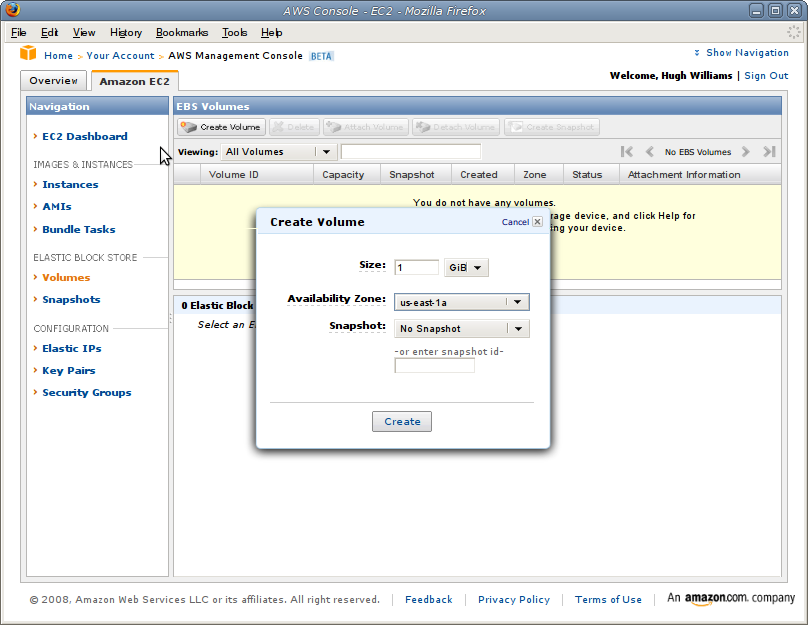
- Click create and fill in a size (here 1Gb) and an availability zone.
Note that this must match the availability zone of the instance to which you attach it:
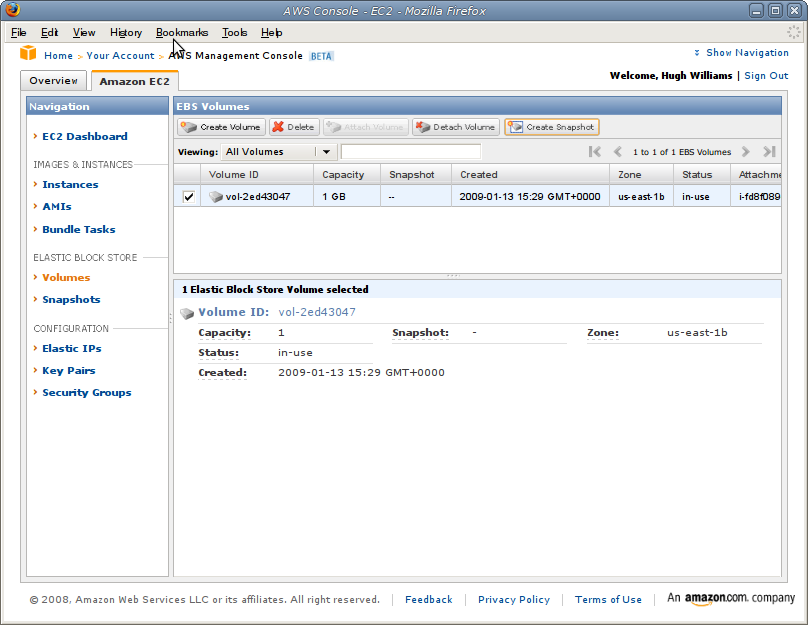
- After a short while, the new EBS volume will be created and appear in the management console accordingly:

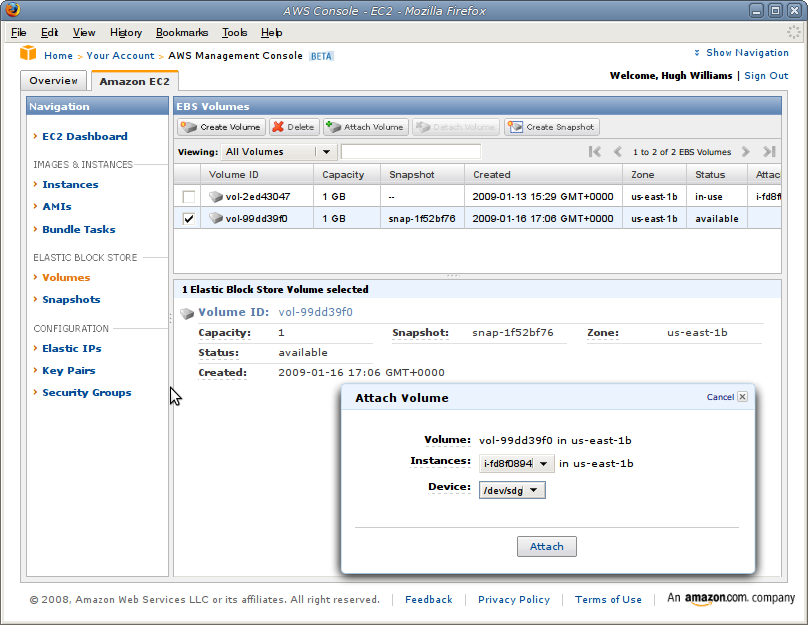
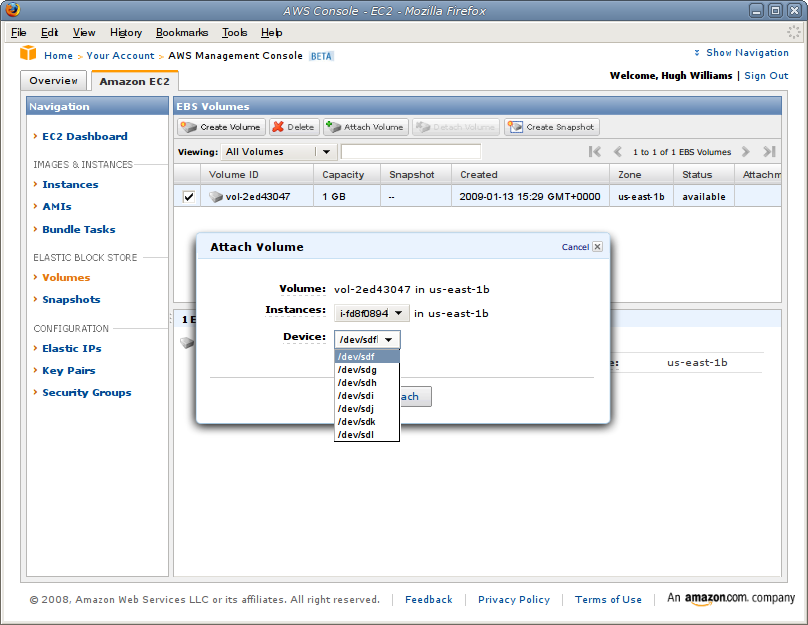
- If you click *attach,* a dialog will pop-up asking to which instance the new volume should be attached.
Choose the relevant one and select a device-name for the volume to use within the AMI.
Here we choose
/dev/sdf(a pseudo-SCSI drive name):
- If not already connected, ssh into the AMI as root using your key identity and check for the appearance of the new drive:
zsh% ssh -i MyKeyPair.pem root@ec2-67-202-58-58.compute-1.amazonaws.com
[root@domU-12-31-39-03-BE-04 ~]# ls -ltr /dev/[hs]d*
brw-r----- 1 root disk 8,  3 2009-01-09 07:48 /dev/sda3
brw-r----- 1 root disk 8,  1 2009-01-09 07:48 /dev/sda1
brw-r----- 1 root disk 8,  2 2009-01-09 07:48 /dev/sda2
brw-r----- 1 root disk 8, 80 2009-01-16 11:50 /dev/sdf
- Should you wish, you may partition the new block-storage device at this point using
fdiskorcfdiskor similar. Here we create an ext3 filesystem using the whole device:
[root@domU-12-31-39-03-BE-04 ~]# mkfs.ext3 -F /dev/sdf
mke2fs 1.40.8 (13-Mar-2008)
Warning: 256-byte inodes not usable on older systems
Filesystem label=
OS type: Linux
Block size=4096 (log=2)
Fragment size=4096 (log=2)
65536 inodes, 262144 blocks
13107 blocks (5.00%) reserved for the super user
First data block=0
Maximum filesystem blocks=268435456
8 block groups
32768 blocks per group, 32768 fragments per group
8192 inodes per group
Superblock backups stored on blocks:
        32768, 98304, 163840, 229376

Writing inode tables: done
Creating journal (8192 blocks): done
Writing superblocks and filesystem accounting information: done

This filesystem will be automatically checked every 20 mounts or
180 days, whichever comes first.  Use tune2fs -c or -i to override.
- For you to work with the new filesystem, the system has to "mount" it.
- This can be done manually with the
mountcommand, here becoming visible as the directory/opt/virtuoso/data-store/:
[root@domU-12-31-39-03-BE-04 ~]# mount -t ext3 /dev/sdf /opt/virtuoso/data-store
- You can also add a line in
/etc/fstab, to make the filesystem come up and be automatically mounted when you reboot or restart the AMI. As above, we are using the directory/opt/virtuoso/data-store/as the mount point:
[root@domU-12-31-39-03-BE-04 ~]# cat /etc/fstab
/dev/sda1       /           ext3        defaults              1 1
/dev/sda2       /mnt        ext3        defaults              1 1
/dev/sda3       swap        swap        defaults              0 0
/dev/sdf        /opt/virtuoso/data-store ext3 defaults,noatime 0 0
[root@domU-12-31-39-03-BE-04 ~]# mount
- This can be done manually with the
- To migrate the Virtuoso database directory across to this new EBS volume, first, stop the running Virtuoso instance:
[root@domU-12-31-39-03-BE-04 ~]# cd /opt/virtuoso/
[root@domU-12-31-39-03-BE-04 virtuoso]# . ./virtuoso-environment.sh
[root@domU-12-31-39-03-BE-04 virtuoso]# virtuoso-stop.sh
Shutting down Virtuoso instance in [database]
- The Virtuoso installation is based on the Personal Edition layout so the
virtuoso-start.shandvirtuoso-stop.shcommands work on all subdirectories containing an ini-file by default. - Now that the
data-store/directory is mounted, copy the database files across:
[root@domU-12-31-39-03-BE-04 virtuoso]# cp -v database/* data-store/
'database/php.ini' -> 'data-store/php.ini'
'database/virtuoso' -> 'data-store/virtuoso'
'database/virtuoso.db' -> 'data-store/virtuoso.db'
'database/virtuoso.ini' -> 'data-store/virtuoso.ini'
'database/virtuoso.log' -> 'data-store/virtuoso.log'
'database/virtuoso.pxa' -> 'data-store/virtuoso.pxa'
'database/virtuoso-temp.db' -> 'data-store/virtuoso-temp.db'
'database/virtuoso.trx' -> 'data-store/virtuoso.trx'
[root@domU-12-31-39-03-BE-04 virtuoso]#
- Then restart Virtuoso using the
data-storedirectory:
[root@domU-12-31-39-03-BE-04 virtuoso]# virtuoso-start.sh data-store/
Starting Virtuoso instance in [data-store/]
- You can tail the server log file to watch its progress:
[root@domU-12-31-39-03-BE-04 virtuoso]# tail -f data-store/virtuoso.log
12:00:51 Issued by OpenLink Software
12:00:51 This license will expire on Fri Jan  1 00:00:00 2010 GMT
12:00:51 Database version 3016
12:00:51 SQL Optimizer enabled (max 1000 layouts)
12:00:53 Compiler unit is timed at 0.001264 msec
12:00:55 Roll forward started
12:00:55 Roll forward complete
12:00:56 Checkpoint made, log reused
12:00:56 HTTP/WebDAV server online at 80
12:00:56 Server online at 1111 (pid 14099)
- The Virtuoso EC2 AMI instance is now ready for use, and accessible at
http://your-ec2-instance-cname/>.
Striping
If your database instance is very large and/or you have a large number of concurrent users causing access to random parts of the database simultaneously, it makes sense to distribute the storage across files on two or more devices using striping.
- Follow through the above, to create as many EBS storage volumes as you need, and create a filesystem and mount each of them somewhere under
/opt/virtuoso/. - From your
sshlogin session, modify thedatabase/virtuoso.inifile. First, in the[Database]section, enableStripingoverall:
[Database]
...
Striping = 1
MaxCheckpointRemap = 2000000
- Then, towards the bottom of the file, enter the files to use on EBS devices in the
[Striping]section:
[Striping]
...
Segment1 = 60000, /opt/virtuoso/data-space1>/virt-seg1.db = q1, /opt/virtuoso/data-space2>/virt-seg1-str2.db = q2, /opt/virtuoso/data-space3>/virt-seg1-str3.db = q3
- Each database segment file is assigned a separate background IO thread (the
=qclause). *Note:* All files on the same physical device should have the sameqvalue; i.e., multiple stripes on a single EBS volume should have the sameqvalue.
Further information on tuning Virtuoso is available in our documentation.
Creating a Database Snapshot
It is often helpful to be able to preserve the state of a filesystem at a point in time, either in order to restore to it later or to run a backup or similar.
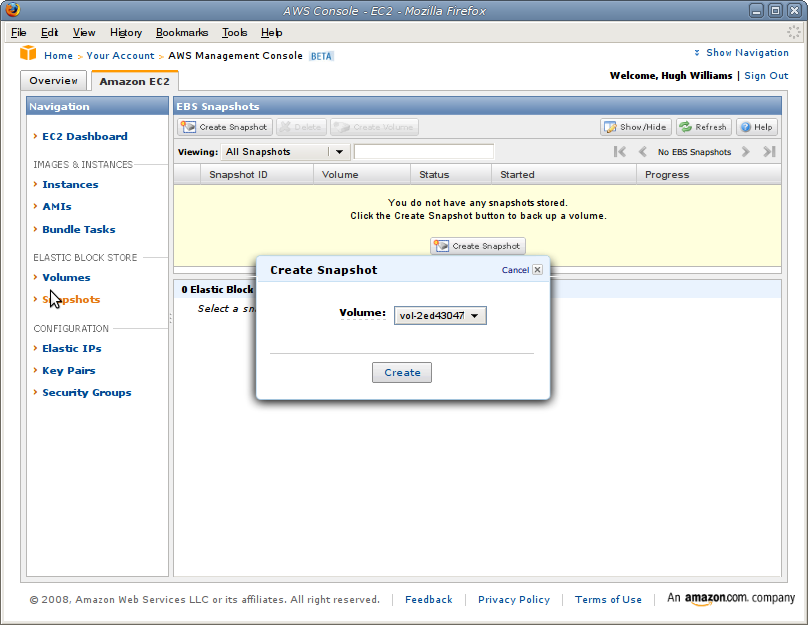
With the Amazon AWS Management Console, creating a new snapshot is a matter of two clicks.
- Start at the console's Volumes view:
- Click on create snapshot and select the volume of which you wish to make a copy:
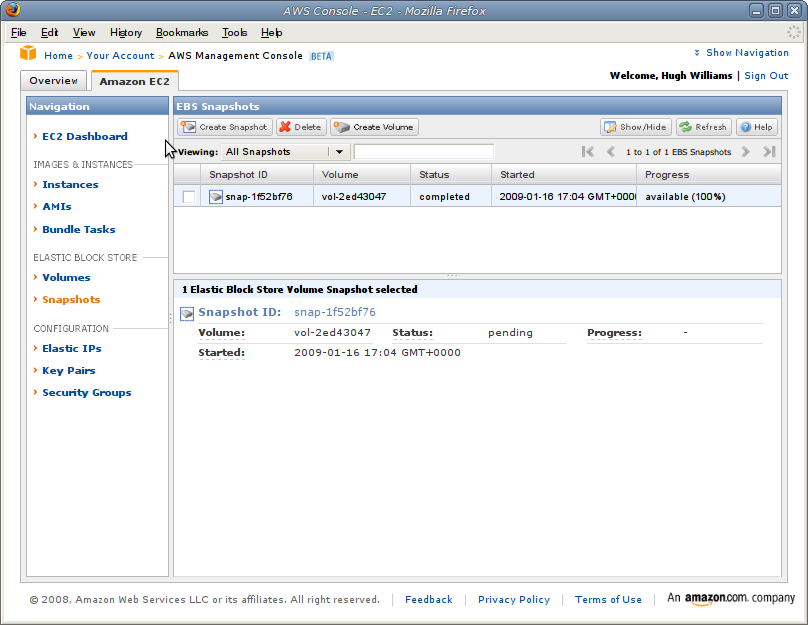
- After a short delay, the Volumes view will show the snapshot completed:
- If required, the snapshot permissions can be changed from the default of private to public by right clicking on the snapshot and selecting the public radio button option, enabling it to then be accessed by the public.
- You restore a snapshot by using it as a source from which to create a new volume:
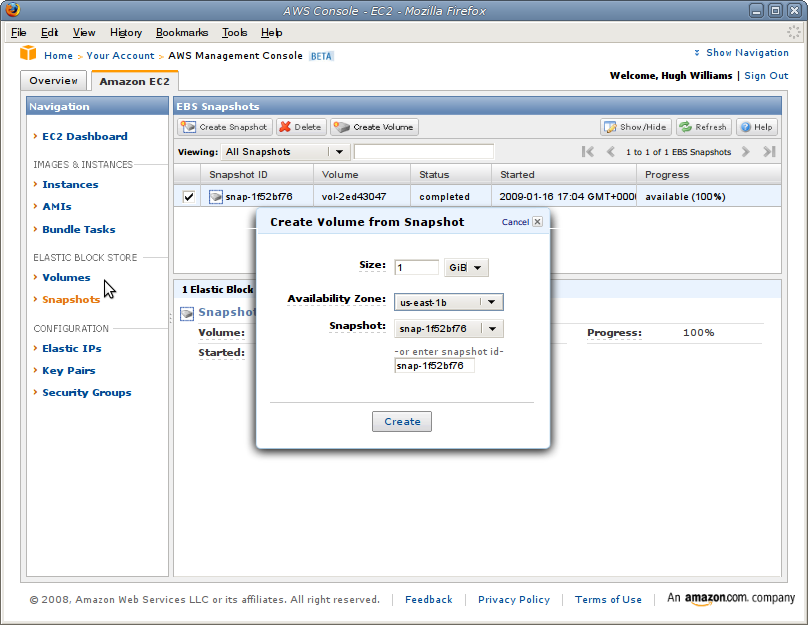
- Continue attaching it to an existing AMI instance as previously: