Virtuoso EC2 Extension User Interface
The Virtuoso EC2 Extension User Interface can be used for backing up and restoring a Virtuoso Database to or from an Amazon S3 bucket.
Prerequisites
The following must be done before you proceed, as all are necessary for accessing your Amazon S3 bucket.
- Obtain an Amazon Web Services (AWS) account.
- Sign up for Amazon S3 and EC2 Web Service.
- Obtain your AWS Access Identifiers, Access Key ID, and Secret Access Key.
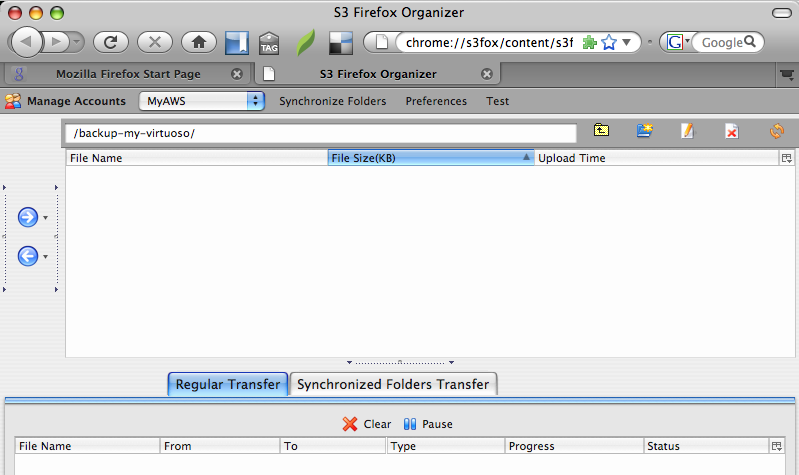
- Download and install the Firefox Amazon S3 Organiser.
Note: If not using a pre-configured Virtuoso EC2 AMI
The ec2ext VAD was originally written for use with the Virtuoso pre-packaged and pre-configured EC2 AMIs, and thus makes certain assumptions about the configuration. To make this work with an open source or commercial Virtuoso installation on a different AMI, please ensure the following has been done:
- A "
virtuoso" symlink to the Virtuoso binary executable (virtuoso-torvirtuoso-iodbc-t) must exist in the directory the database is run/started from. - The entries "
SafeExecutables=0 DbaExecutables=/bin/tar,/bin/sh Parameters" section of the Virtuoso Configuration file (virtuoso.ini).
...
[Parameters]
...
SafeExecutables=0
DbaExecutables=/bin/tar,/bin/sh
...
- Open Source users must manually restart the Virtuoso server after a restore, as the "
restart.sh" script is only included with the commercial installers. - On Windows, cygwin or similar must be installed, such that the required "
sh" shell is available.
Backup and Restore Procedure
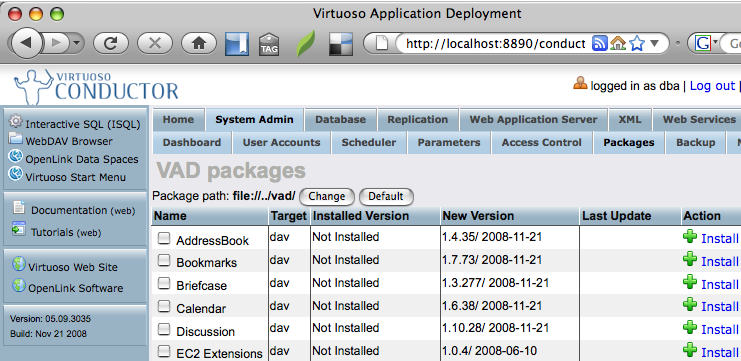
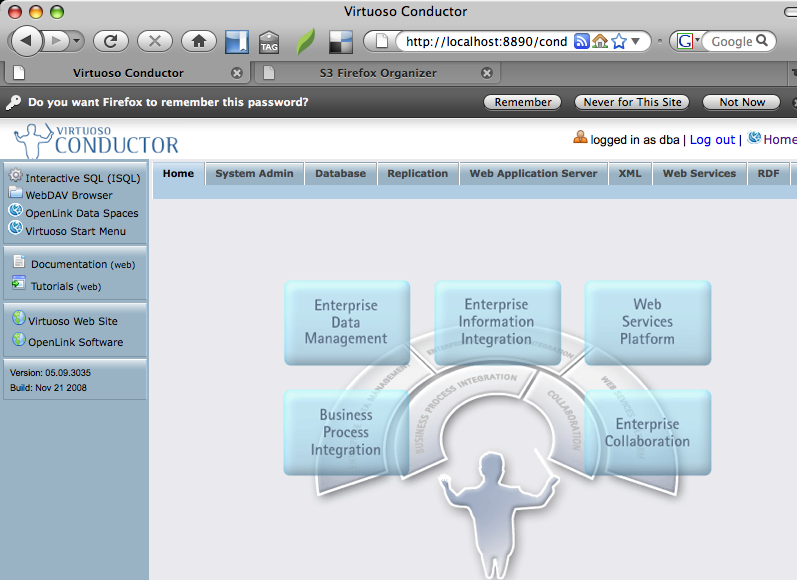
- Select the EC2 Extension VAD from the "System Admin" -> "Packages" Tab of the Virtuoso Conductor and Click the "Install" button.
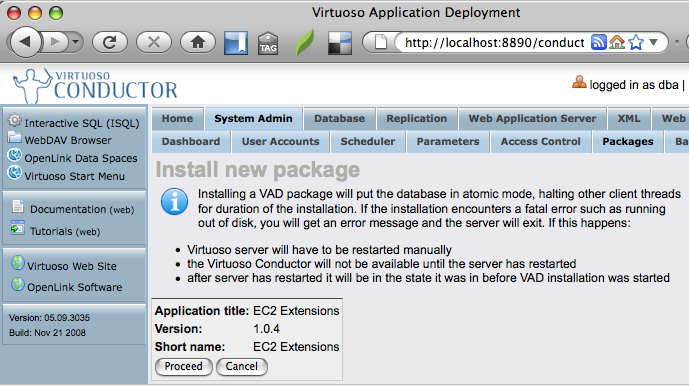
- Click the "proceed" button to begin the installation
- Select "System Admin" -> "Backup" Tab of the Virtuoso Conductor, set the "Backup File Prefix" to the name each backup file name should be prefixed with and click the "Run Full Backup" button to create an initial backup set.
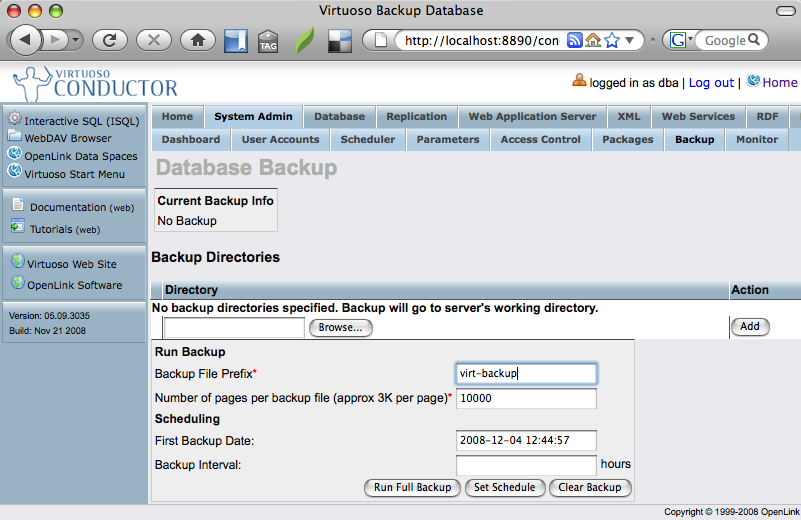
- Once complete a full backup of the Database will exist, after which an "incremental backup" can be performed to create additional backup segments (scheduled or manual) as the database changes.
- Create an Amazon S3 bucket for storing your online backup.
- Go to the URL
http://your-ec2-instance-cname/ec2extsto load the Virtuoso Extensions for Amazon EC2 Images login page and log in as the "dba" user.

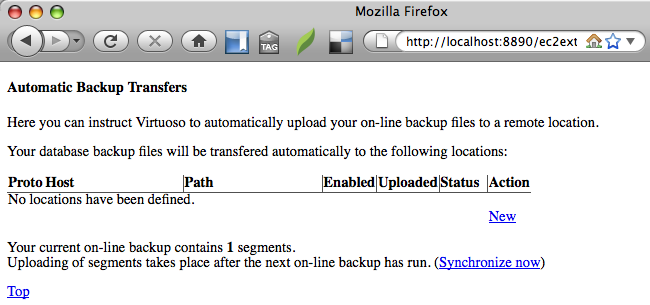
- Select the "Automatic Backup Transfer" link to start the backup.

- Select the "New" link to create a new S3 backup location.
- Enter the aws access key id, aws secret access key and S3 bucket name where the backups are to be placed and click the "Save" button.
Note backup and restore operations can be performed using the S3, WebDAV / HTTP or FTP protocols which are selectable from the Protocol drop-down list.
Note also that the AWS access key id and AWS secret access key are the actual Access Identifiers associated with your AWS account and not the email/password combination used to login to your AWS account.
A link to the Access identifiers is available when logged in to your AWS account.

- Click on the "Synchronize now" link to commence the backup to the S3 bucket.
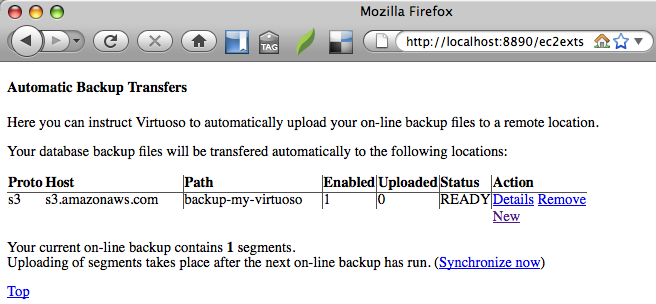
- The "Status" column changes from "READY" to "RUNNING" will the backup is in progress

- Once complete the "Uploaded" column will indicate "1" backup file has been uploaded.

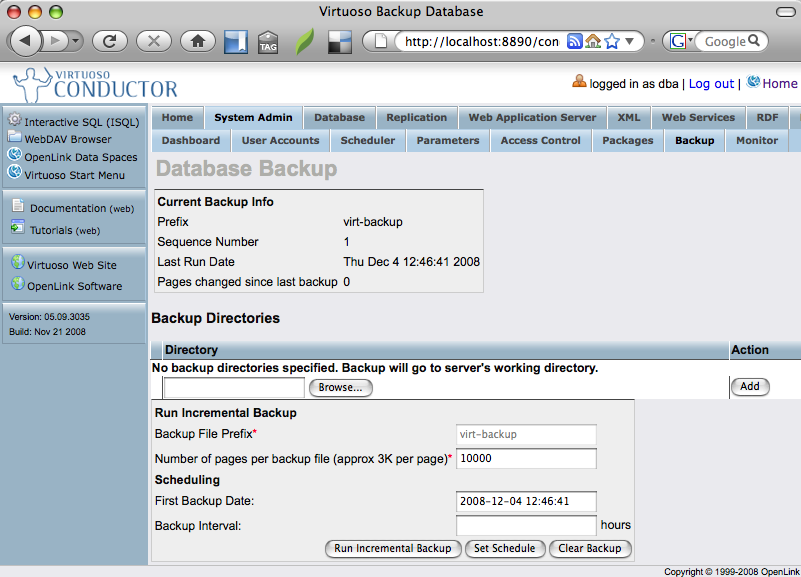
- Subsequent incremental backups can be made from the "System Admin" -> "Backup" Tab of the Virtuoso Conductor by clicking on the "Run Incremental Backup" button.

- Going back to the "Automatic Backup Transfer" link of the Virtuoso Extensions for Amazon EC2 UI (
http://your-ec2-instance-cname/ec2exts) click on the "Synchronize now" button to upload the new backup segment.
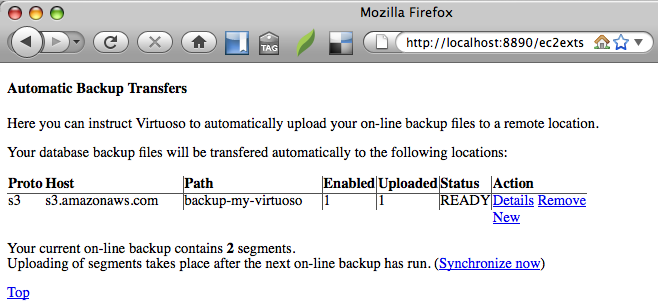
- Once complete there will then be 2 online backup segments uploaded.

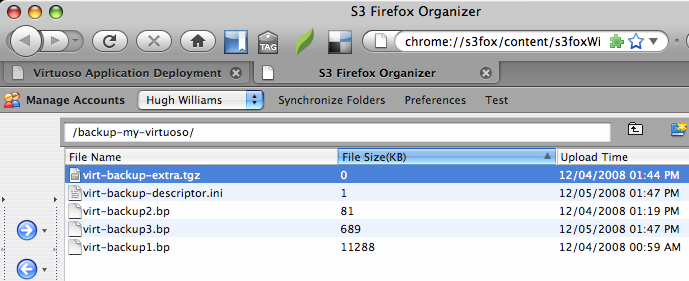
- Checking the S3 bucket created using the Firefox S3 Organiser will display the online backup files uploaded.
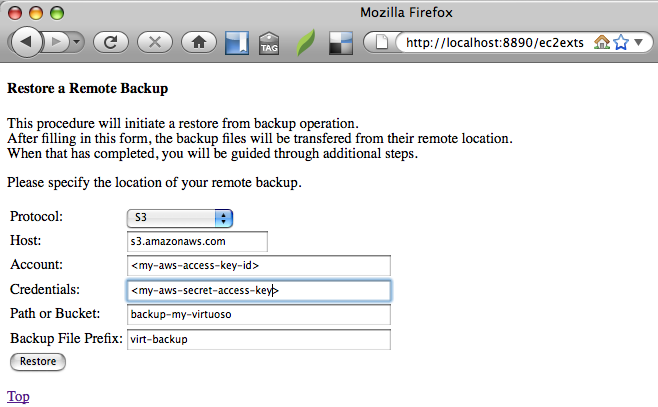
Note: Setting the incremental backup in the Conductor to be performed as a "scheduled" backup, will result in the backup set being automatically uploaded to S3. - To Restore an EC2 S3 online backup go back to the Virtuoso Extensions for Amazon EC2 (
http://your-ec2-instance-cname/ec2exts), login and click on the "Restore a Remote Backup" link.

- Enter the AWS access key, secret key and S3 bucket name and Backup File Prefix name of the online backup to be restore and click on the "Restore" button to commence the process.
Note: backup and restore operations can be performed using the S3, WebDAV / HTTP or FTP protocols which are selectable from the Protocol drop-down list.
- The backup files available from the S3 storage location will be downloaded, click on the "Continue" button to re-assemble the database from the backups.
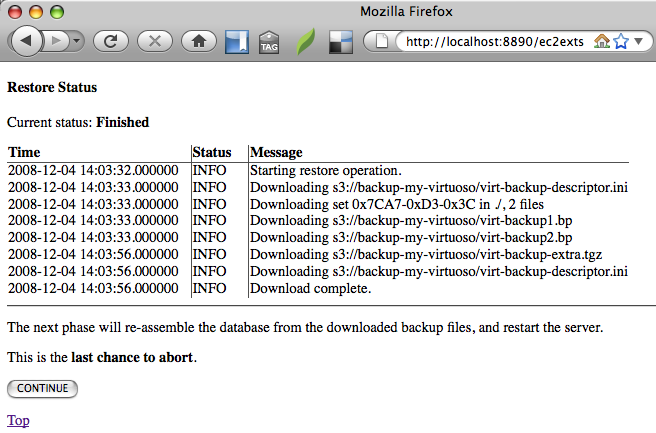
- Once complete the server will be restarted with the restored database.
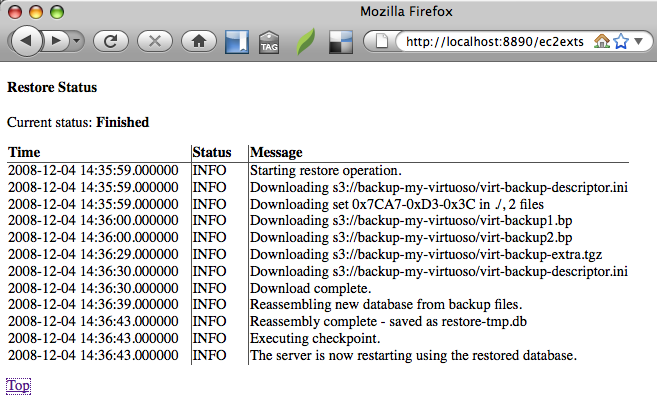
- The Virtuoso Conductor will then be accessible again.
- Output similar to the following will typically be written to the Virtuoso Server log, detailing the backup and restore processes.
12:46:41 Checkpoint made, log reused
12:46:41 Starting online backup from page 1 to 8875
13:00:04 PL LOG: S3 upload /backup-my-virtuoso/virt-backup1.bp
13:04:06 PL LOG: S3 upload /backup-my-virtuoso/virt-backup-descriptor.ini
13:08:23 Checkpoint made, log reused
13:08:23 Checkpoint made, log reused
13:08:23 Starting online backup from page 1 to 8875
13:20:01 PL LOG: S3 upload /backup-my-virtuoso/virt-backup2.bp
13:20:05 PL LOG: S3 upload /backup-my-virtuoso/virt-backup-descriptor.ini
14:03:33 PL LOG: Starting restore operation.
14:03:33 PL LOG: Downloading s3://backup-my-virtuoso/virt-backup-descriptor.ini
14:03:33 PL LOG: Downloading set 0x7CA7-0xD3-0x3C in ./, 2 files
14:03:33 PL LOG: Downloading s3://backup-my-virtuoso/virt-backup1.bp
14:03:56 PL LOG: Downloading s3://backup-my-virtuoso/virt-backup2.bp
14:03:56 PL LOG: Downloading s3://backup-my-virtuoso/virt-backup-extra.tgz
14:03:56 PL LOG: Downloading s3://backup-my-virtuoso/virt-backup-descriptor.ini
14:03:57 PL LOG: Download complete.
14:35:59 PL LOG: Starting restore operation.
14:35:59 PL LOG: Downloading s3://backup-my-virtuoso/virt-backup-descriptor.ini
14:36:00 PL LOG: Downloading set 0x7CA7-0xD3-0x3C in ./, 2 files
14:36:00 PL LOG: Downloading s3://backup-my-virtuoso/virt-backup1.bp
14:36:29 PL LOG: Downloading s3://backup-my-virtuoso/virt-backup2.bp
14:36:30 PL LOG: Downloading s3://backup-my-virtuoso/virt-backup-extra.tgz
14:36:30 PL LOG: Downloading s3://backup-my-virtuoso/virt-backup-descriptor.ini
14:36:30 PL LOG: Download complete.
14:36:39 PL LOG: Reassembling new database from backup files.
14:36:43 PL LOG: Reassembly complete - saved as restore-tmp.db
14:36:43 Server received signal 20. Continuing with the default action for that signal.
14:36:43 PL LOG: Executing checkpoint.
14:36:43 Checkpoint made, log reused
14:36:43 PL LOG: The server is now restarting using the restored database.
14:36:48 Checkpoint made, log reused
14:36:48 Server shutdown complete