Deploying the Virtuoso Pay As You Go (PAGO) EBS-backed EC2 AMI
Introduction
In addition to the Instance-backed EC2 AMI that has been in existence since 2008, Virtuoso is now also available as an EBS-backed EC2 AMI based on your choice of License Model --
- Bring You Own License, or BYOL
- Pay As You Go, or PAGO (documented here)
With either License Model, you will be starting with a preconfigured Virtuoso instance. The fundamental benefits provided by this type of AMI include:
- Virtuoso DBMS Server is preinstalled with basic tuning for the host operating system.
- You can start and stop this Virtuoso instance without having to terminate its host AMI.
- With the hourly model, you pay only for the time the AMI is used.
Prerequisites
- An Amazon Web Services (AWS) account.
- Recently created AWS accounts will have been automatically signed up for the Amazon S3 and EC2 Web Service. If you created your AWS account a long time ago, you may now need to manually sign up for these services.
- Ensure an AWS security group allowing access to ports 22 (SSH) and 80 (HTTP) is used.
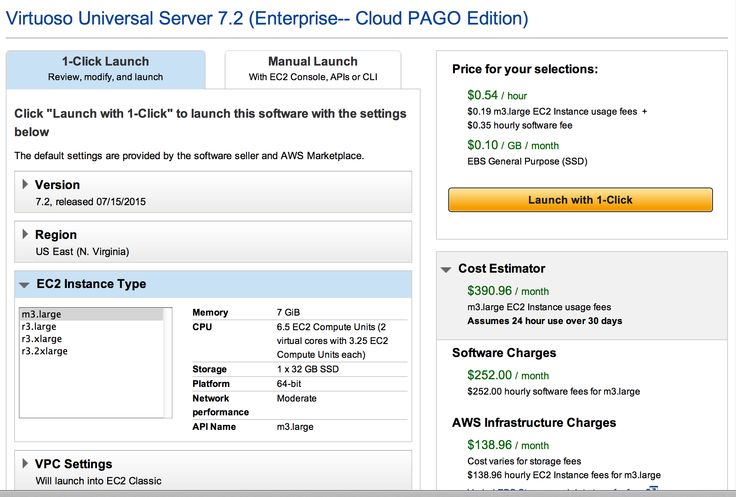
Instantiating & Using Virtuoso 7.2 PAGO Enterprise Edition via Web Interface
- Use one-click or aws-console (at
https://console.aws.amazon.com/) launch options to start the Virtuoso Universal Server 7.2 (Enterprise-- Cloud PAGO Edition)
First-time Setup & Usage Notes
These steps are only necessary immediately after instantiating the AMI, when you start the Virtuoso Database for the first time. This section may subsequently be ignored, as it is not necessary after AMI reboots.
-
sshinto your instantiated AMI using a command of the form:
ssh -i {secure-pem-file} ec2-user@{amazon-ec2-dns-name-or-ip-address}
- Start the Virtuoso DBMS Server by issuing the following command:
sudo /etc/rc.d/init.d/virtuoso restart
- Retrieve the AMI
instance-idfrom the AMI properties presented by the Amazon AWS console UI, or by executing the following command in the Linux shell:
curl http://169.254.169.254/latest/meta-data/instance-id
- Install the Virtuoso Conductor VAD application package by running the following commands:
$ /opt/virtuoso/virtuoso-environment.sh
$ isql 1111 -U dba -P instance-id
Connected to OpenLink Virtuoso
Driver: 07.10.3214 OpenLink Virtuoso ODBC Driver
OpenLink Interactive SQL (Virtuoso), version 0.9849b.
Type HELP; for help and EXIT; to exit.
SQL>  vad_install('/opt/virtuoso/vad/conductor_dav.vad',0);
SQL_STATE     SQL_MESSAGE
LONG VARCHAR  VARCHAR
_______________________________________________________________________________

00000         No errors detected
00000         Installation of "Virtuoso Conductor" is complete.
00000         Now making a final checkpoint.
00000         Final checkpoint is made.
00000         SUCCESS
BLOB 0 chars

6 Rows. -- 5773 msec.
SQL>
- Go to
http://{amazon-ec2-ami-dns-name-or-ip-address}/conductor-- to change the default password of this instance. - At the authentication challenge, log in as the
dbauser, with the AMIinstance-idas the password. - Change the password for the
dbauser.
Administering Virtuoso Instance via SSH
All scripts for starting and stopping the Virtuoso instance are found in the following locations --
-
/etc/rc.d/init.d-- scripts that enable automatic database server instantiation at operating system (AMI) boot or reboot time -
/opt/virtuoso-- scripts for starting and stopping the database server within a running operating system (AMI)
OpenLink License Manager
- Start the License Manager:
/etc/rc.d/init.d/oplmgr start
- Stop the License Manager
/etc/rc.d/init.d/oplmgr stop
- Restart the License Manager
/etc/rc.d/init.d/oplmgr restart
Virtuoso Server
- Start the Virtuoso Server:
/etc/rc.d/init.d/virtuoso start
- Stop the Virtuoso Server:
/etc/rc.d/init.d/virtuoso stop
- Restart the Virtuoso Server:
/etc/rc.d/init.d/virtuoso restart
Virtuoso Database Instance Interaction
- Set the Virtuoso environment variables by running the following command (note that it must start dot-space-slash):
. /opt/virtuoso/virtuoso-environment.sh
- Run the Virtuoso "
isql" command line tool to connect to the database. Note: your EC2 AMI's instance-id will be thedbauser's password, until you change it.
$ isql 1111 -U dba -P i-123abc321
Connected to OpenLink Virtuoso
Driver: 07.10.3214 OpenLink Virtuoso ODBC Driver
OpenLink Interactive SQL (Virtuoso), version 0.9849b.
Type HELP; for help and EXIT; to exit.
SQL>
- Run the "
tables" command to obtain a list of tables in the default schema
SQL> tables;
Showing SQLTables of tables like 'NULL.NULL.NULL', tabletype/colname like 'NULL'
TABLE_QUALIFIER  TABLE_OWNER      TABLE_NAME       TABLE_TYPE       REMARKS
VARCHAR          VARCHAR          VARCHAR          VARCHAR          VARCHAR
_______________________________________________________________________________

DB               DBA              ADMIN_SESSION    SYSTEM TABLE     NULL
DB               DBA              ADM_OPT_ARRAY_TO_RS_PVIEW  SYSTEM TABLE     NULL
DB               DBA              ADM_XML_VIEWS    SYSTEM TABLE     NULL
.
.
.
DB               DBA              SYS_SQL_INVERSE  SYSTEM TABLE     NULL
DB               DBA              SYS_TRIGGERS     SYSTEM TABLE     NULL
DB               DBA              SYS_VIEWS        SYSTEM TABLE     NULL

209 Rows. -- 1890 msec.
SQL>
- You can stop the Virtuoso Database Server by running:
virtuoso-stop.sh
- You can restart the Virtuoso Database Server by running:
virtuoso-start.sh
Performance Notes
In regards to performance, please be aware of the following:
- We currently bundle a 10 Database Sessions and 4 CPU Affinity license with this AMI -- Database & CPU Affinity upgrade licenses are available as upgrade options.
- There are a range of AMIs choices covering system memory and CPU combination.
Collectively, the factors above affect the performance of your DBpedia instance.
Thus, use EC2 Instance Types with more memory and CPU cores for best performance.
m3.large EC2 Instance Type.
If a larger EC2 Instance Type is chosen, the NumberOfBuffer and MaxDirtyBuffers parameters in the /opt/virtuoso/dbpedia/dbpedia.ini configuration file should be increased to the available memory, as detailed in the Virtuoso Performance Tuning Guide --
| EC2 Instance Type | System RAM | Number Of Buffers | Max Dirty Buffers |
|---|---|---|---|
m3.large |
7 GB | 680000 | 500000 |
r3.large |
15 GB | 1360000 | 1000000 |
r3.xlarge |
30.5 GB | 2720000 | 2000000 |
r3.2xlarge |
61 GB | 5450000 | 4000000 |
-- and the Virtuoso server restarted as detailed above.
Troubleshooting
If you are unable to start your Virtuoso instance as described in the installation and usage steps above, please execute the following commands to get your instance running:
-
cd /opt/virtuoso -
. ./*ent*.sh(note that this command starts dot-space-dot-slash) -
cd /opt/virtuoso/database -
virtuoso -c virtuoso -f
If that successfully starts the instance, you can try an AMI reboot or various other commands, such as:
-
/etc/init.d/virtuoso restart -
/etc/init.d/virtuoso start
Sometimes the output and virtuoso.log will show an error like --
The transaction log file has been produced by different
server instance.
A transaction log file (e.g., virtuoso.trx) is associated with a specific configuration file (e.g., virtuoso.ini) and a specific database file (e.g., virtuoso.db).
This association is not tied to filenames, but on the content of these files.
You cannot run a transaction log file that was produced with one database file, against a different database file.
When launching a new Virtuoso AMI for the first time, there should be a pre-existing, pre-configured /opt/virtuoso/database/virtuoso.ini present before AMI launch, which should trigger creation of a new virtuoso.db.
There should be no virtuoso.trx until after user interaction with the AMI and the running Virtuoso instance.
However, sometimes production errors leave a virtuoso.trx file in place on the image used to start your AMI, which result in the above error.
You will then find several files in /opt/virtuoso/database/, including some or all of these --
php.ini               virtuoso.lck
virtuoso-temp.db      virtuoso.log
virtuoso.db           virtuoso.pxa
virtuoso.ini          virtuoso.trx
Recovery from this state requires removal of all of these except the virtuoso.ini and php.ini.
After removing all the other files, reboot the AMI, and your experience should be as documented and intended.
If you encounter this situation, please be sure to notify us, so we can publish an updated AMI.
Related Items
- OpenLink Data Spaces Installation
- EC2 & AMI related information
- Virtuoso DBpedia 2015 Pay As You Go (PAGO) EBS-backed EC2 AMI
- Instance-backed Virtuoso EC2 AMI
- Pre-configured & Pre-loaded Virtuoso instances (DBpedia, BBC Music & Programmes etc.)
- Creating Your Own Neurocommons Instance
- Creating Your Own Bio2RDF Instance
- Creating Your Own MusicBrainz Instance
- Backup Your Virtuoso EC2 AMI to S3
- Configure your Virtuoso EC2 AMI for use with Amazon Elastic Block Storage (EBS)
- Amazon-provided AWS Simple Monthly Cost Calculator
- Protecting your Virtuoso-hosted SPARQL Endpoint
- Virtuoso documentation
- Virtuoso Tips and Tricks
CategoryHowTo CategoryODS CategoryVirtuoso CategoryDocumentation CategoryEC2