DBpedia Live (Virtuoso PAGO) EBS-backed EC2 AMI
Introduction
In addition to the Instance-backed EC2 AMI that has been available since 2008, a standard unpopulated Virtuoso instance is available as an EBS-backed EC2 AMI based on either a BYOL (Bring Your Own License) or a PAGO (Pay As You Go) basis. In each case, the AMI delivers a preconfigured Virtuoso instance.
We also now offer two PAGO variants, each pre-loaded with a DBpedia dataset.
- The DBpedia Snapshot (Virtuoso PAGO) (documented on this page) starts as a static instance, preloaded with the DBpedia 2021-09 dataset, mirroring the public DBpedia instance found at OpenLink Virtuoso SPARQL Query Editor. You can make changes to this data, but it will not track changes made to Wikipedia nor DBpedia-Live.
- The DBpedia Live (Virtuoso PAGO) (documented on this page) starts as a static instance, preloaded with the DBpedia 2016-04 dataset, and includes an optional switch that enables data updates based on the Wikipedia firehose, effectively giving you a mirror of the public DBpedia-Live instance found at http://live.dbpedia.org/sparql.
This type of AMI provides several fundamental benefits including —
- Virtuoso DBMS Server is preinstalled with basic tuning for the host operating system. (That said, since we support many AMI machine types/sizes, you should still tune the configuration to suit the available RAM in your instance.)
- DBpedia Dataset is preloaded and preconfigured (and may be configurable to auto-update).
- You can start and stop the DBpedia instance without having to terminate its host AMI.
- With the hourly model, you pay only for the time the AMI is used.
Prerequisites
- An Amazon Web Services (AWS) account.
- Recently created AWS accounts will have been automatically signed up for the Amazon S3 and EC2 Web Service. If you created your AWS account a long time ago, you may now need to manually sign up for these services.
- Ensure an AWS
security groupallowing access to ports 22 (standard SSH), 80 (standard HTTP), and 8890 (Virtuoso HTTP-based Admin) is used. (This is the setup of the AMI offerings.)
Instantiating DBpedia Live (Virtuoso PAGO) via Web Interface
- Locate the DBpedia Snapshot (Virtuoso PAGO) image in AWS Marketplace and click the
Continue to Subscribebutton.
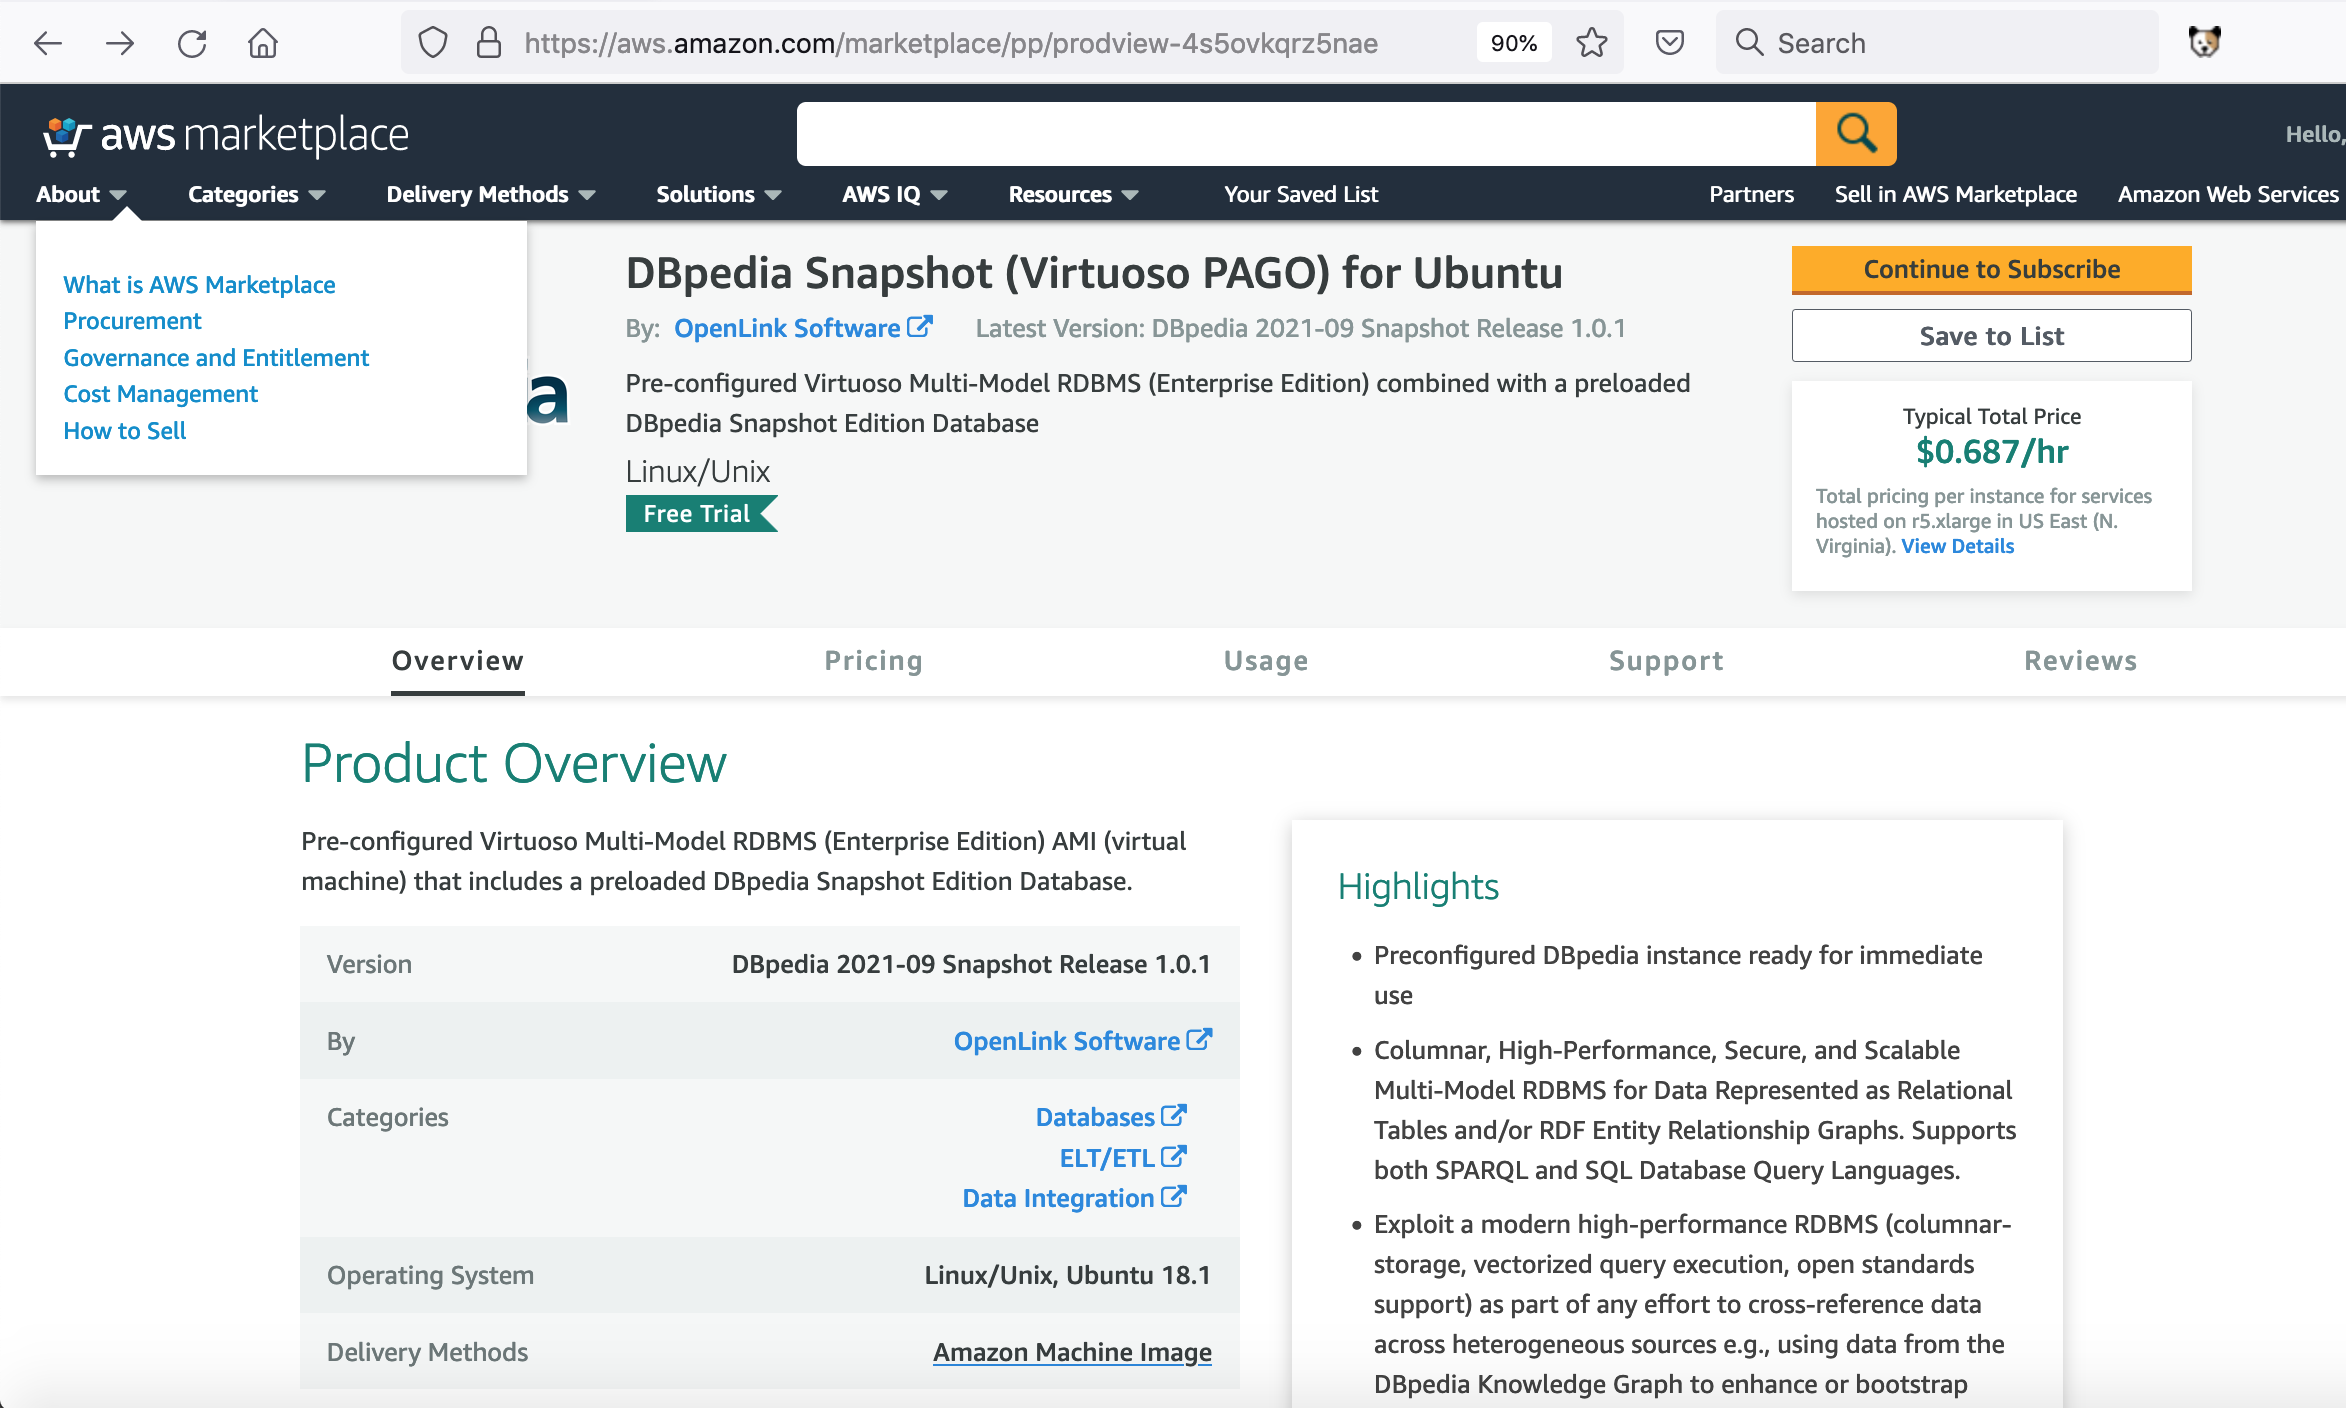
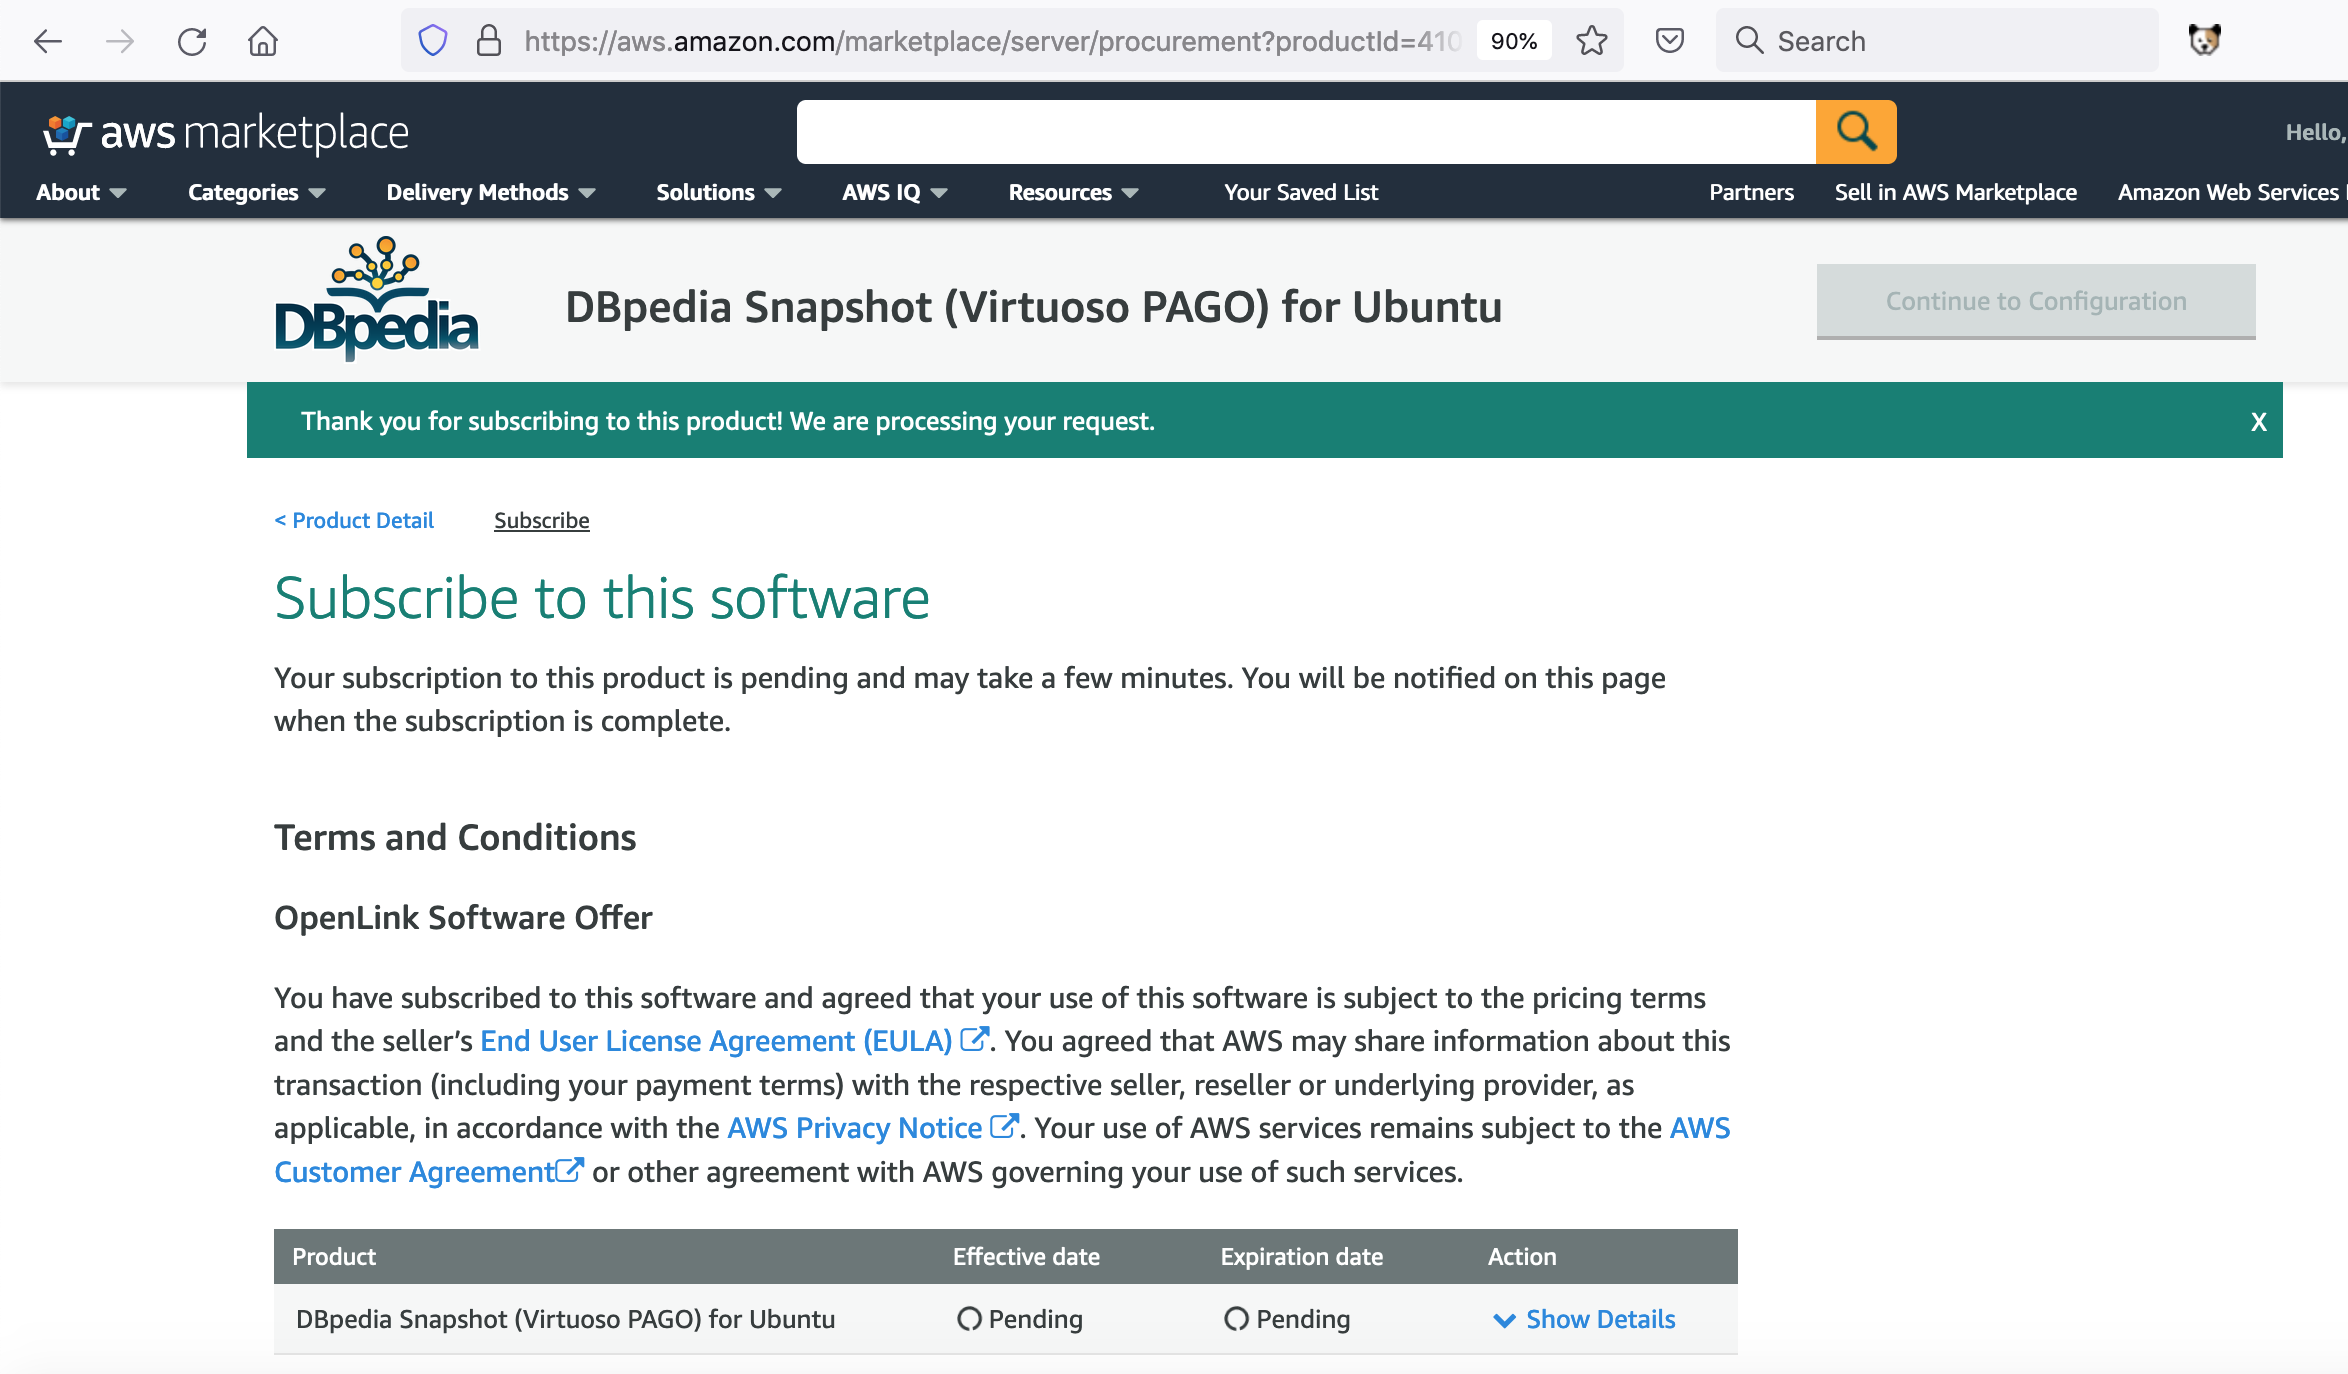
- Click on the
Accept Termsbutton.

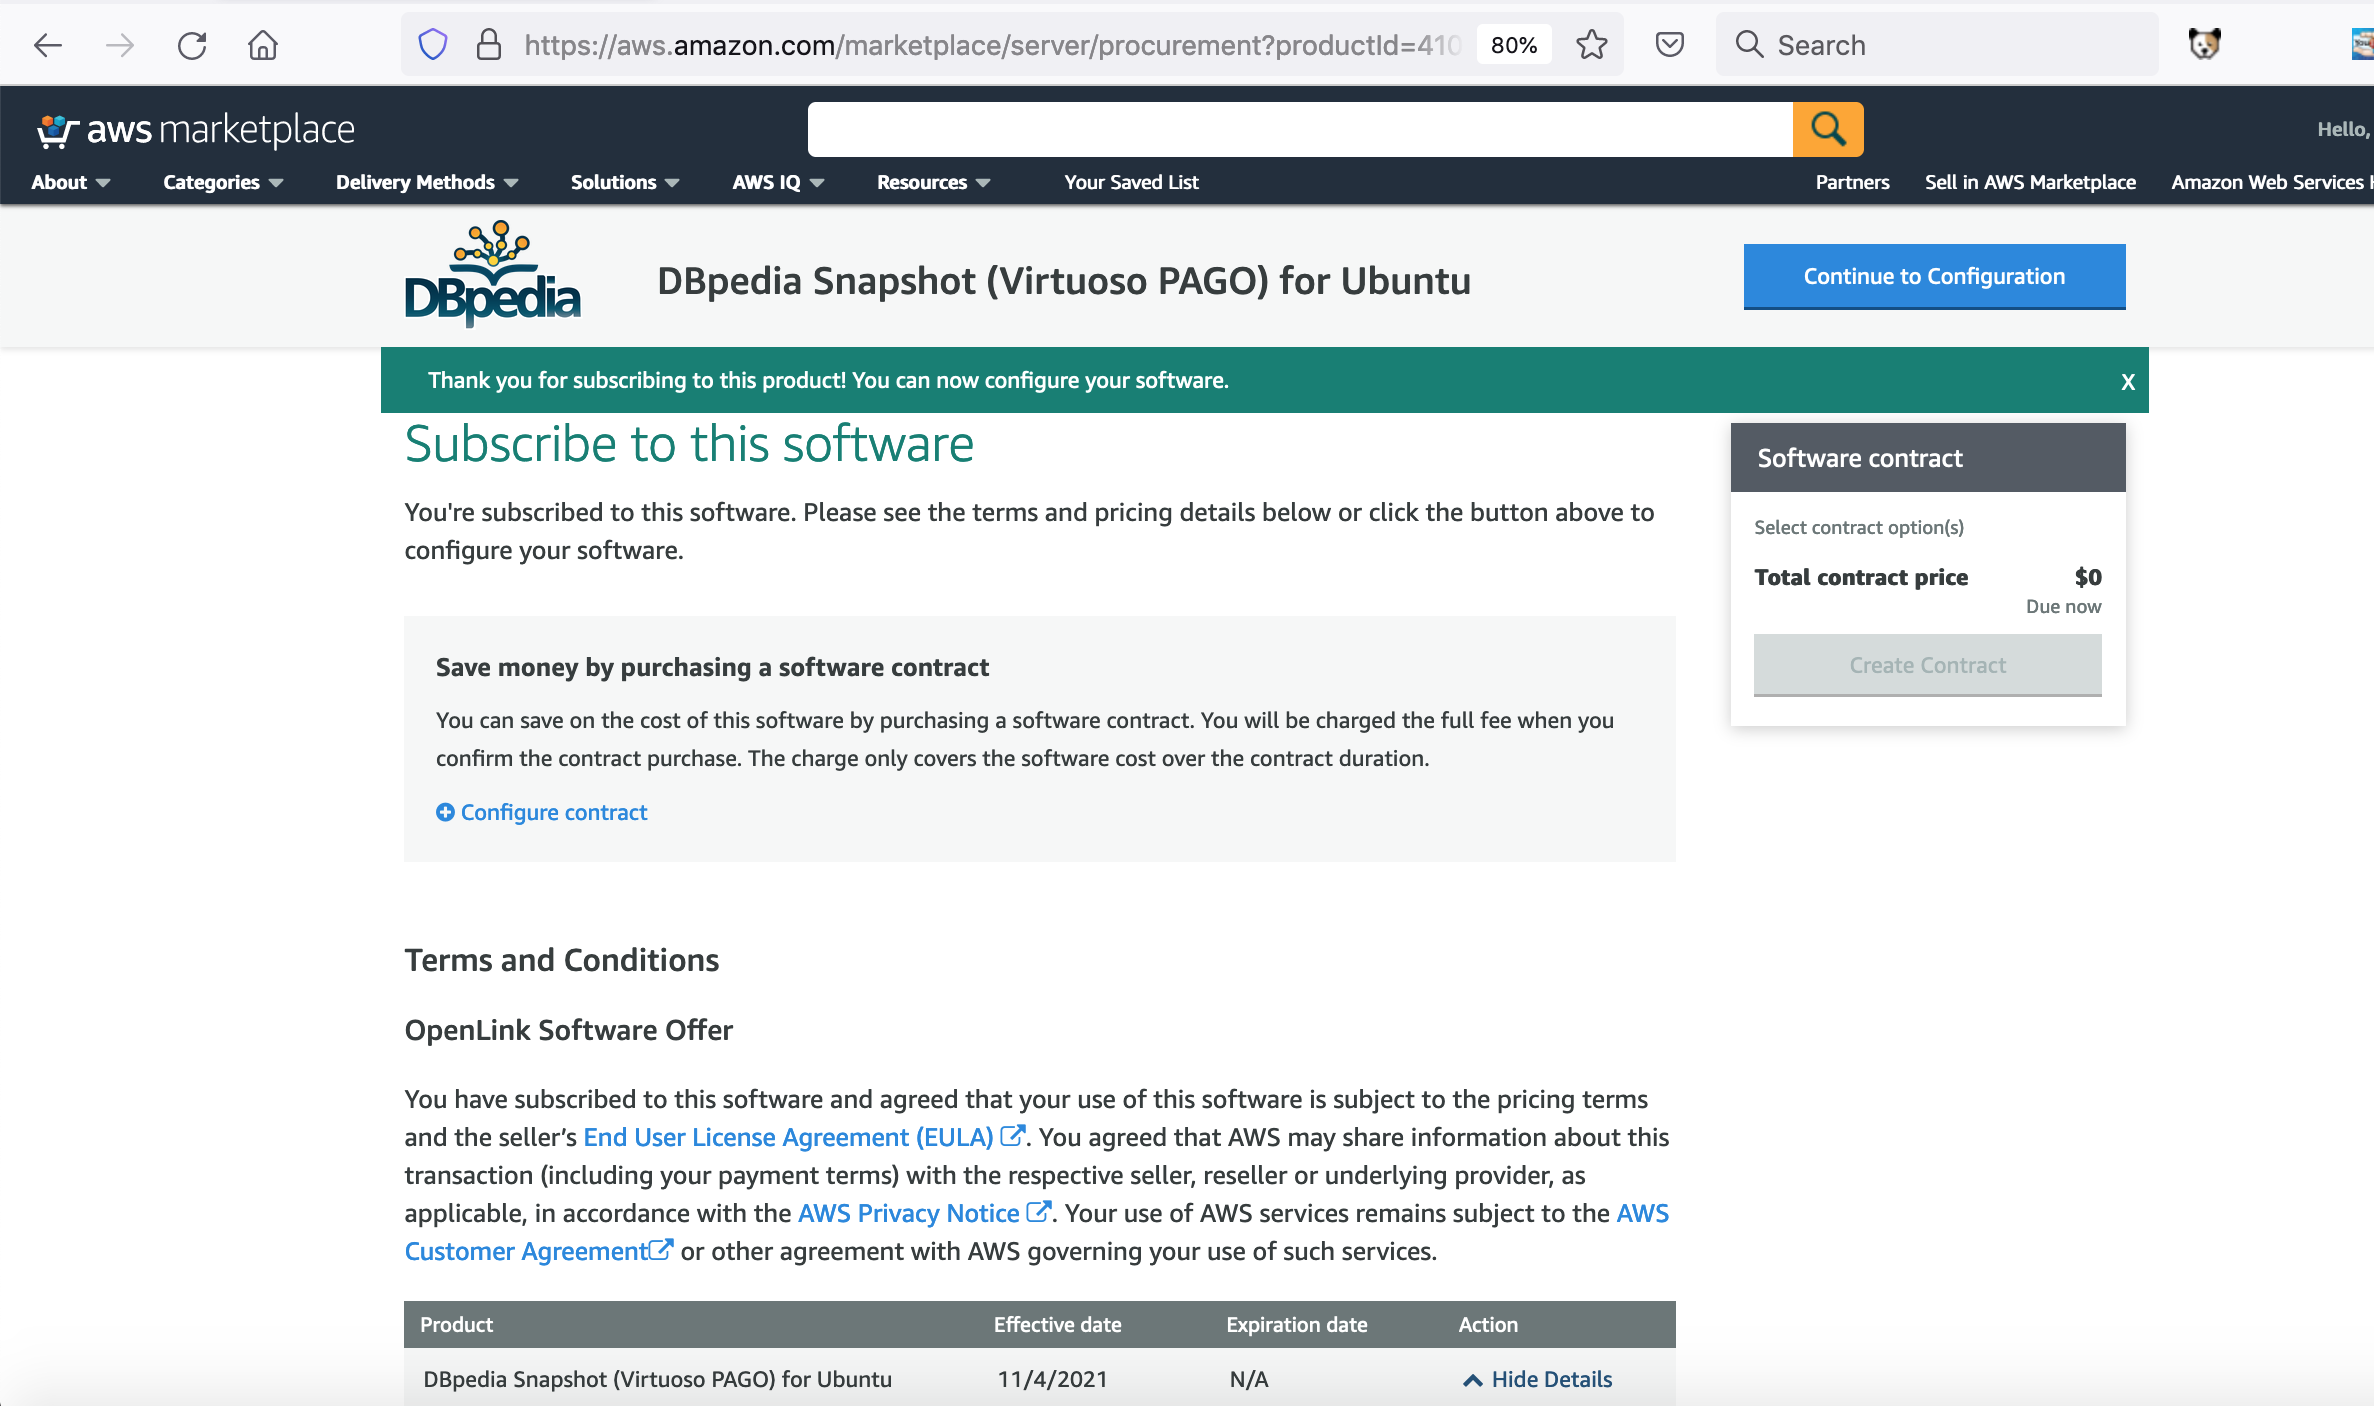
- Click on the
Continue to Configurationbutton.
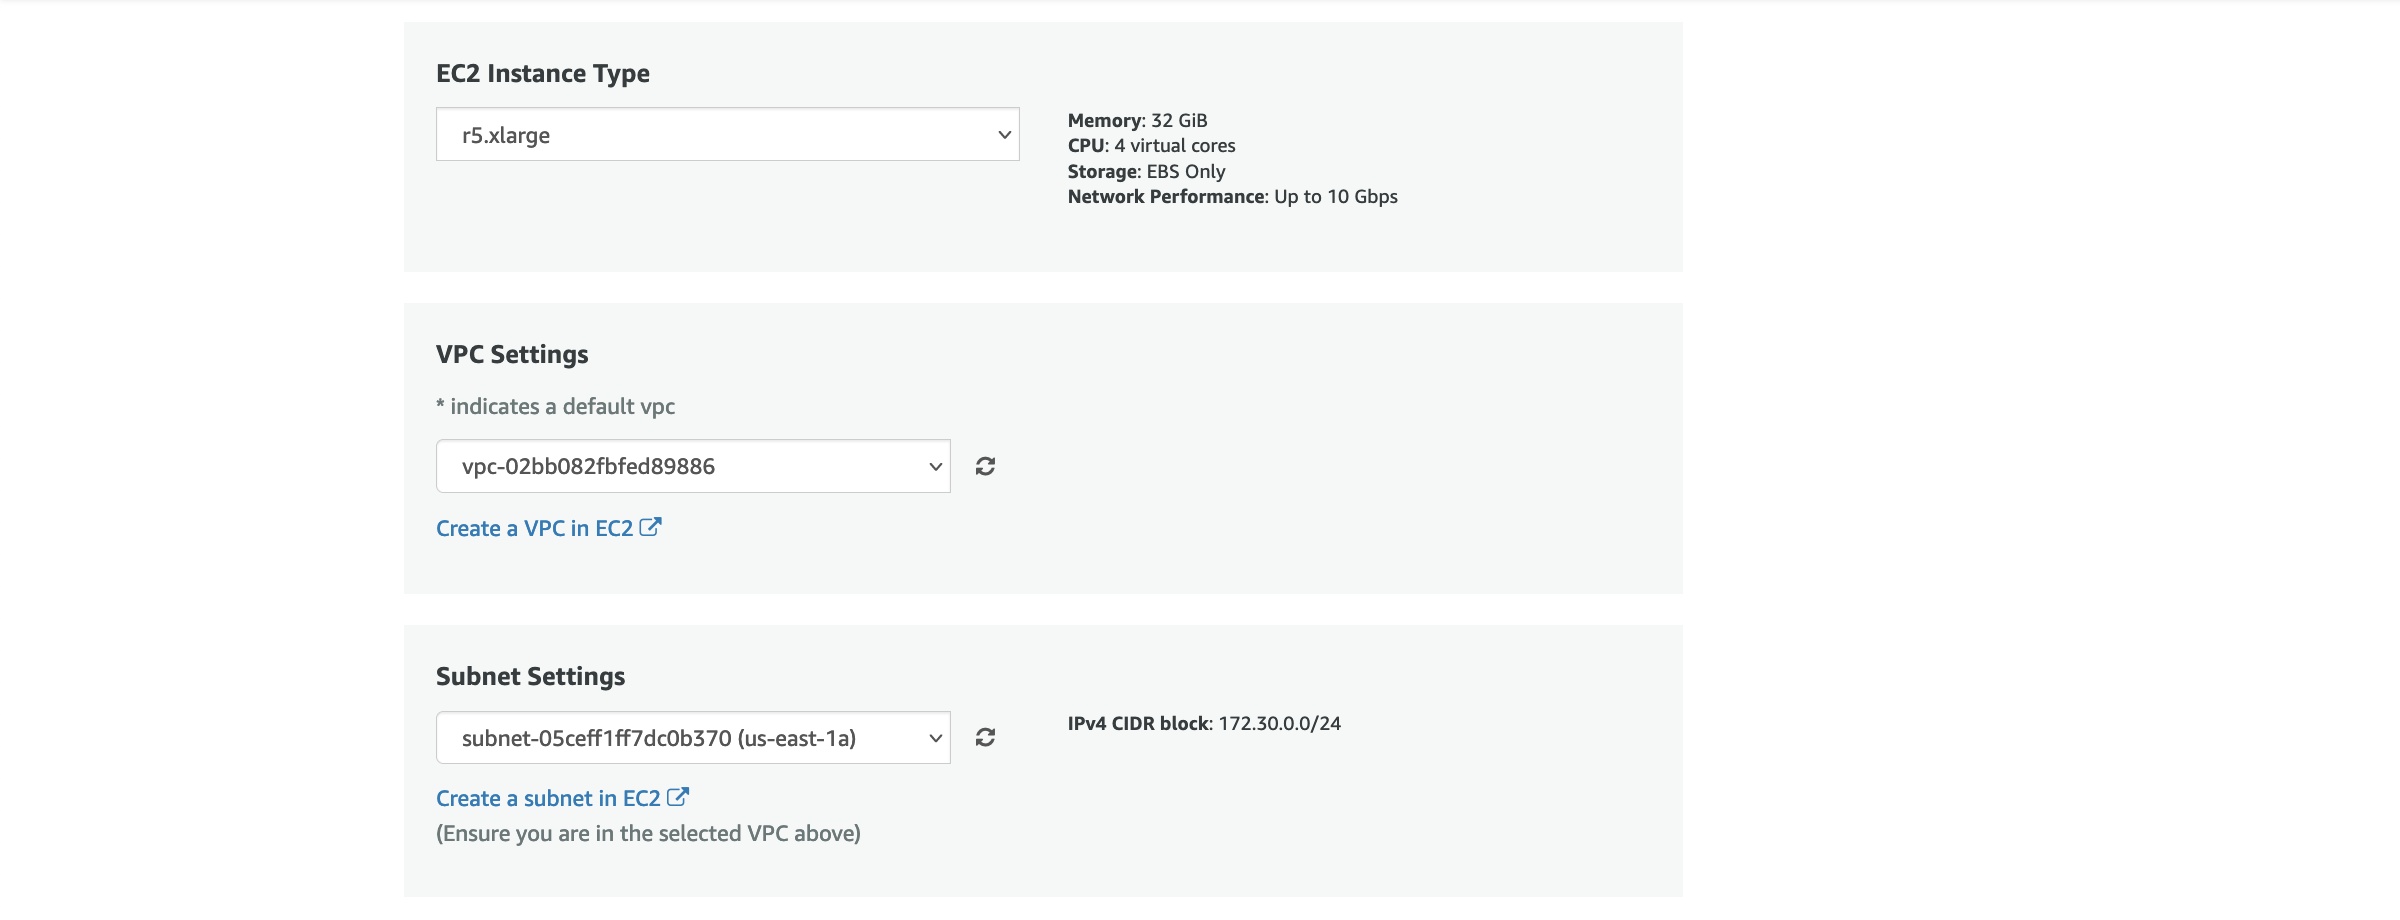
- Select the
Regionto where the AMI should be deployed and click on theContinue to Launchbutton.
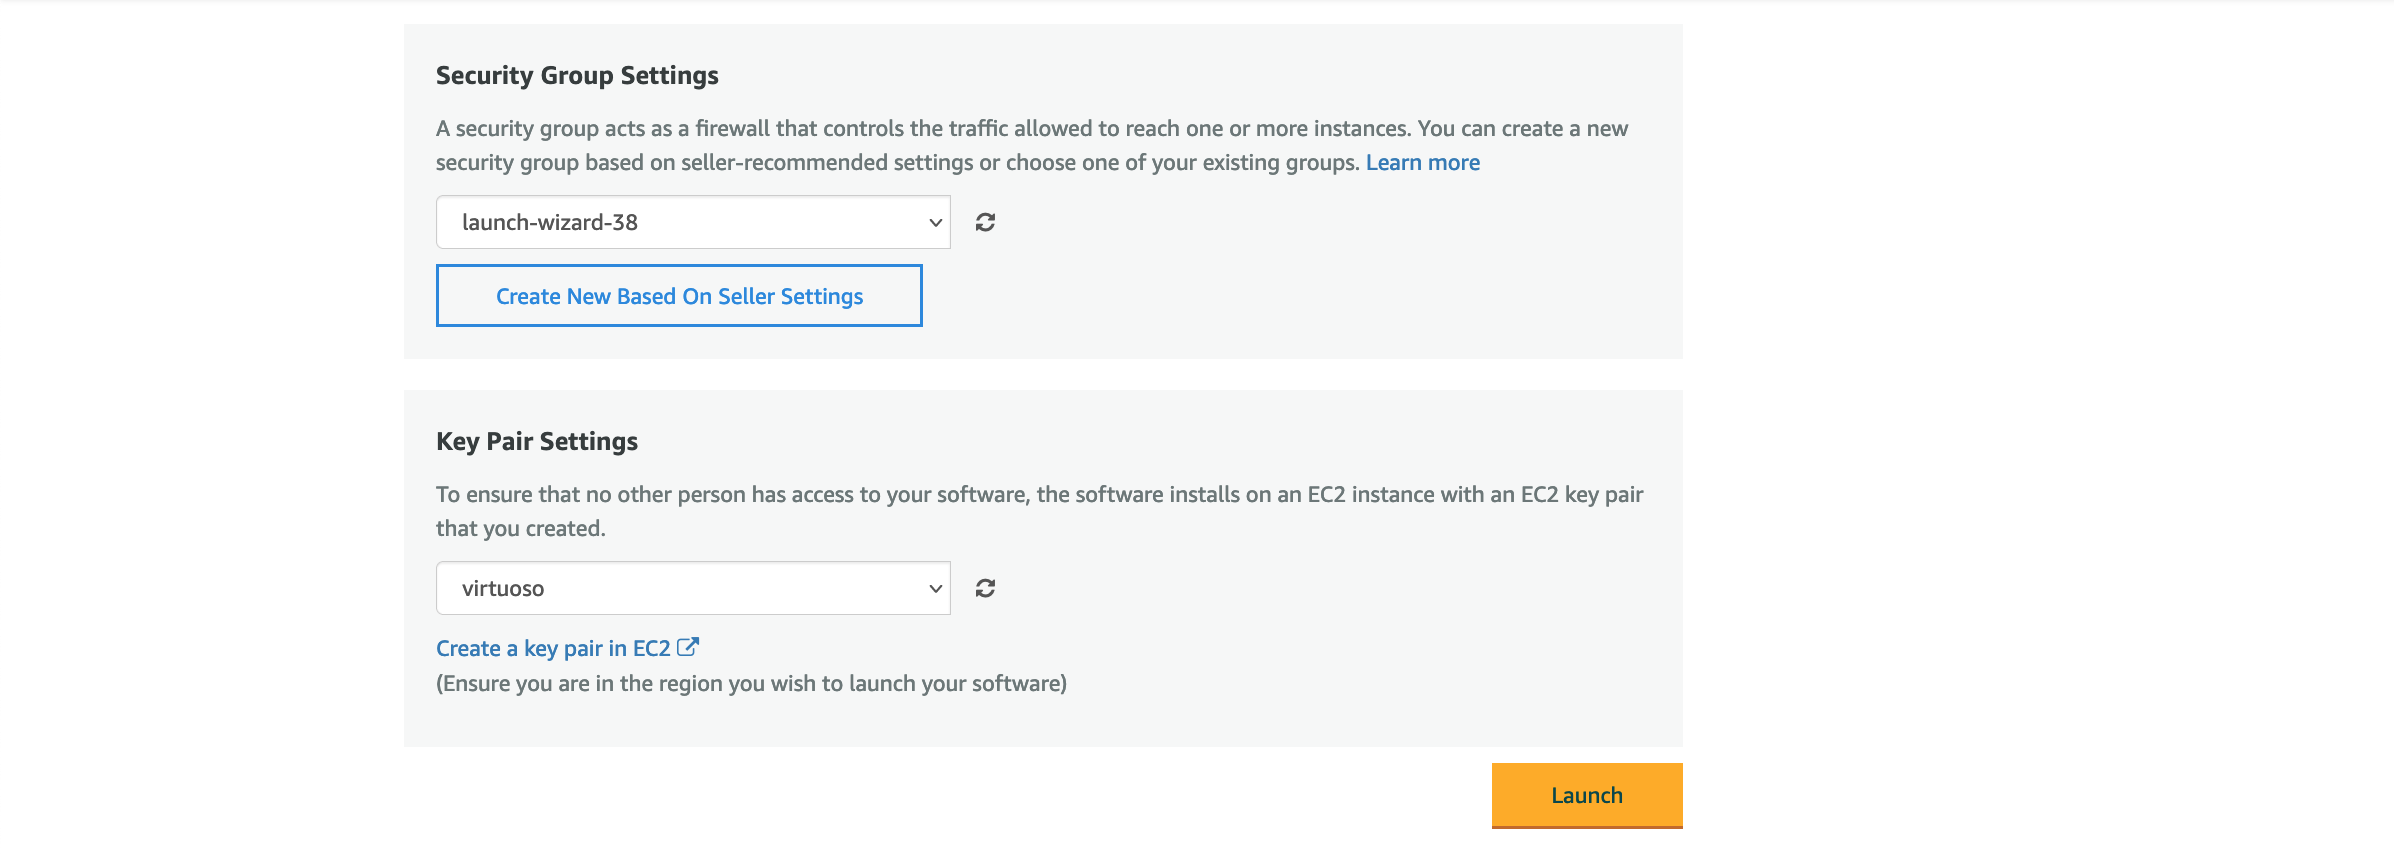
- Select the
EC2 Instance Type, Security Group Settings, Key Pair Settingsthe AMI should be started with and click on the Launch button.
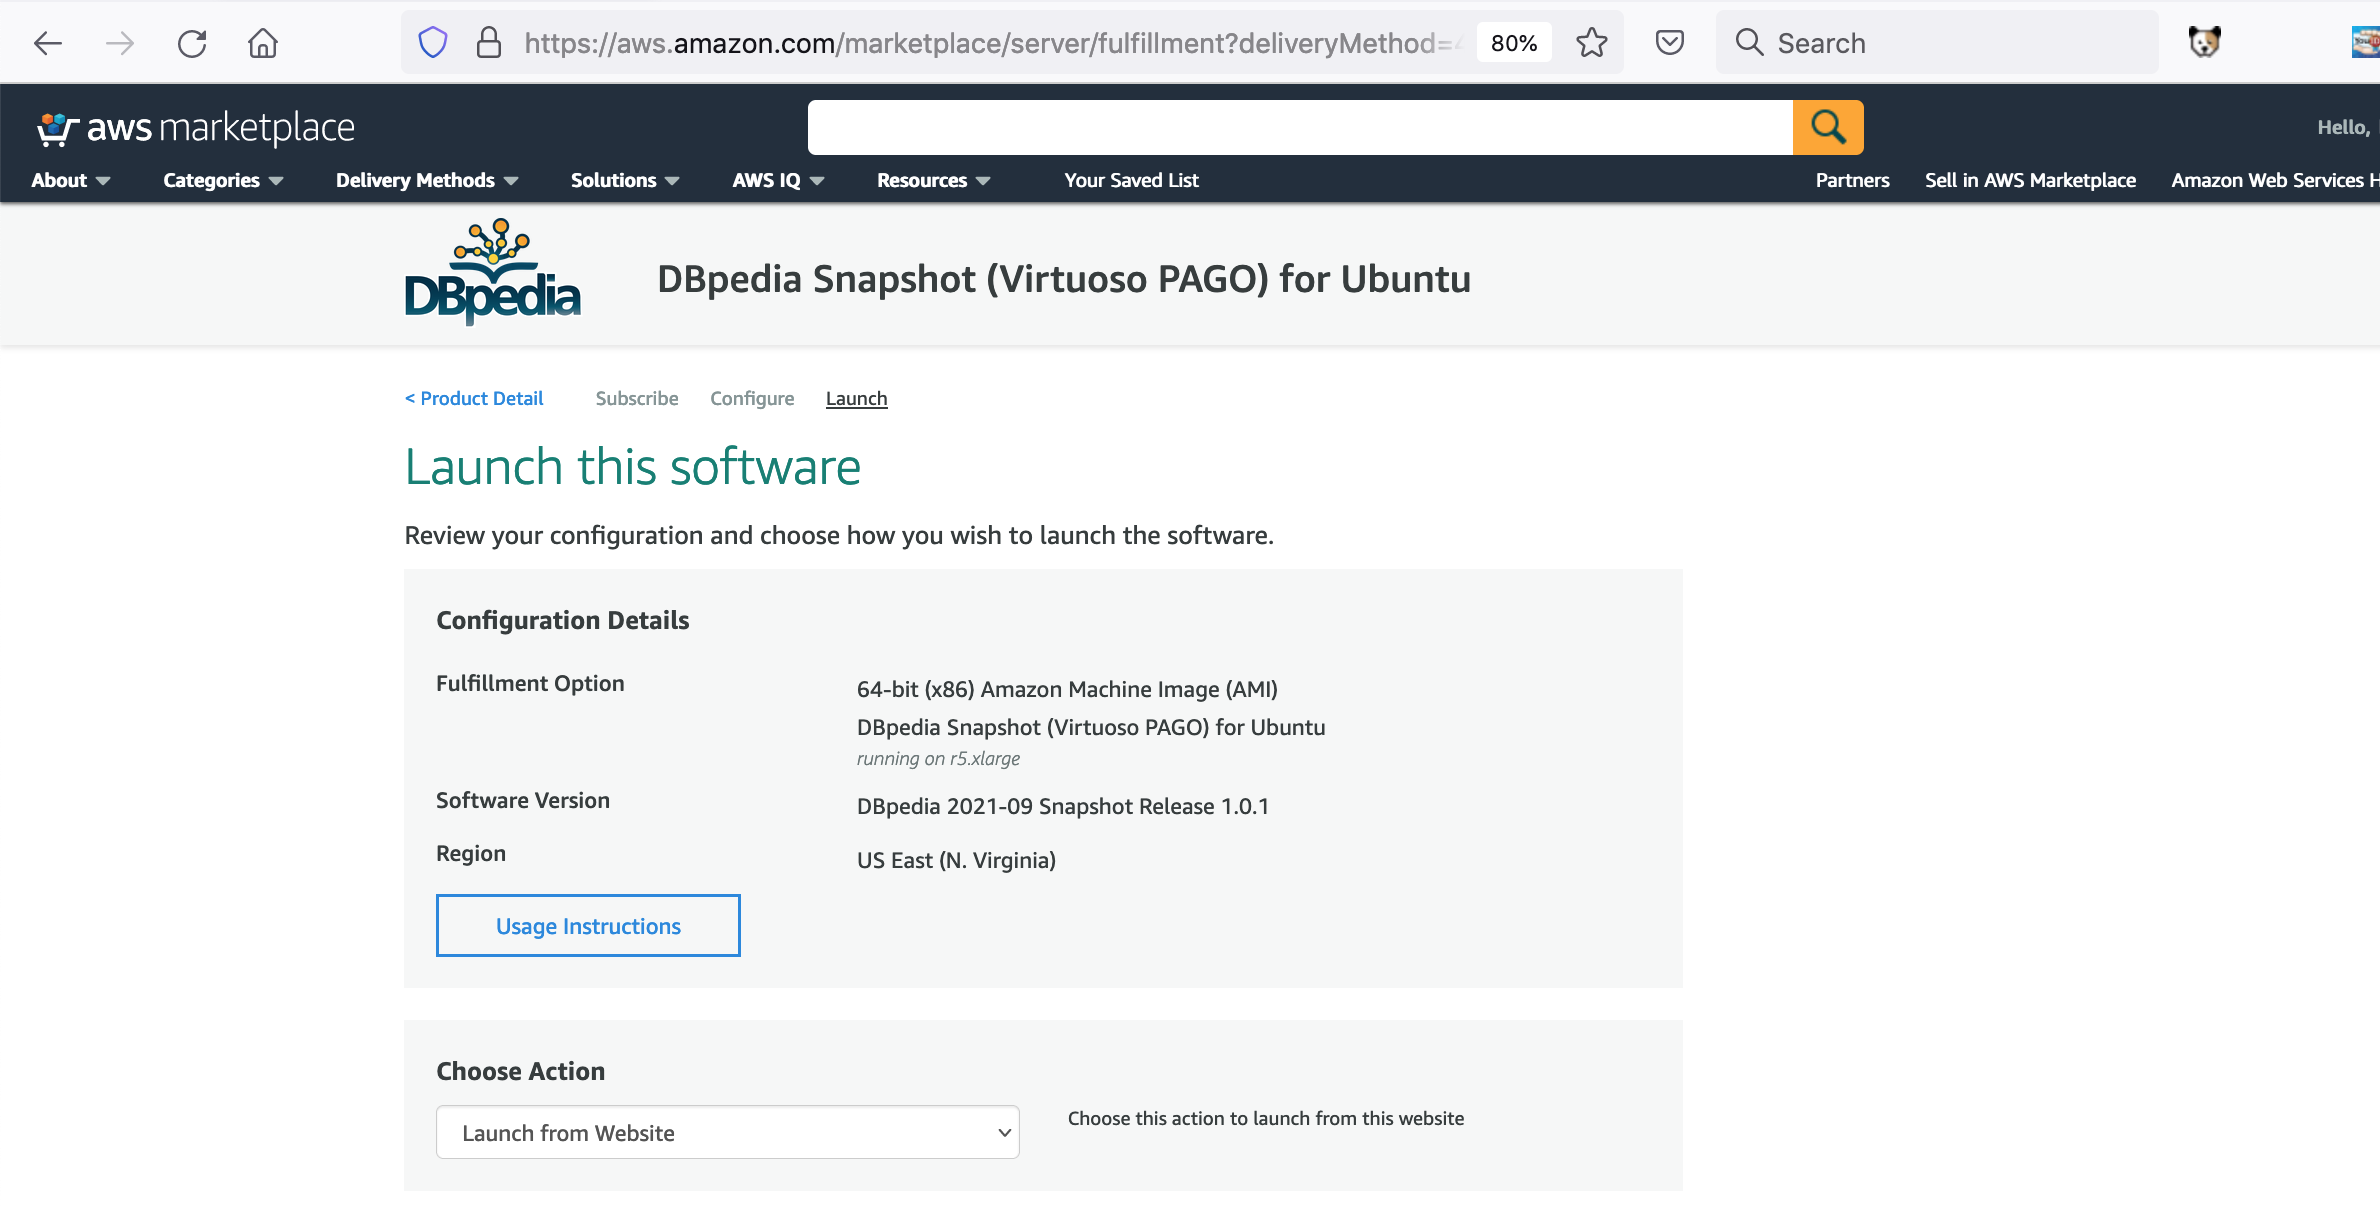
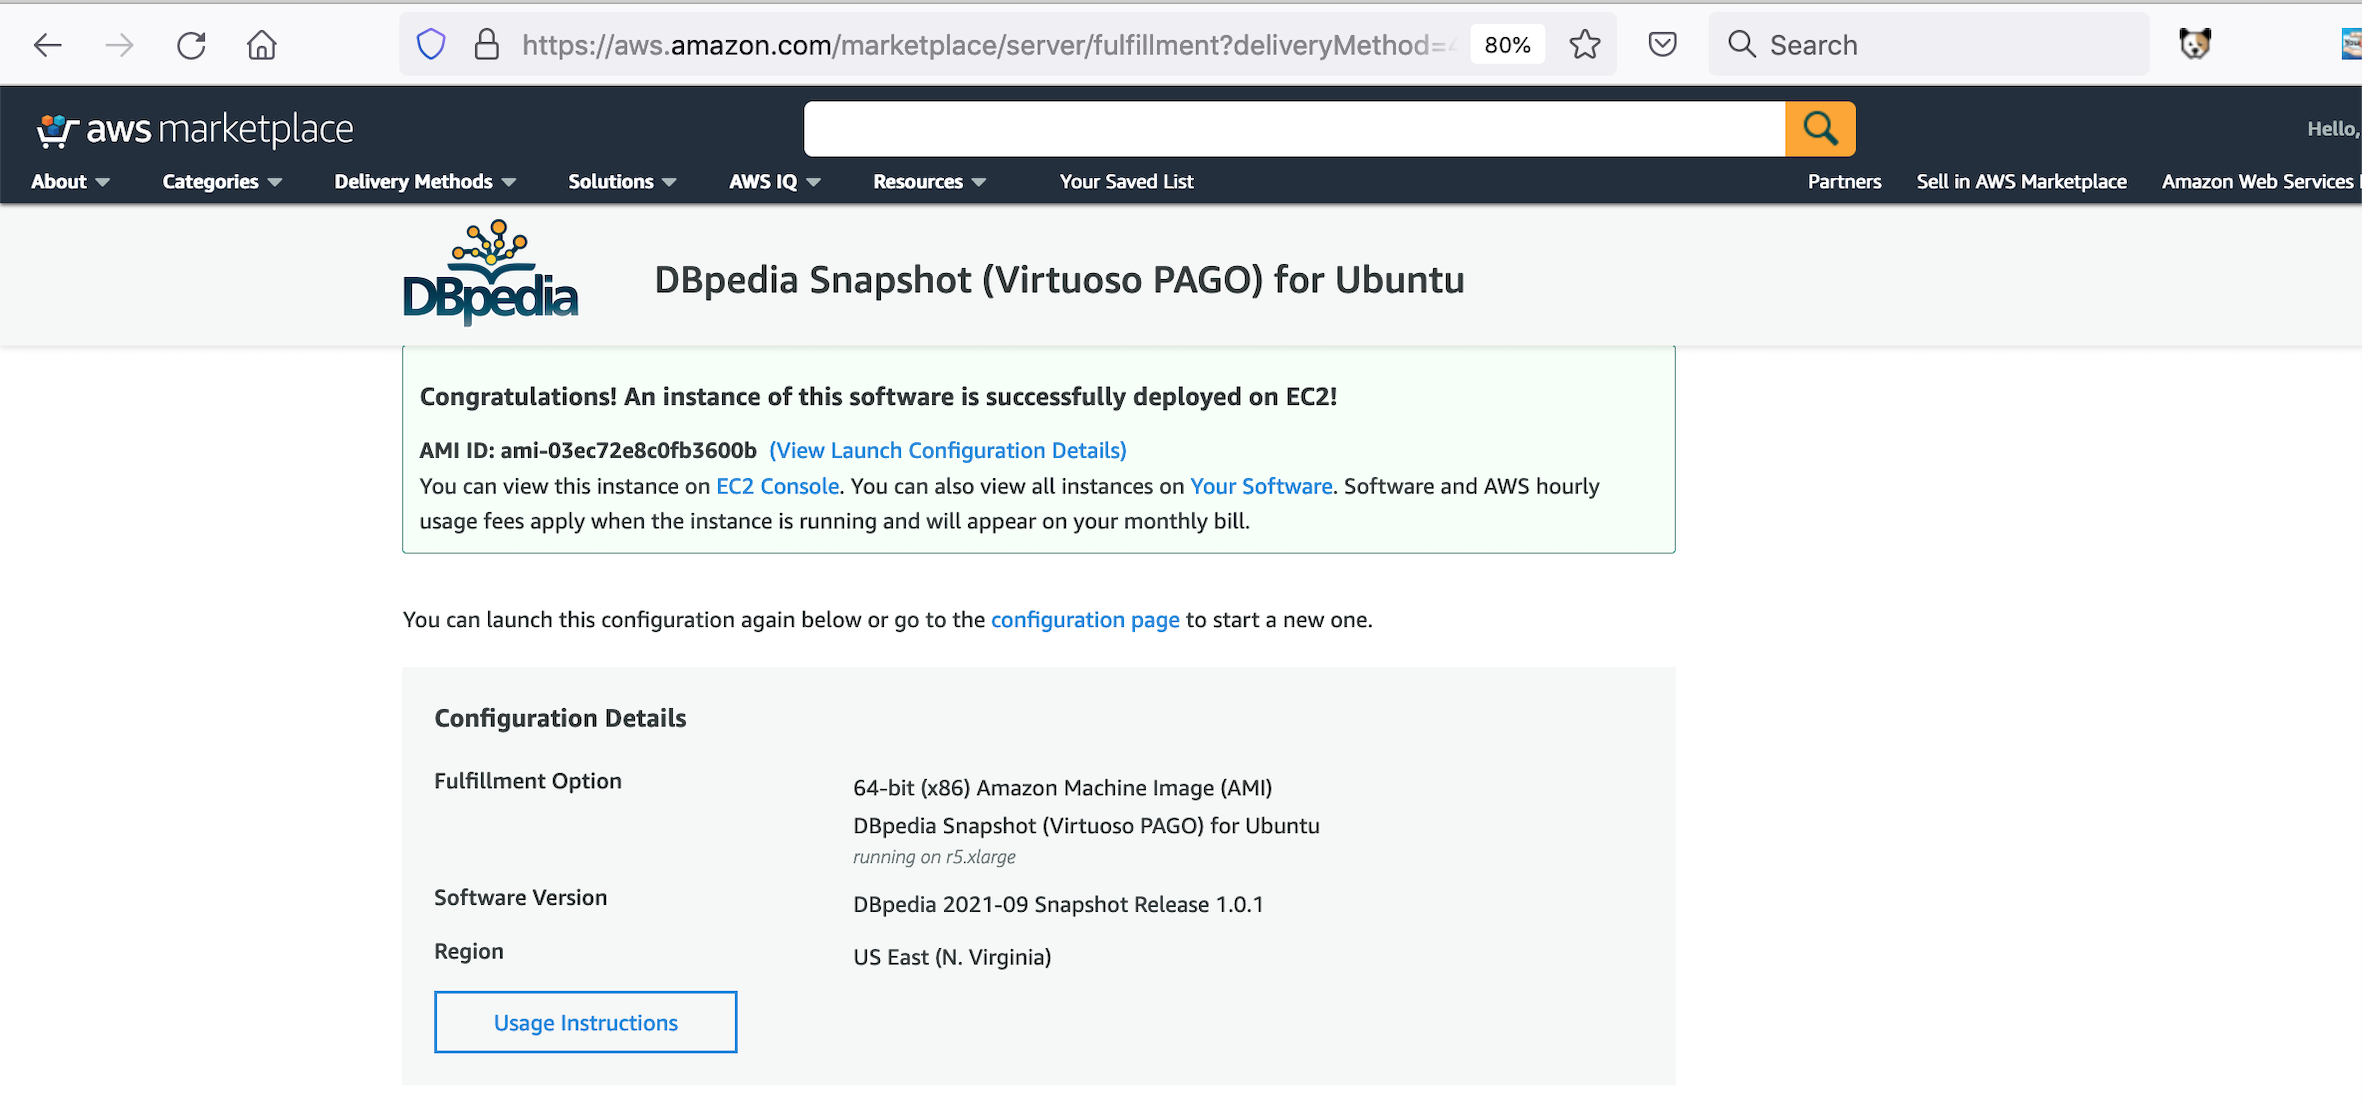
- The deployment is now complete.
Click on the
EC2 Consolelink to view the launched instance in the AWS EC2 console
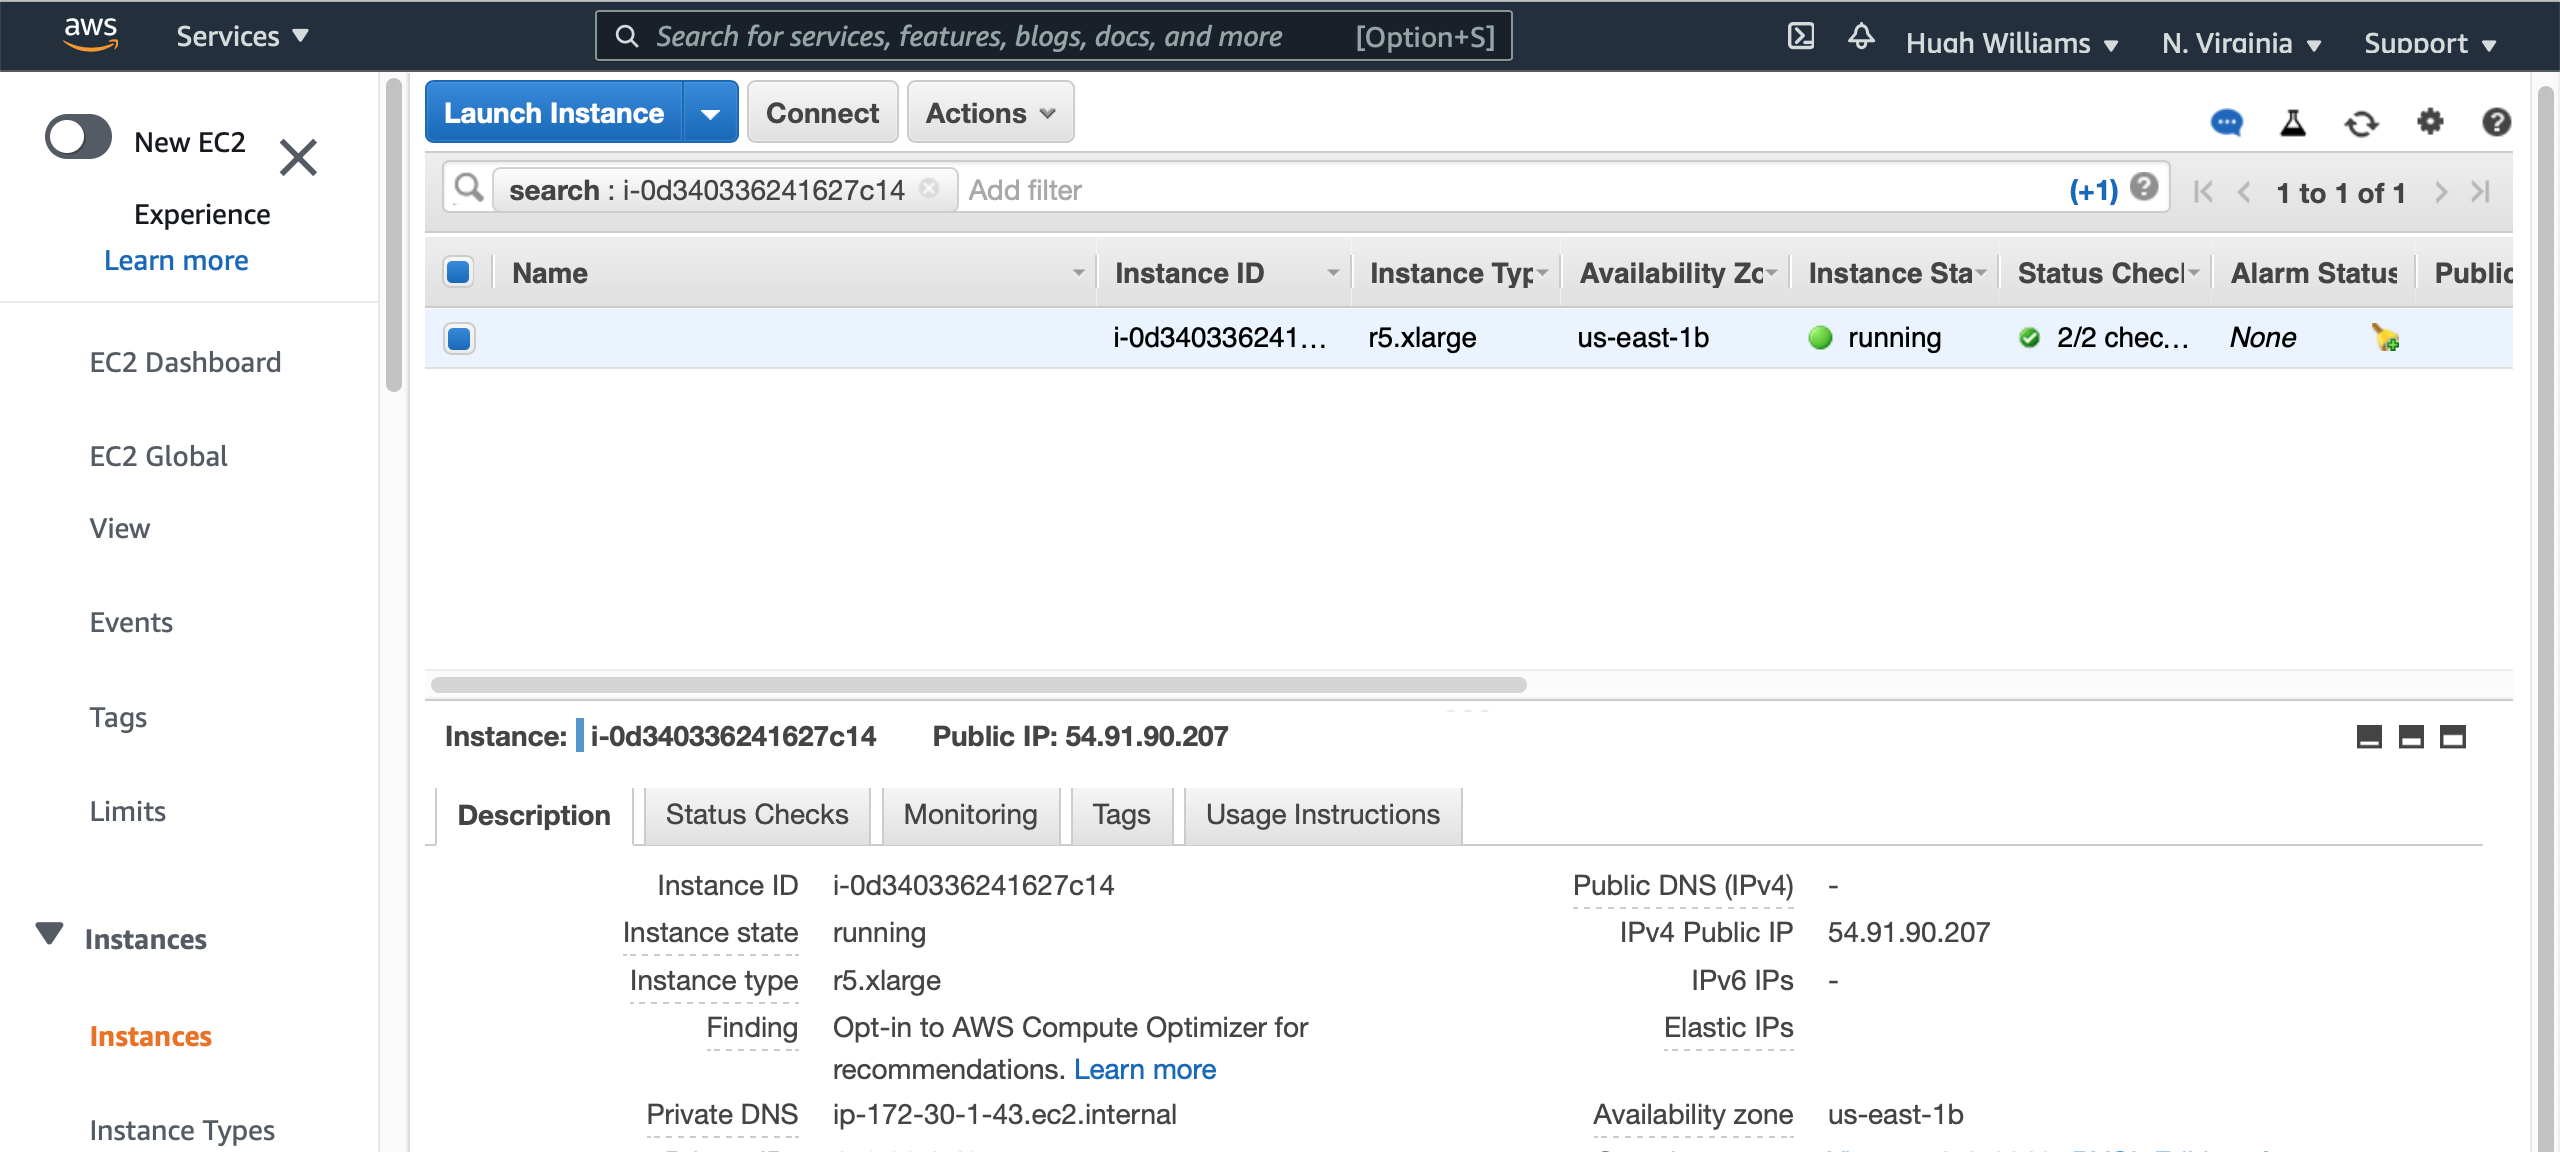
- From the EC2 Console not the
Public IPaddress of the instance for accessing it via ssh, http etc
First-time Setup & Usage Notes
These steps in this section are only necessary the first time you start the Virtuoso instances on the AMI. This section may be ignored thereafter, as it is not necessary after AMI reboots.
There are two Virtuoso instances in this AMI. One which comes up quickly, with no significant content, so you know the AMI is basically functional; and one which comes up more slowly, with the full DBpedia dataset, which takes significant time to start due to some Amazon requirements for such AWS instances.
-
sshinto your instantiated AMI using:
ssh -i {secure-pem-file} ubuntu@{ec2-dns-name-or-ip-address}
- The Virtuoso DBMS Server for the Basic Instance will have started with the AMI.
You can verify this with ?
ps -ef | grep "virt*" | grep -v grep
- If you do not see a running instance, execute the following command, and then repeat the command above.
sudo service virtuoso status
sudo service virtuoso start
sudo service virtuoso status
- We strongly recommend you now use the Conductor to change the password for the '
dba' user from the the AMIinstance-id.
- Retrieve the AMI
instance-idby either --- checking the AMI properties presented by the Amazon AWS console UI --
- executing the following command in the Linux shell --
curl http://169.254.169.254/latest/meta-data/instance-id
- checking the AMI properties presented by the Amazon AWS console UI --
- Load the Conductor interface
http://{amazon-ec2-ami-dns-name-or-ip-address}/conductor
- At the authentication challenge, log in as the
dbauser, with the AMIinstance-idas the password. Note: If unable to connect to the Virtuoso server using theinstance-idas password, please create a Support Case for fastest assistance. - Drill down to System Admin → User Accounts.
- Locate the
dbauser, and click the associatedEditlink. - The form allows many things to be changed. For now, just input your desired password into both Password and Confirm Password boxes, and click the Save button.
- You can now perform other administrative tasks through the Conductor interface, or return to basic DBpedia use.
- Retrieve the AMI
DBpedia Snapshot (Virtuoso PAGO) Database Interaction via Web Interface
Once online, your DBpedia Live instance will be ready for use from —
- Basic Linked Data Exploration Page — an obvious starting point
http://{amazon-ec2-ami-dns-name-or-ip-address}/resource/DBpedia
- Faceted Browsing Endpoint
http://{amazon-ec2-ami-dns-name-or-ip-address}/fct
- Advanced Faceted Browsing Page
http://{amazon-ec2-ami-dns-name-or-ip-address}/describe/?uri=http://dbpedia.org/resource/DBpedia
- SPARQL Query Service Endpoint
http://{amazon-ec2-ami-dns-name-or-ip-address}/sparql
- Virtuoso Instance Administration Page (Virtuoso Conductor)
http://{amazon-ec2-ami-dns-name-or-ip-address}/conductor
Administering the Virtuoso Instance via SSH
- Make a ssh connection to the VM using the public key ( pem-file ) and username ( ubuntu by default) chosen when creating the deployment, and the Public IP address from the previous section as follows:
ssh -i {pem-file} ubuntu@{Public IP address}
- Once connected it is strongly recommended to update the VM to get the latest operating system and Virtuoso updates with the command:
sudo apt-get upgrade
- Check the Virtuoso server is automatically started post deployment with the command:
sudo service virtuoso status
- The following commands can be used to Administer the Virtuoso server:
- Start the Virtuoso Server:
sudo service virtuoso start
- Stop the Virtuoso Server:
sudo service virtuoso stop
- Restart the Virtuoso Server:
sudo service virtuoso restart
- Check status of Virtuoso Server:
sudo service virtuoso status
- Start the Virtuoso Server:
- Determine the random password set for the dba user with the command:
sudo cat /opt/virtuoso/database/.initial-password
- A SQL connection can then be made Virtuoso with the isql command line tool with the command on port 1111 :
isql 1111
Typical output for running these steps are:
$ ssh -i certificates/virtuoso.pem ubuntu@54.221.25.206
The authenticity of host '54.221.25.206 (54.221.25.206)' can't be established.
ECDSA key fingerprint is SHA256:QGsOFcQoa4x5DBavtdHWDQUUQtBdHJ/OkizKep8UOcM.
Are you sure you want to continue connecting (yes/no)? yes
Warning: Permanently added '54.221.25.206' (ECDSA) to the list of known hosts.
Welcome to Ubuntu 18.04.5 LTS (GNU/Linux 5.4.0-1025-aws x86_64)

 * Documentation:  https://help.ubuntu.com
 * Management:     https://landscape.canonical.com
 * Support:        https://ubuntu.com/advantage

  System information as of Fri Jan 29 12:41:03 UTC 2021

  System load:  0.0                Processes:           104
  Usage of /:   2.0% of 116.27GB   Users logged in:     0
  Memory usage: 4%                 IP address for eth0: 10.0.0.214
  Swap usage:   0%


 * Canonical Livepatch is available for installation.
   - Reduce system reboots and improve kernel security. Activate at:
     https://ubuntu.com/livepatch

9 packages can be updated.
0 updates are security updates.


Last login: Tue Sep 22 19:26:19 2020 from 108.26.205.225
ubuntu@ip-10-0-0-214:~$ cd /opt/virtuoso/database
ubuntu@ip-10-0-0-214:/opt/virtuoso/database$ sudo bash
root@ip-10-0-0-214:/opt/virtuoso/database# cat .initial-password
i-0343ad51fe5e4f196
root@ip-10-0-0-214:/opt/virtuoso/database# service virtuoso status
? virtuoso.service - OpenLink Virtuoso Database
   Loaded: loaded (/lib/systemd/system/virtuoso.service; enabled; vendor preset: enabled)
   Active: active (running) since Fri 2021-01-29 12:04:31 UTC; 38min ago
  Process: 878 ExecStart=/opt/virtuoso/bin/virtuoso-start.sh $VIRTUOSO_DB_NAMES (code=exited, status=0/SUC
 Main PID: 1170 (virtuoso)
    Tasks: 15 (limit: 4915)
   CGroup: /system.slice/virtuoso.service
           ??1170 ./virtuoso

Jan 29 12:04:25 ip-10-0-0-214 systemd[1]: Starting OpenLink Virtuoso Database...
Jan 29 12:04:26 ip-10-0-0-214 virtuoso-start.sh[878]: Starting Virtuoso instance in [database]
Jan 29 12:04:26 ip-10-0-0-214 virtuoso-start.sh[878]:   - Starting the database
Jan 29 12:04:31 ip-10-0-0-214 systemd[1]: Started OpenLink Virtuoso Database.
root@ip-10-0-0-214:/opt/virtuoso/database# /opt/virtuoso/bin/isql 1111
OpenLink Virtuoso Interactive SQL (Virtuoso)
Version 08.03.3319 as of Sep  1 2020
Type HELP; for help and EXIT; to exit.

Enter password for dba :
Connected to OpenLink Virtuoso
Driver: 08.03.3319 OpenLink Virtuoso ODBC Driver
SQL> status('');
REPORT
VARCHAR
_______________________________________________________________________________

OpenLink Virtuoso VDB Server
Version 08.03.3319-pthreads for Linux as of Sep  1 2020
Started on: 2021-01-29 12:45 GMT+0
CPU: 0.05% RSS: 148MB PF: 0

Database Status:
  File size 67108864, 8192 pages, 5733 free.
  20000 buffers, 1115 used, 85 dirty 0 wired down, repl age 0 0 w. io 0 w/crsr.
  Disk Usage: 1074 reads avg 0 msec, 0% r 0% w last  23 s, 138 writes flush          0 MB/s,
    34 read ahead, batch = 17.  Autocompact 0 in 0 out, 0% saved.
Gate:  166 2nd in reads, 0 gate write waits, 0 in while read 0 busy scrap.
Log = virtuoso.trx, 8325 bytes
VDB: 0 exec 0 fetch 0 transact 0 error
2309 pages have been changed since last backup (in checkpoint state)
Current backup timestamp: 0x0000-0x00-0x00
Last backup date: unknown
Clients: 1 connects, max 1 concurrent
RPC: 6 calls, 1 pending, 1 max until now, 0 queued, 0 burst reads (0%), 0 second 0M large, 10M max
Checkpoint Remap 38 pages, 0 mapped back. 0 s atomic time.
    DB master 8192 total 5733 free 38 remap 1 mapped back
   temp  256 total 251 free

Lock Status: 0 deadlocks of which 0 2r1w, 0 waits,
   Currently 1 threads running 0 threads waiting 0 threads in vdb.

24 Rows. -- 2 msec.
SQL>
Performance Notes
Please be aware of the following, which impact the performance and utility of your AMI:
- This AMI includes a bundled Virtuoso license which enables 10 Database Sessions and the use of 4 logical processors.
Licenses that upgrade these attributes are available as paid upgrade options.
- Virtuoso always takes full advantage of the memory it's configured to use.
This may be much less than is found in its host environment/AMI.
This AMI is pre-configured for an
m5.xlargeEC2 Instance Type, so will use 16GB or RAM. If you choose a larger EC2 Instance Type, then theNumberOfBuffer MaxDirtyBuffers /opt/virtuoso/database/virtuoso.iniconfiguration file should be increased to correspond to the chosen Instance Type's available memory, as detailed in the Virtuoso Performance Tuning Guide. A few examples are shown below. After changing these or any other settings in the INI file, restart the Virtuoso server as described above.
EC2 Instance Type System RAM NumberOfBuffers? MaxDirtyBuffers? m5.xlarge 16 GB 1360000 1000000 m5.2xlarge 32 GB 2720000 2000000 m5.4xlarge 64 GB 5440000 4000000 m5.8xlarge 128 GB 10880000 8000000
- There are a wide range of AMI choices, offering various combinations of system memory and logical processors. To improve performance, use an EC2 Instance Type with more memory and more logical processors. To make use of additional processors, you will need to also acquire an upgraded Virtuoso license.
Troubleshooting
If the Virtuoso server fails to start:
- Run the command sudo service virtuoso status to see if the Virtuoso server is running
- Check the /opt/virtuoso/database/virtuoso.log file to see why the server might have failed to start
- Ensure the file /opt/virtuoso/database/virtuoso.lck does not exist before starting the server
- Attempt to start the Virtuoso server with the command sudo service virtuoso start
- Run the command sudo service virtuoso status again to see if the Virtuoso server is running
- If it is now running attempt a connect via the SQL or HTTP interfaces as detailed above
Related Items
- OpenLink Data Spaces Installation
- EC2 & AMI related information
- Virtuoso Pay As You Go (PAGO) EBS-backed EC2 AMI
- Instance-backed Virtuoso EC2 AMI
- Pre-configured & Pre-loaded Virtuoso instances (DBpedia 3.8, BBC Music & Programmes, etc.)
- Creating Your Own Neurocommons Instance
- Creating Your Own Bio2RDF Instance
- Creating Your Own MusicBrainz Instance
- Backup your Virtuoso EC2 AMI to S3
- Configure your Virtuoso EC2 AMI for use with Amazon Elastic Block Storage (EBS)
- Amazon-provided AWS Simple Monthly Cost Calculator
- Protecting your Virtuoso-hosted SPARQL Endpoint
- Virtuoso documentation
- Virtuoso Tips and Tricks
CategoryHowTo CategoryODS CategoryVirtuoso CategoryDocumentation CategoryEC2